Manage Your Chain Using a Multisig
Introduction
Appchains deployed through Tanssi are sovereign. This means that the appchain governor is free to define and manage the appchain's critical aspects, such as tokenomics, runtime logic, gas dynamics, and others.
Those critical actions can be performed by a special account called sudo. This account must be protected with the utmost precautions, because losing access or a malicious actor gaining access to it could be catastrophic, and the chain might not recover from the event.
A multisig is one way to make your appchain's management safer. It allows defining an M-of-N threshold, requiring at least M valid signatures from N designated accounts to execute privileged transactions. Using a multisig increases the security of your appchain governance by:
- Completely removing the single point of failure: Losing one account doesn't mean losing the appchain. Also, a compromised account is not enough to execute malicious actions.
- Reducing the human error factor: Transactions must be reviewed and approved by at least one other person, thereby reducing the risk of executing a wrong transaction, an unintended update, sending funds to the wrong address, and other common mistakes.
For appchains where the sudo account is not disabled in favor of another governance mechanism, setting up a multisig is strongly advised. This article shows how to set it up and execute multisig transactions.
Checking Prerequisites
For the examples in this guide, you can either set the multisig during the registration process or, if you already have a Tanssi-powered network (Quick Trial or Dedicated), you will need to have the following:
- The accounts included in the multisig setup, imported into any of the supported wallets
- The account you used when registering the network, imported into any of the supported wallets
- Your appchain's Sudo account, imported into any of the supported wallets
Note
The network's registration account is always a Substrate one, whereas the network's Sudo account depends on the chain type. If the chain is EVM-compatible, then the Sudo account will be an Ethereum type and, otherwise, a Substrate type.
Retrieving the Registration Account
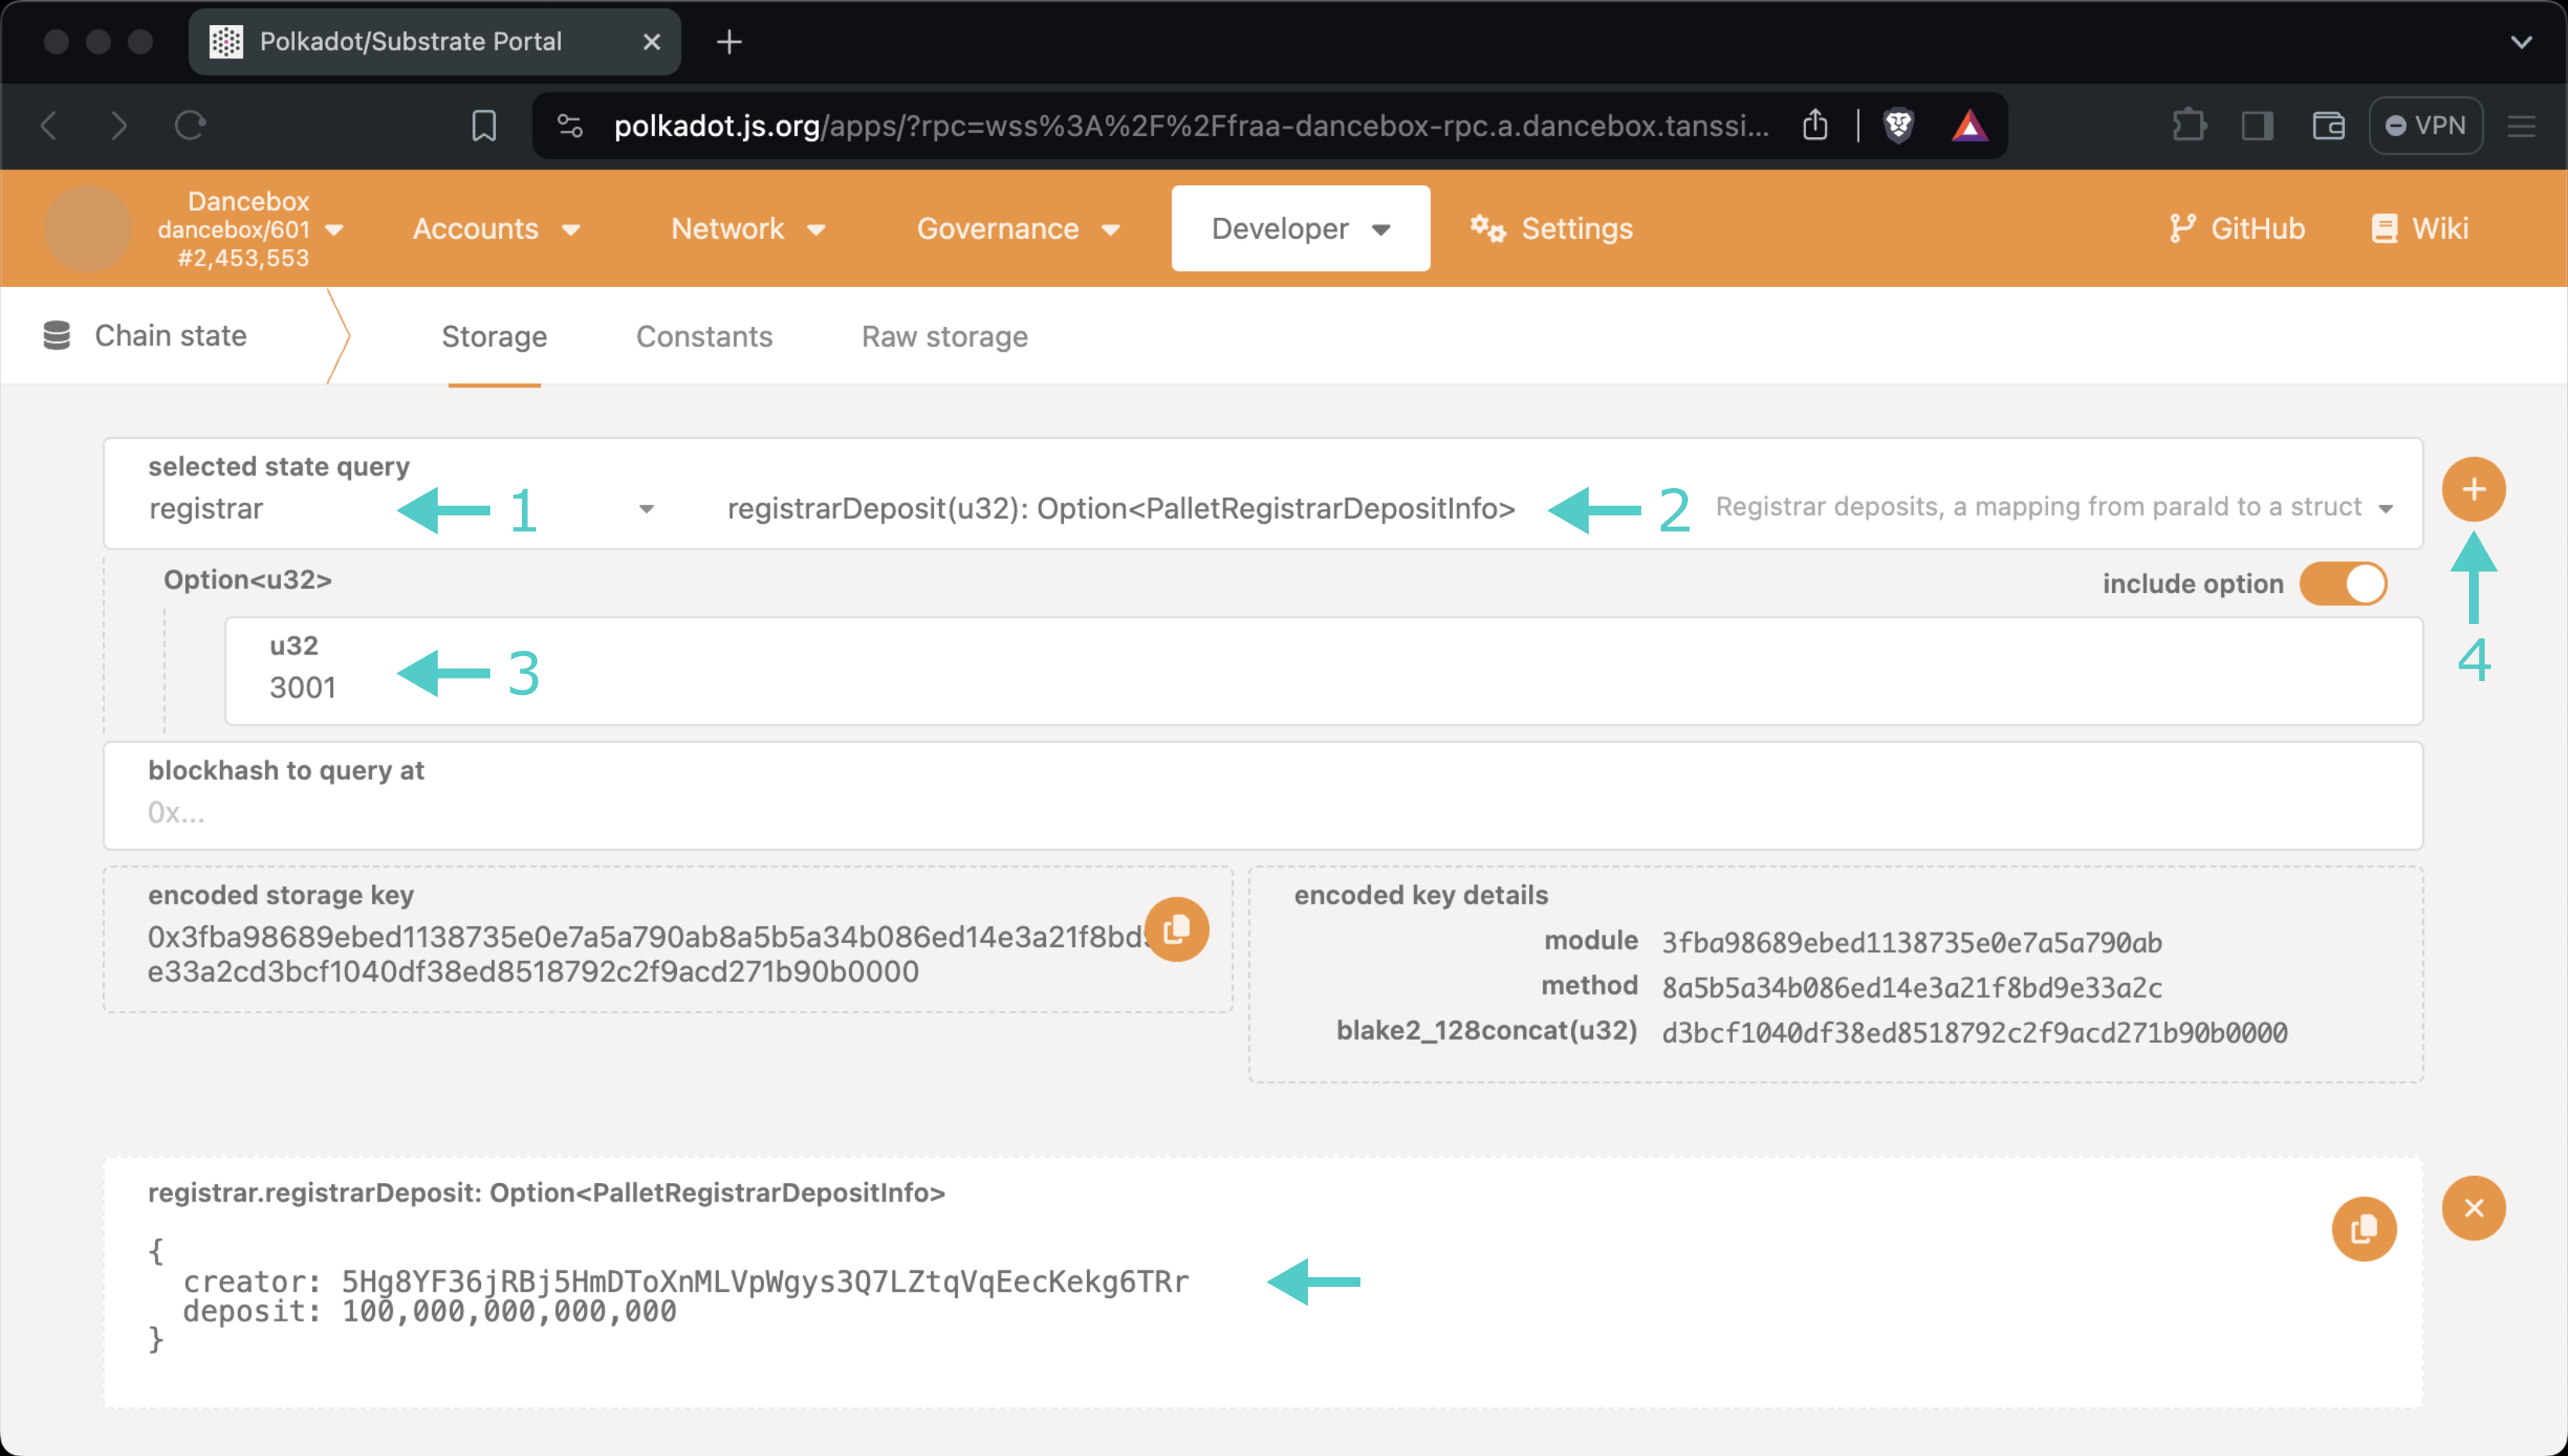
If you're unsure what your registration account is, you can query it directly from the Tanssi orchestrator chain, which keeps records of every registered network. To do so, head to the Chain state section on the Polkadot.js Apps connected to the orchestrator chain for quick trial networks or dedicated networks, and take the following steps:
- Select the registrar storage module
- Select registrarDeposit
- Insert your network ID
- Press + icon
You'll see the registration account at the bottom.
Note
The dApp will show your network in the dashboard only if you have the registration account properly set.
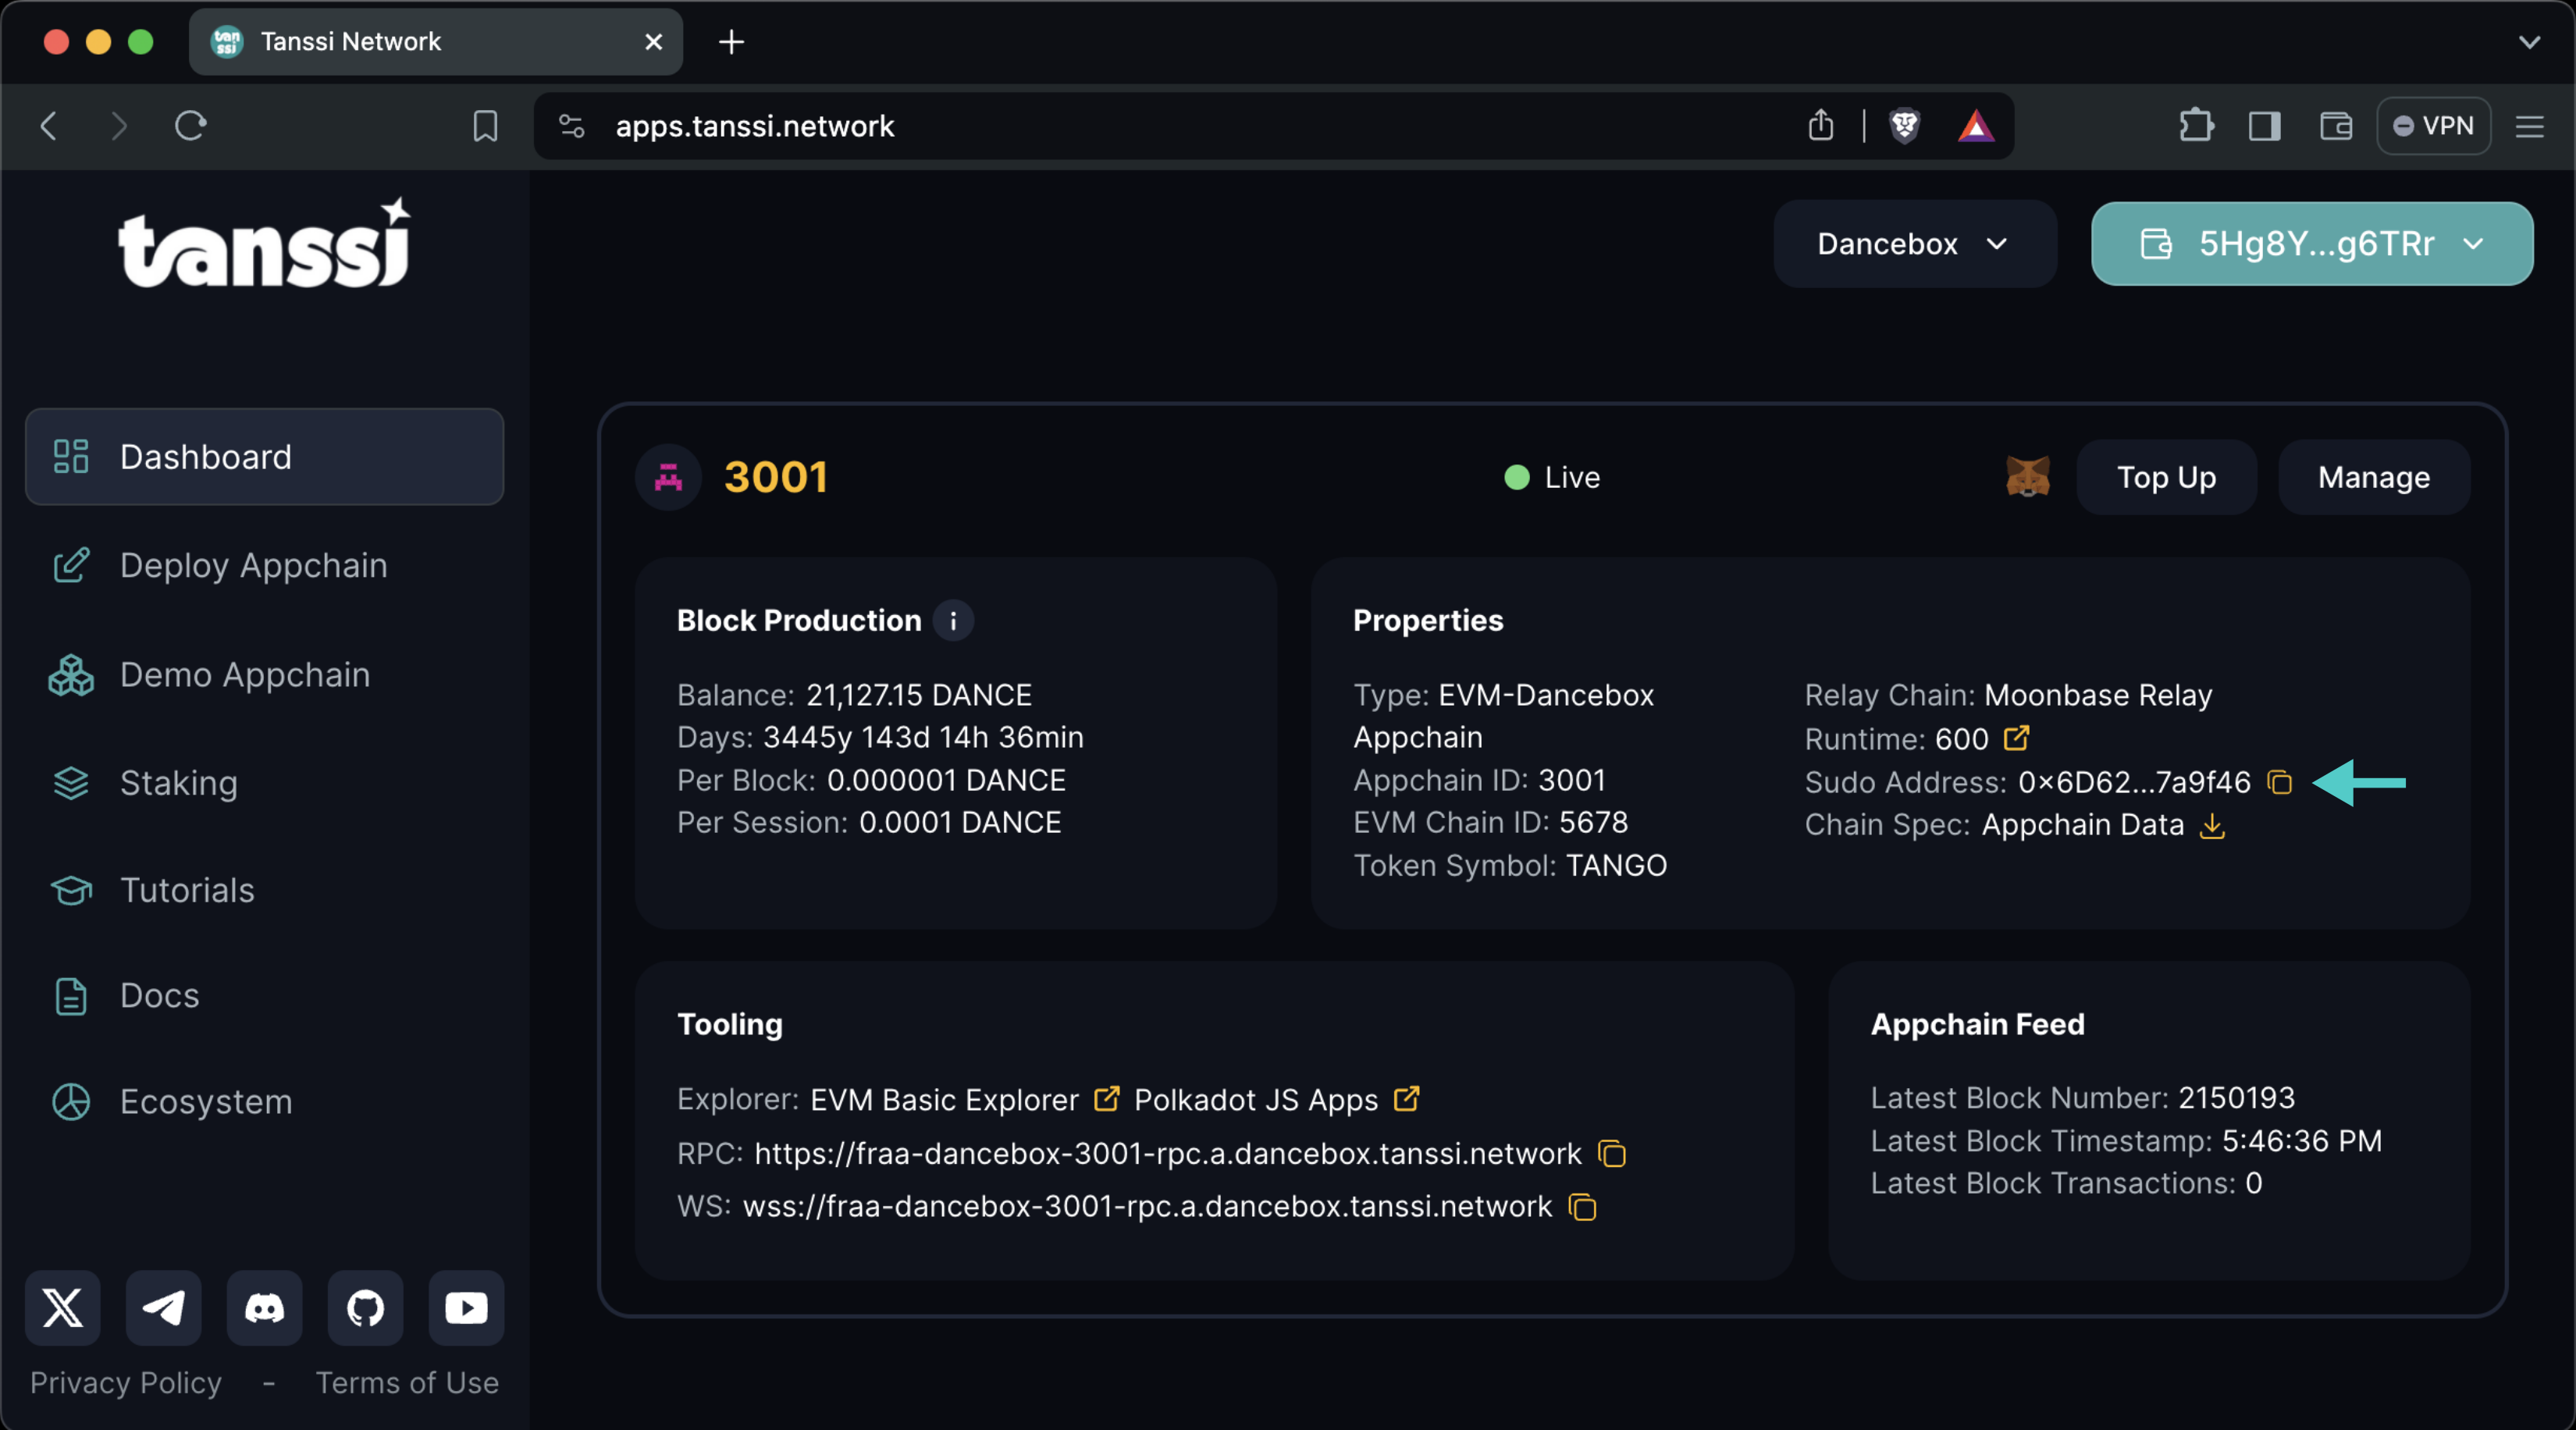
Retrieving the Sudo Account
If you're unsure what your Tanssi network's Sudo account is, you can find it in your Tanssi Dashboard underneath the Properties section.
Warning
It's critical to protect your Sudo account key with the utmost security precautions, as it grants privileged access to your Tanssi network.
Set Up a Multisig for a New Appchain
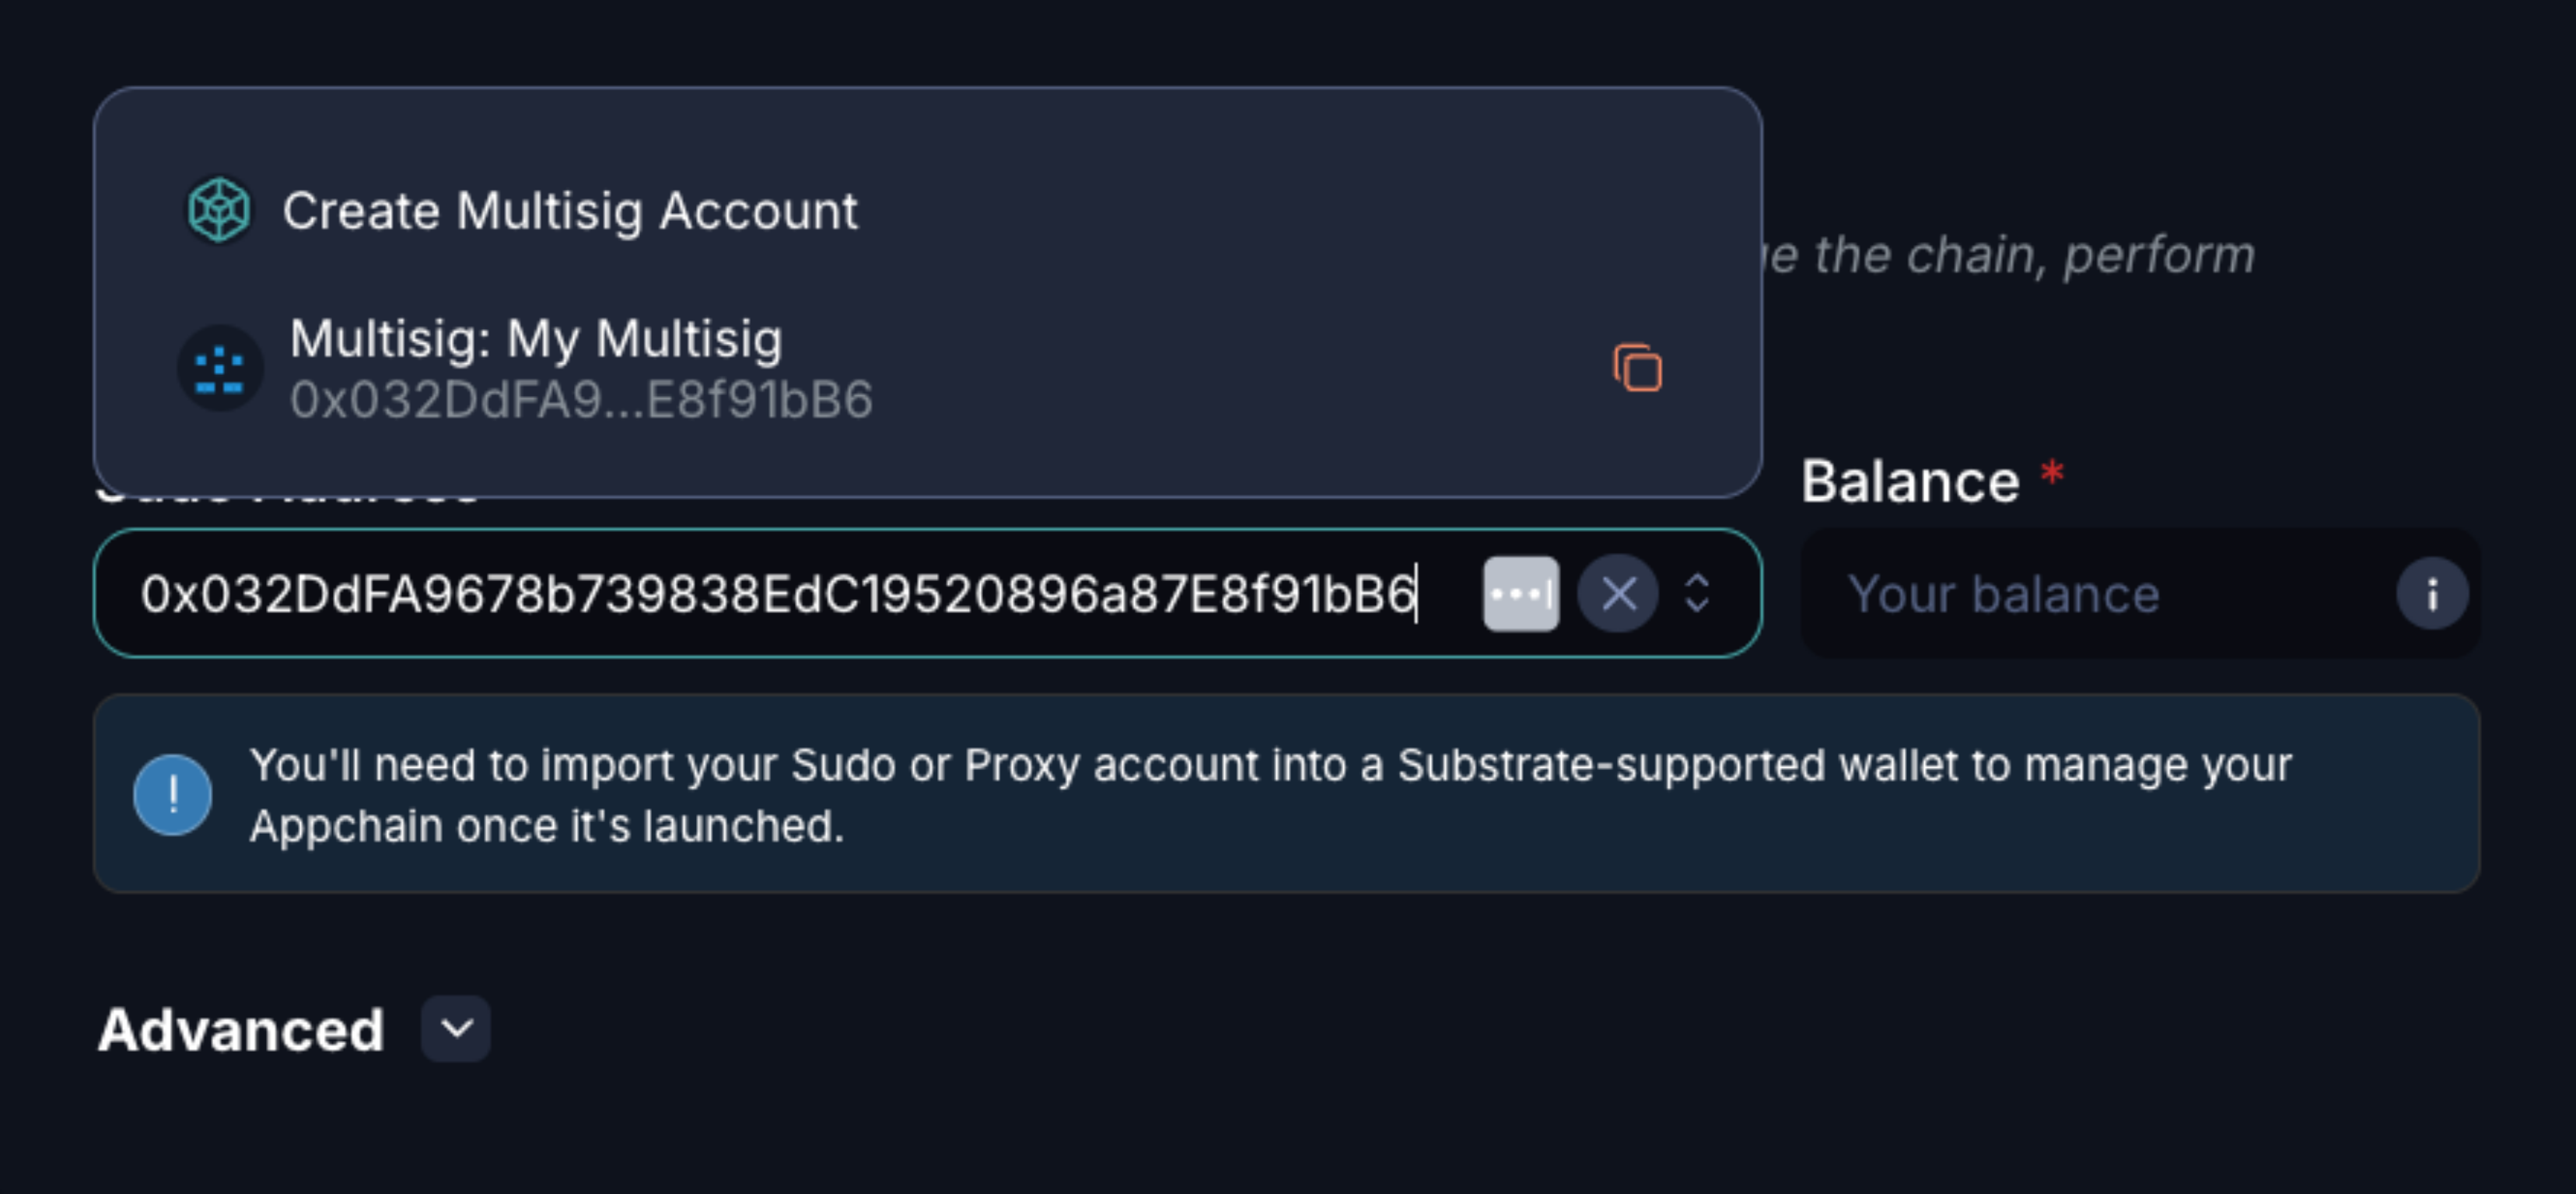
In the first step to deploy a new Tanssi-powered appchain, you must define the account that will have sudo privileges in the Accounts section.
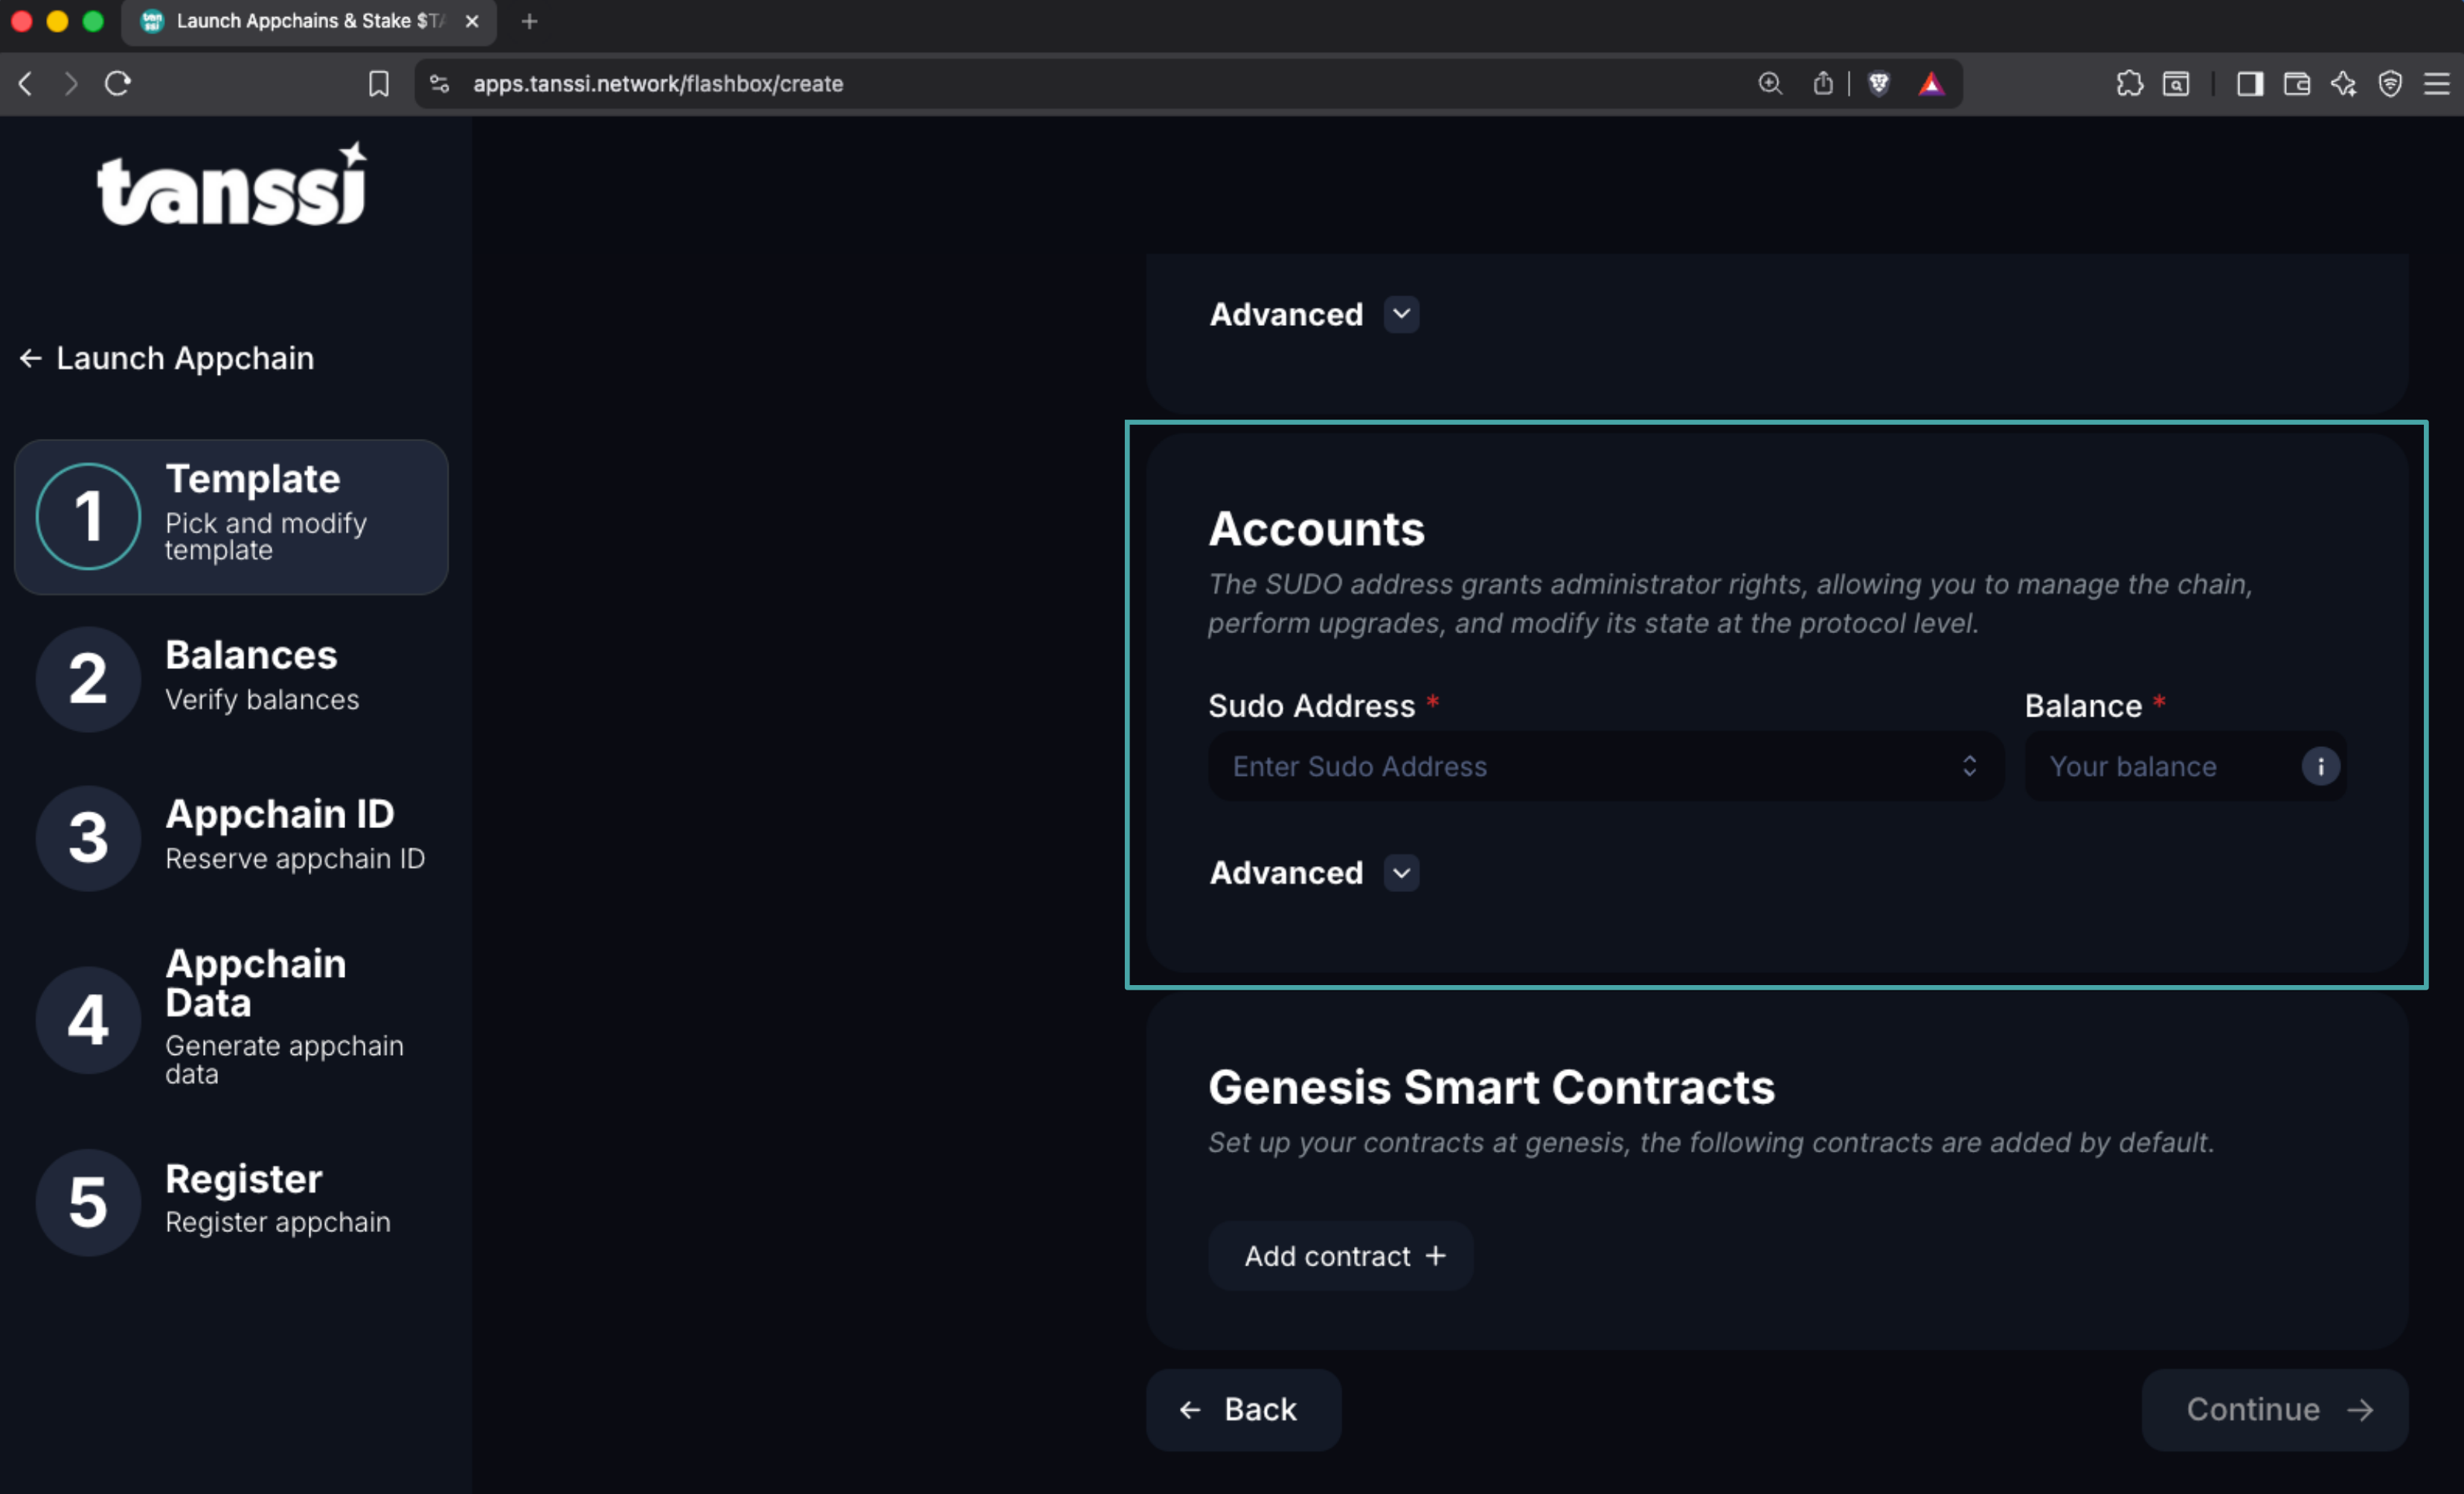
In the Sudo Address field, you can enter any account, though when you select it, a menu with the option Create Multisig Account will appear.
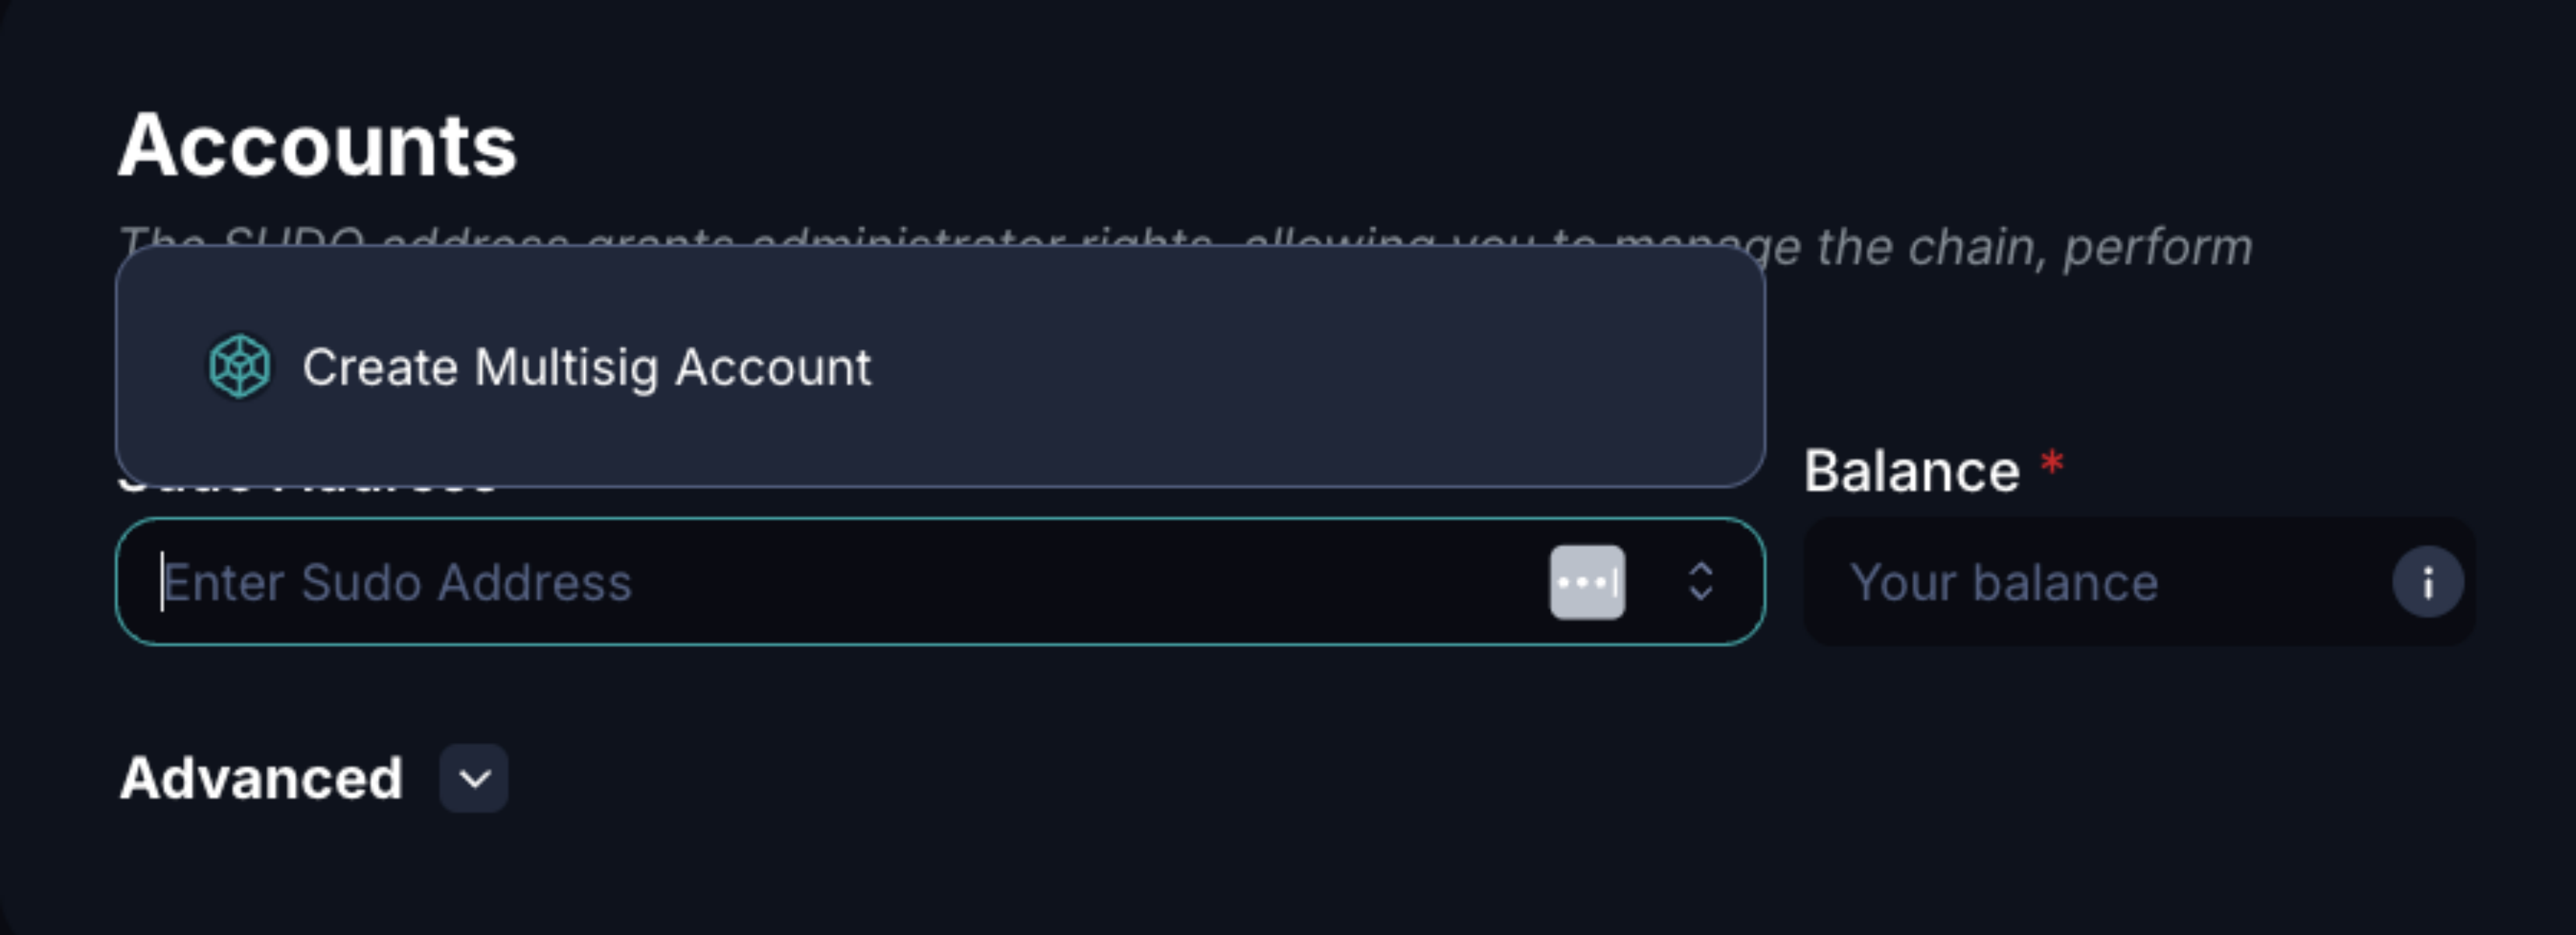
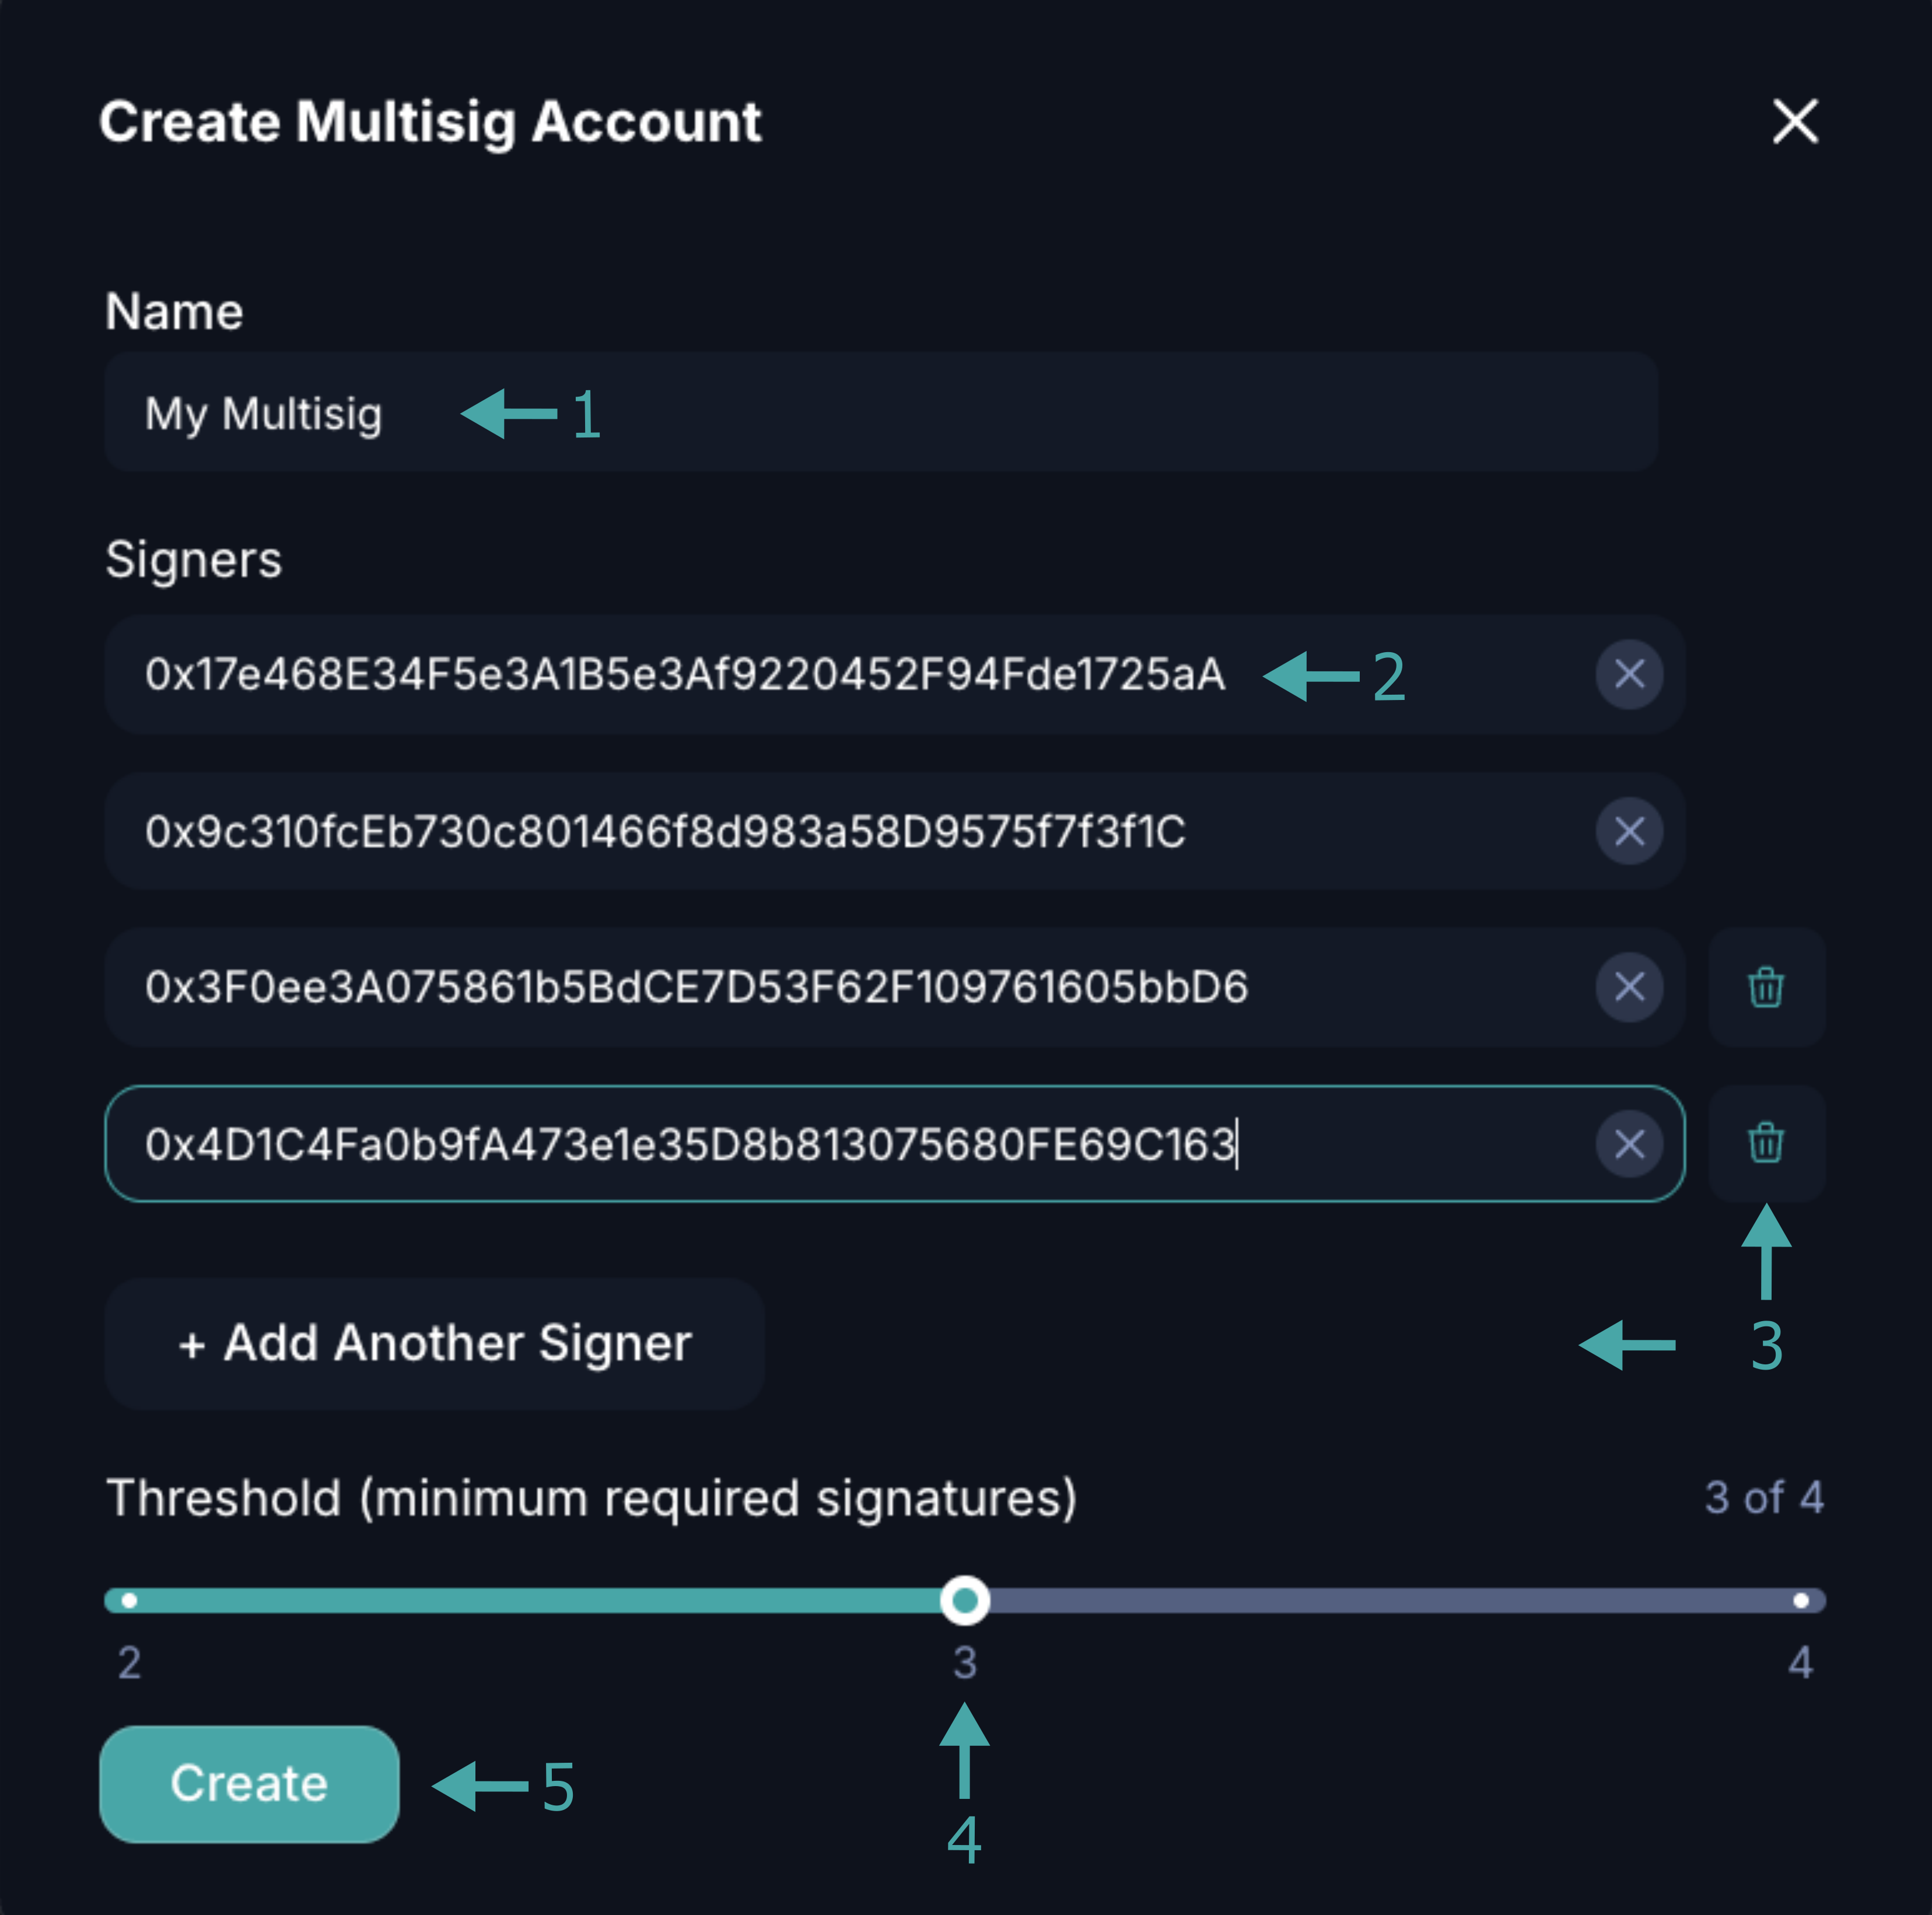
To create a new multisig, click Create Multisig Account and follow the steps in the modal windows that appear:
- Set your multisig's name.
- Insert the addresses that will be part of the signing set.
- Add or remove addresses from the set. The minimum number of addresses for a set is two.
- Define the threshold of signatures to approve the transaction. The minimum threshold is two.
- Click on Create.
Your multisig is now saved and can be used as sudo for your new chain.
Note
Your multisig has a unique address derived from the addresses in the signing set. Hence, you'll see a different account in the Sudo Address.
Switch to Multisig on an Already Live Appchain
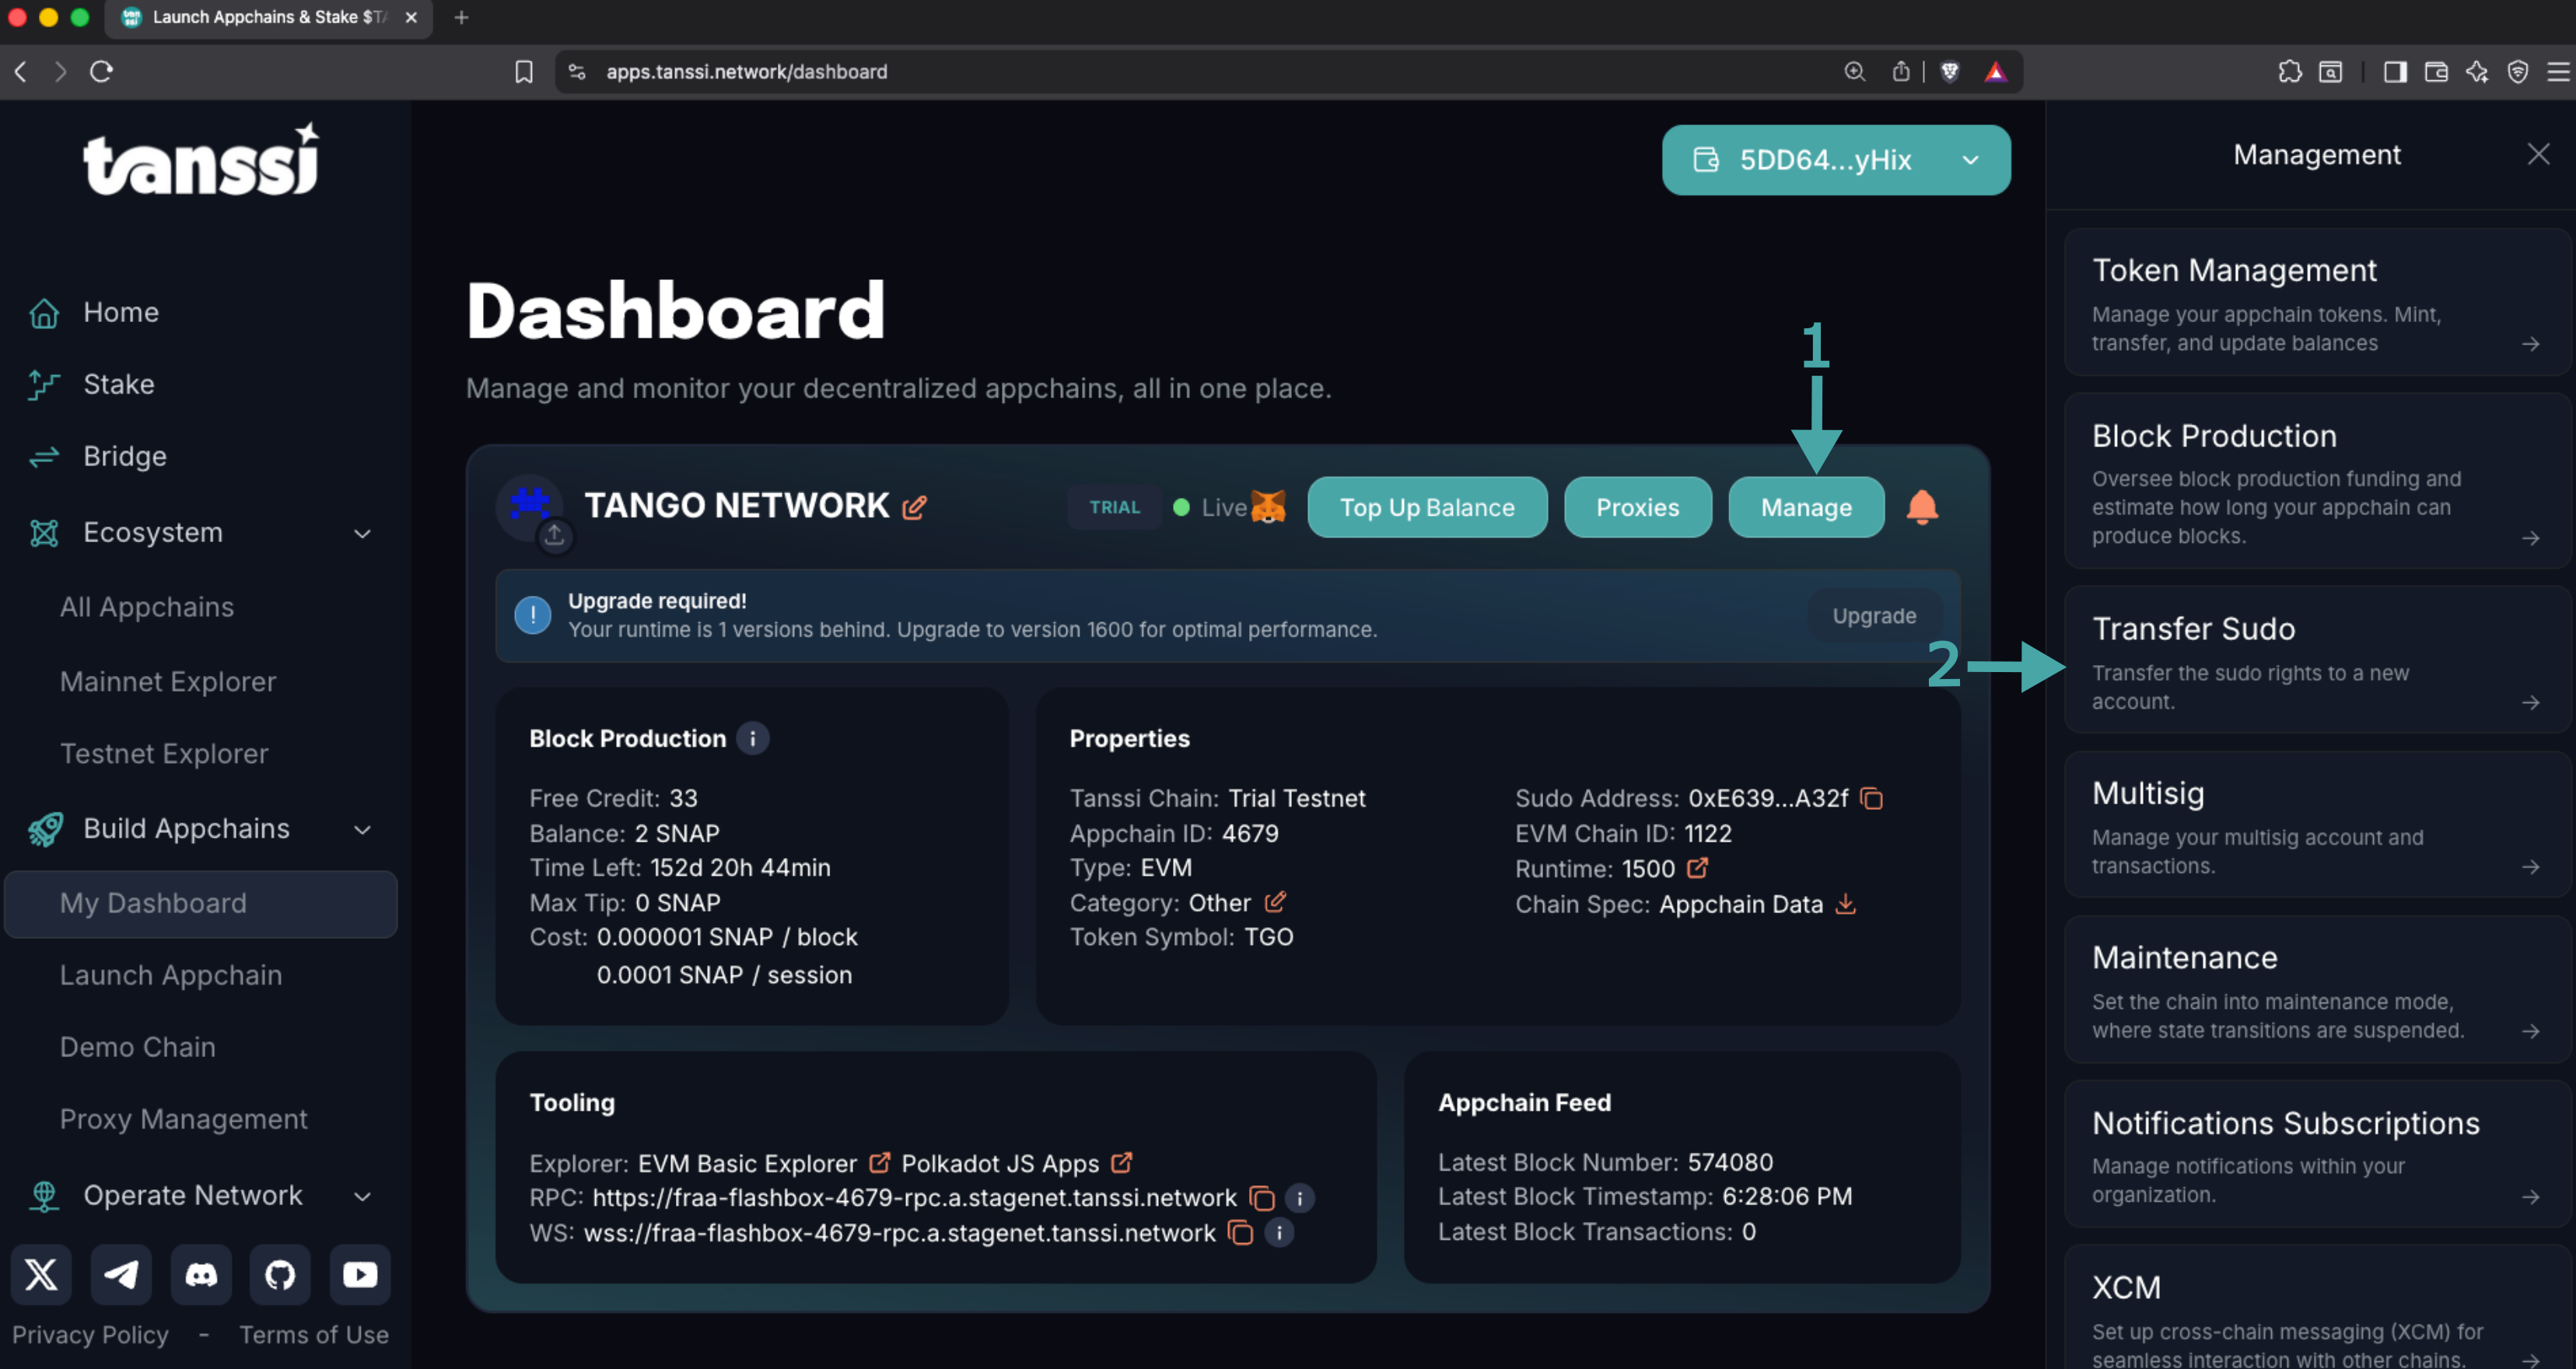
If you already have a live Tanssi-powered appchain, you can easily transfer the sudo rights to a multisig setup. To do so, head to the dashboard and on your appchain's card:
- Click on Manage.
- Click the Transfer Sudo button in the panel on the right.
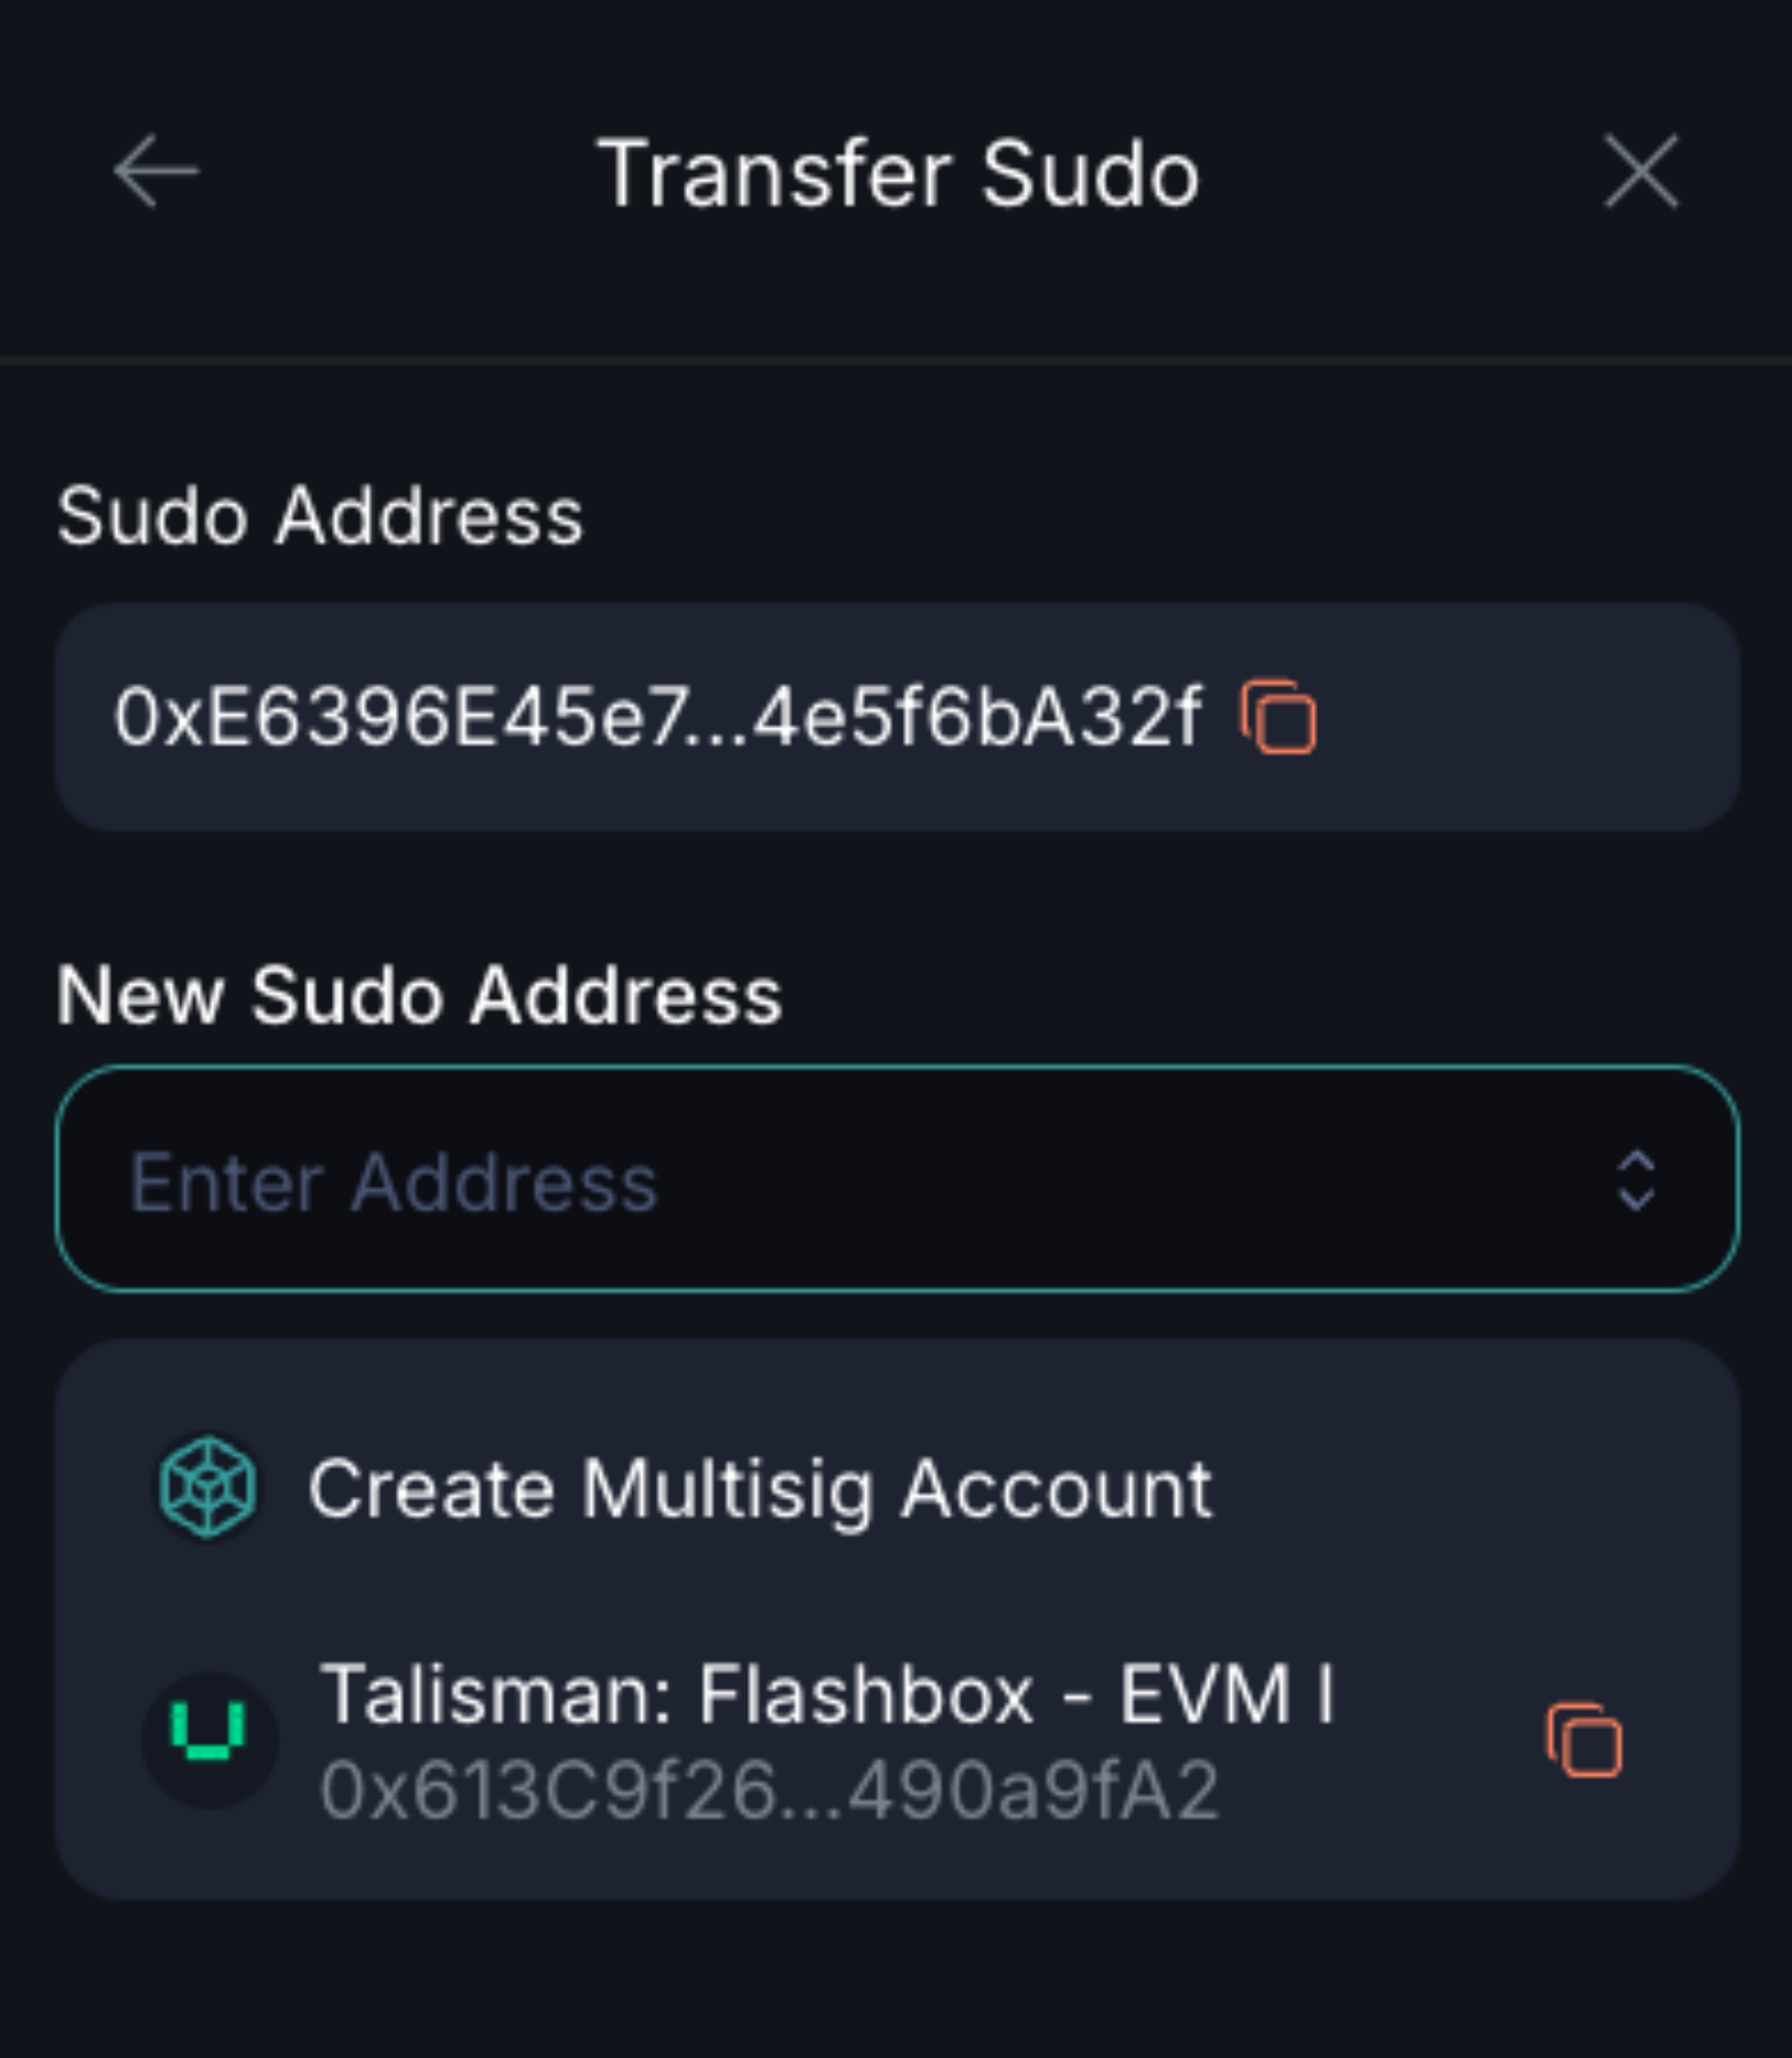
The Transfer Sudo panel will be presented.
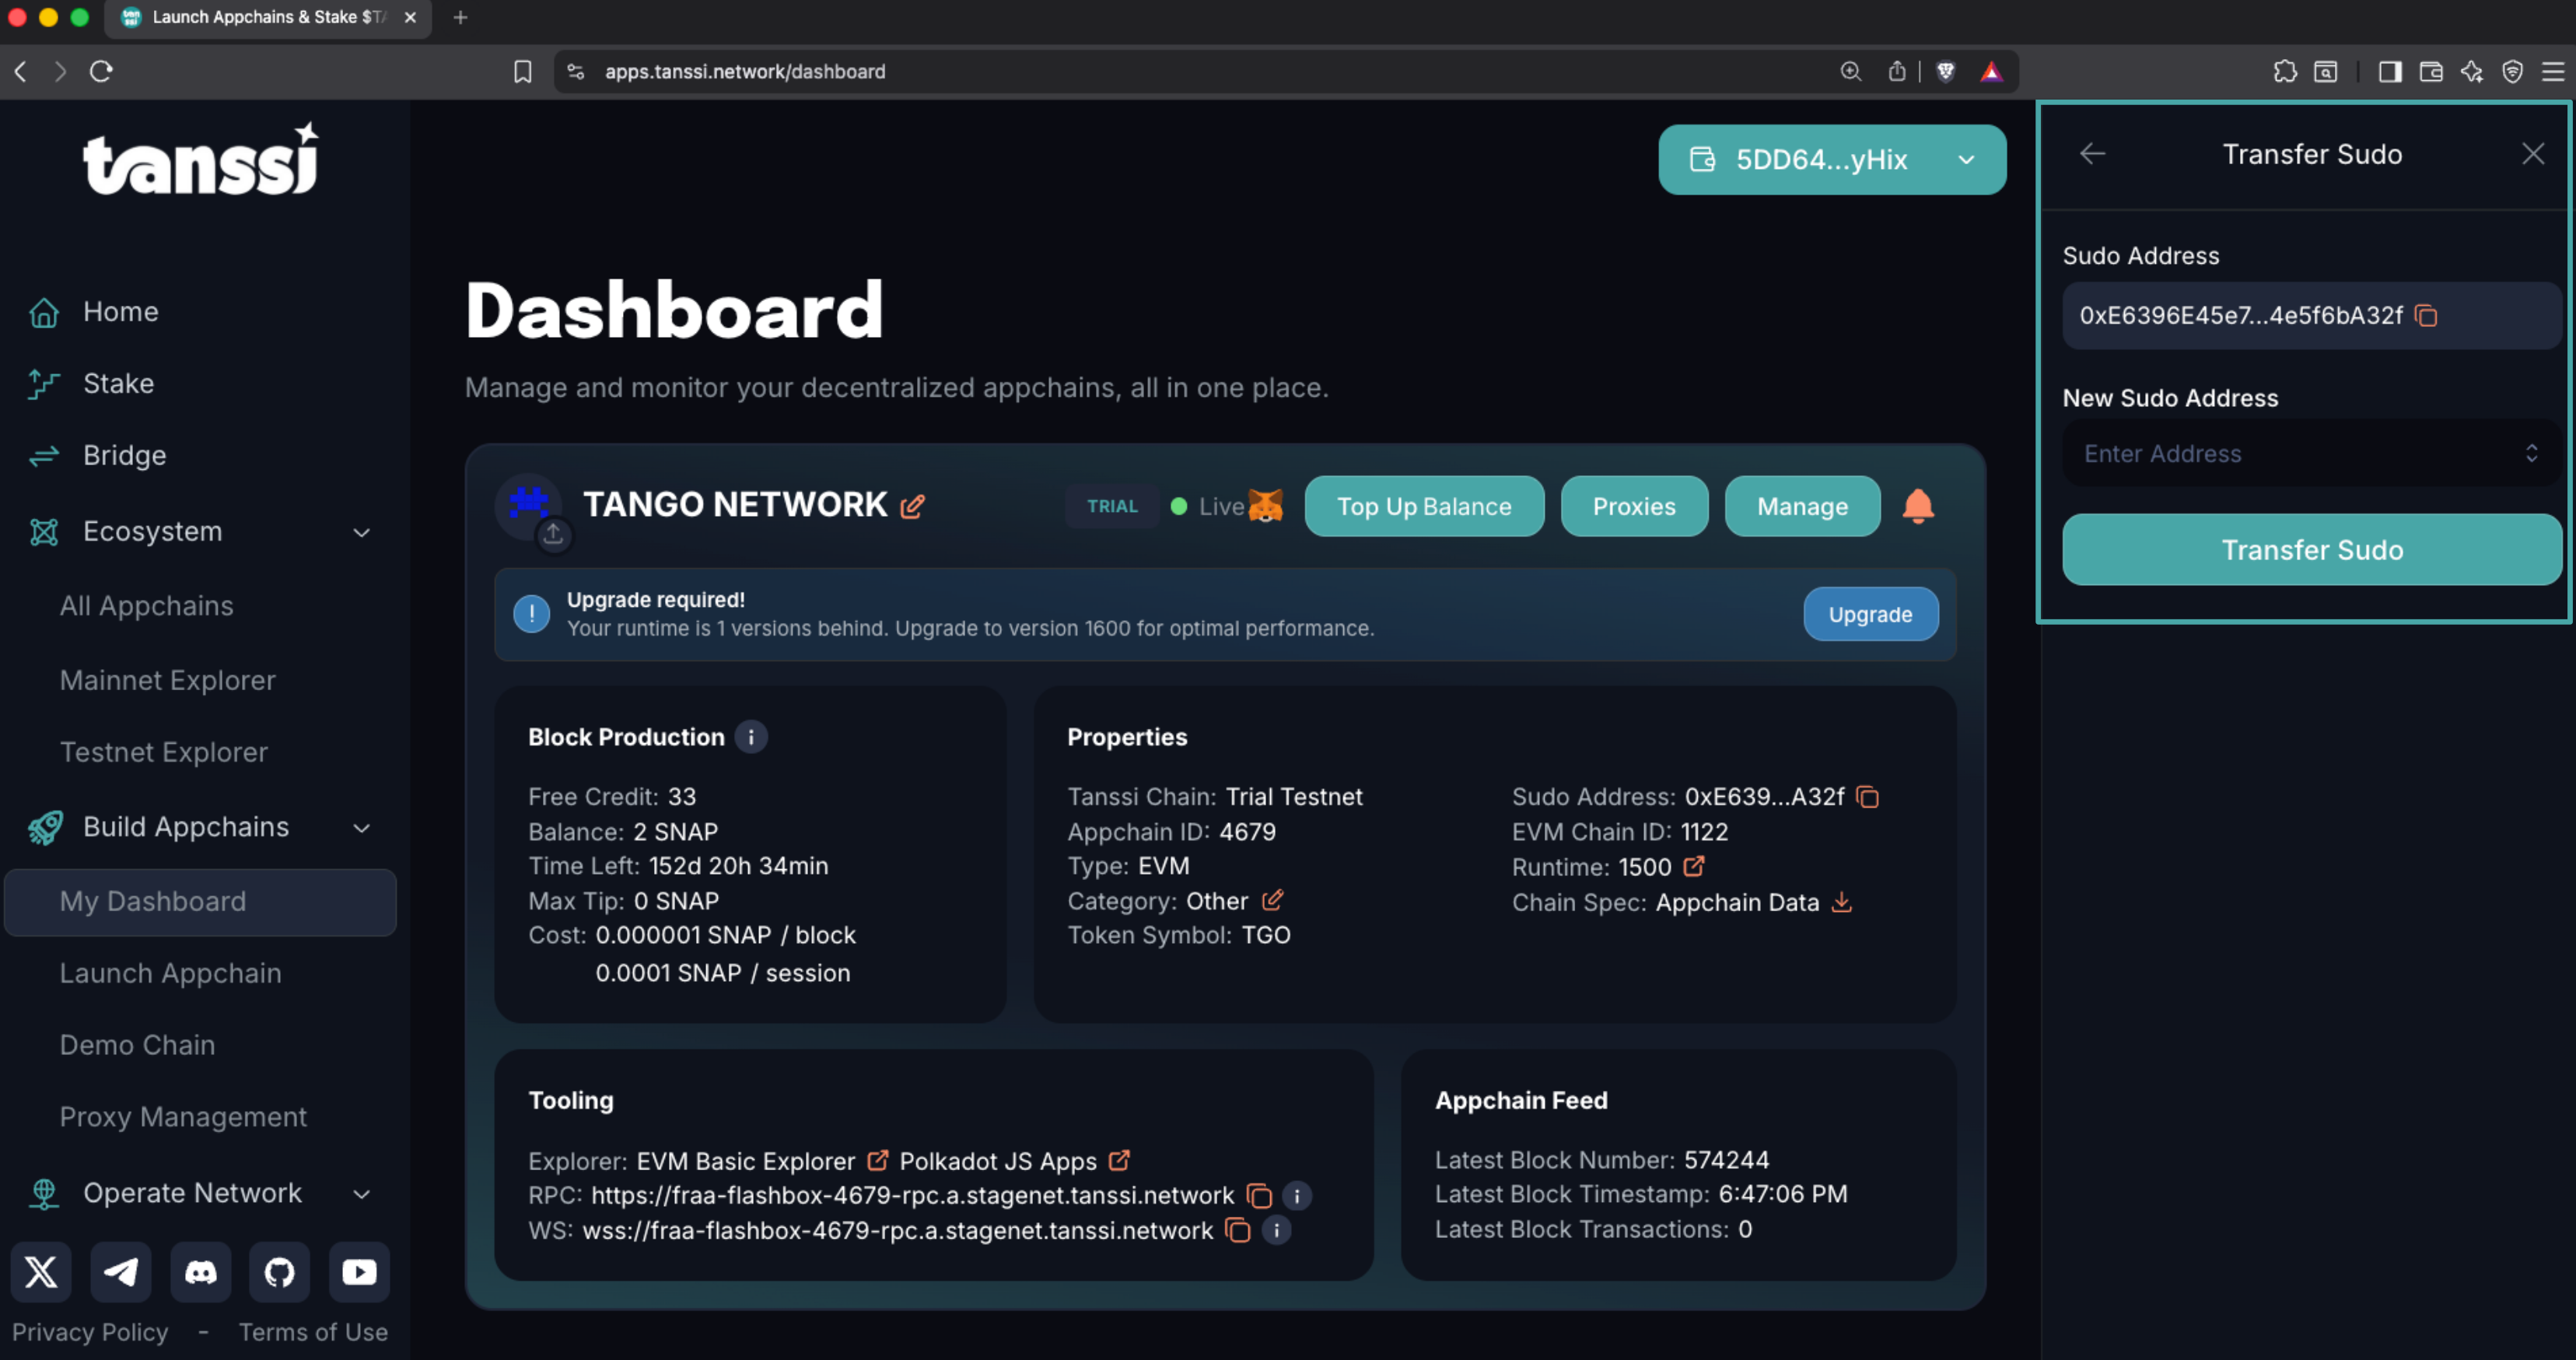
When you select the New Sudo Address field, a menu will be shown displaying the following entries: the multisigs you might have already created, the accounts you have connected to the dApp, and the Create Multisig Account action.
To create a new multisig, click Create Multisig Account and follow the steps in the modal windows that appear:
- Set your multisig's name.
- Insert the addresses that will be part of the signing set.
- Add or remove addresses from the set. The minimum number of addresses for a set is two.
- Define the threshold of signatures to approve the transaction. The minimum threshold is two.
- Click on Create.
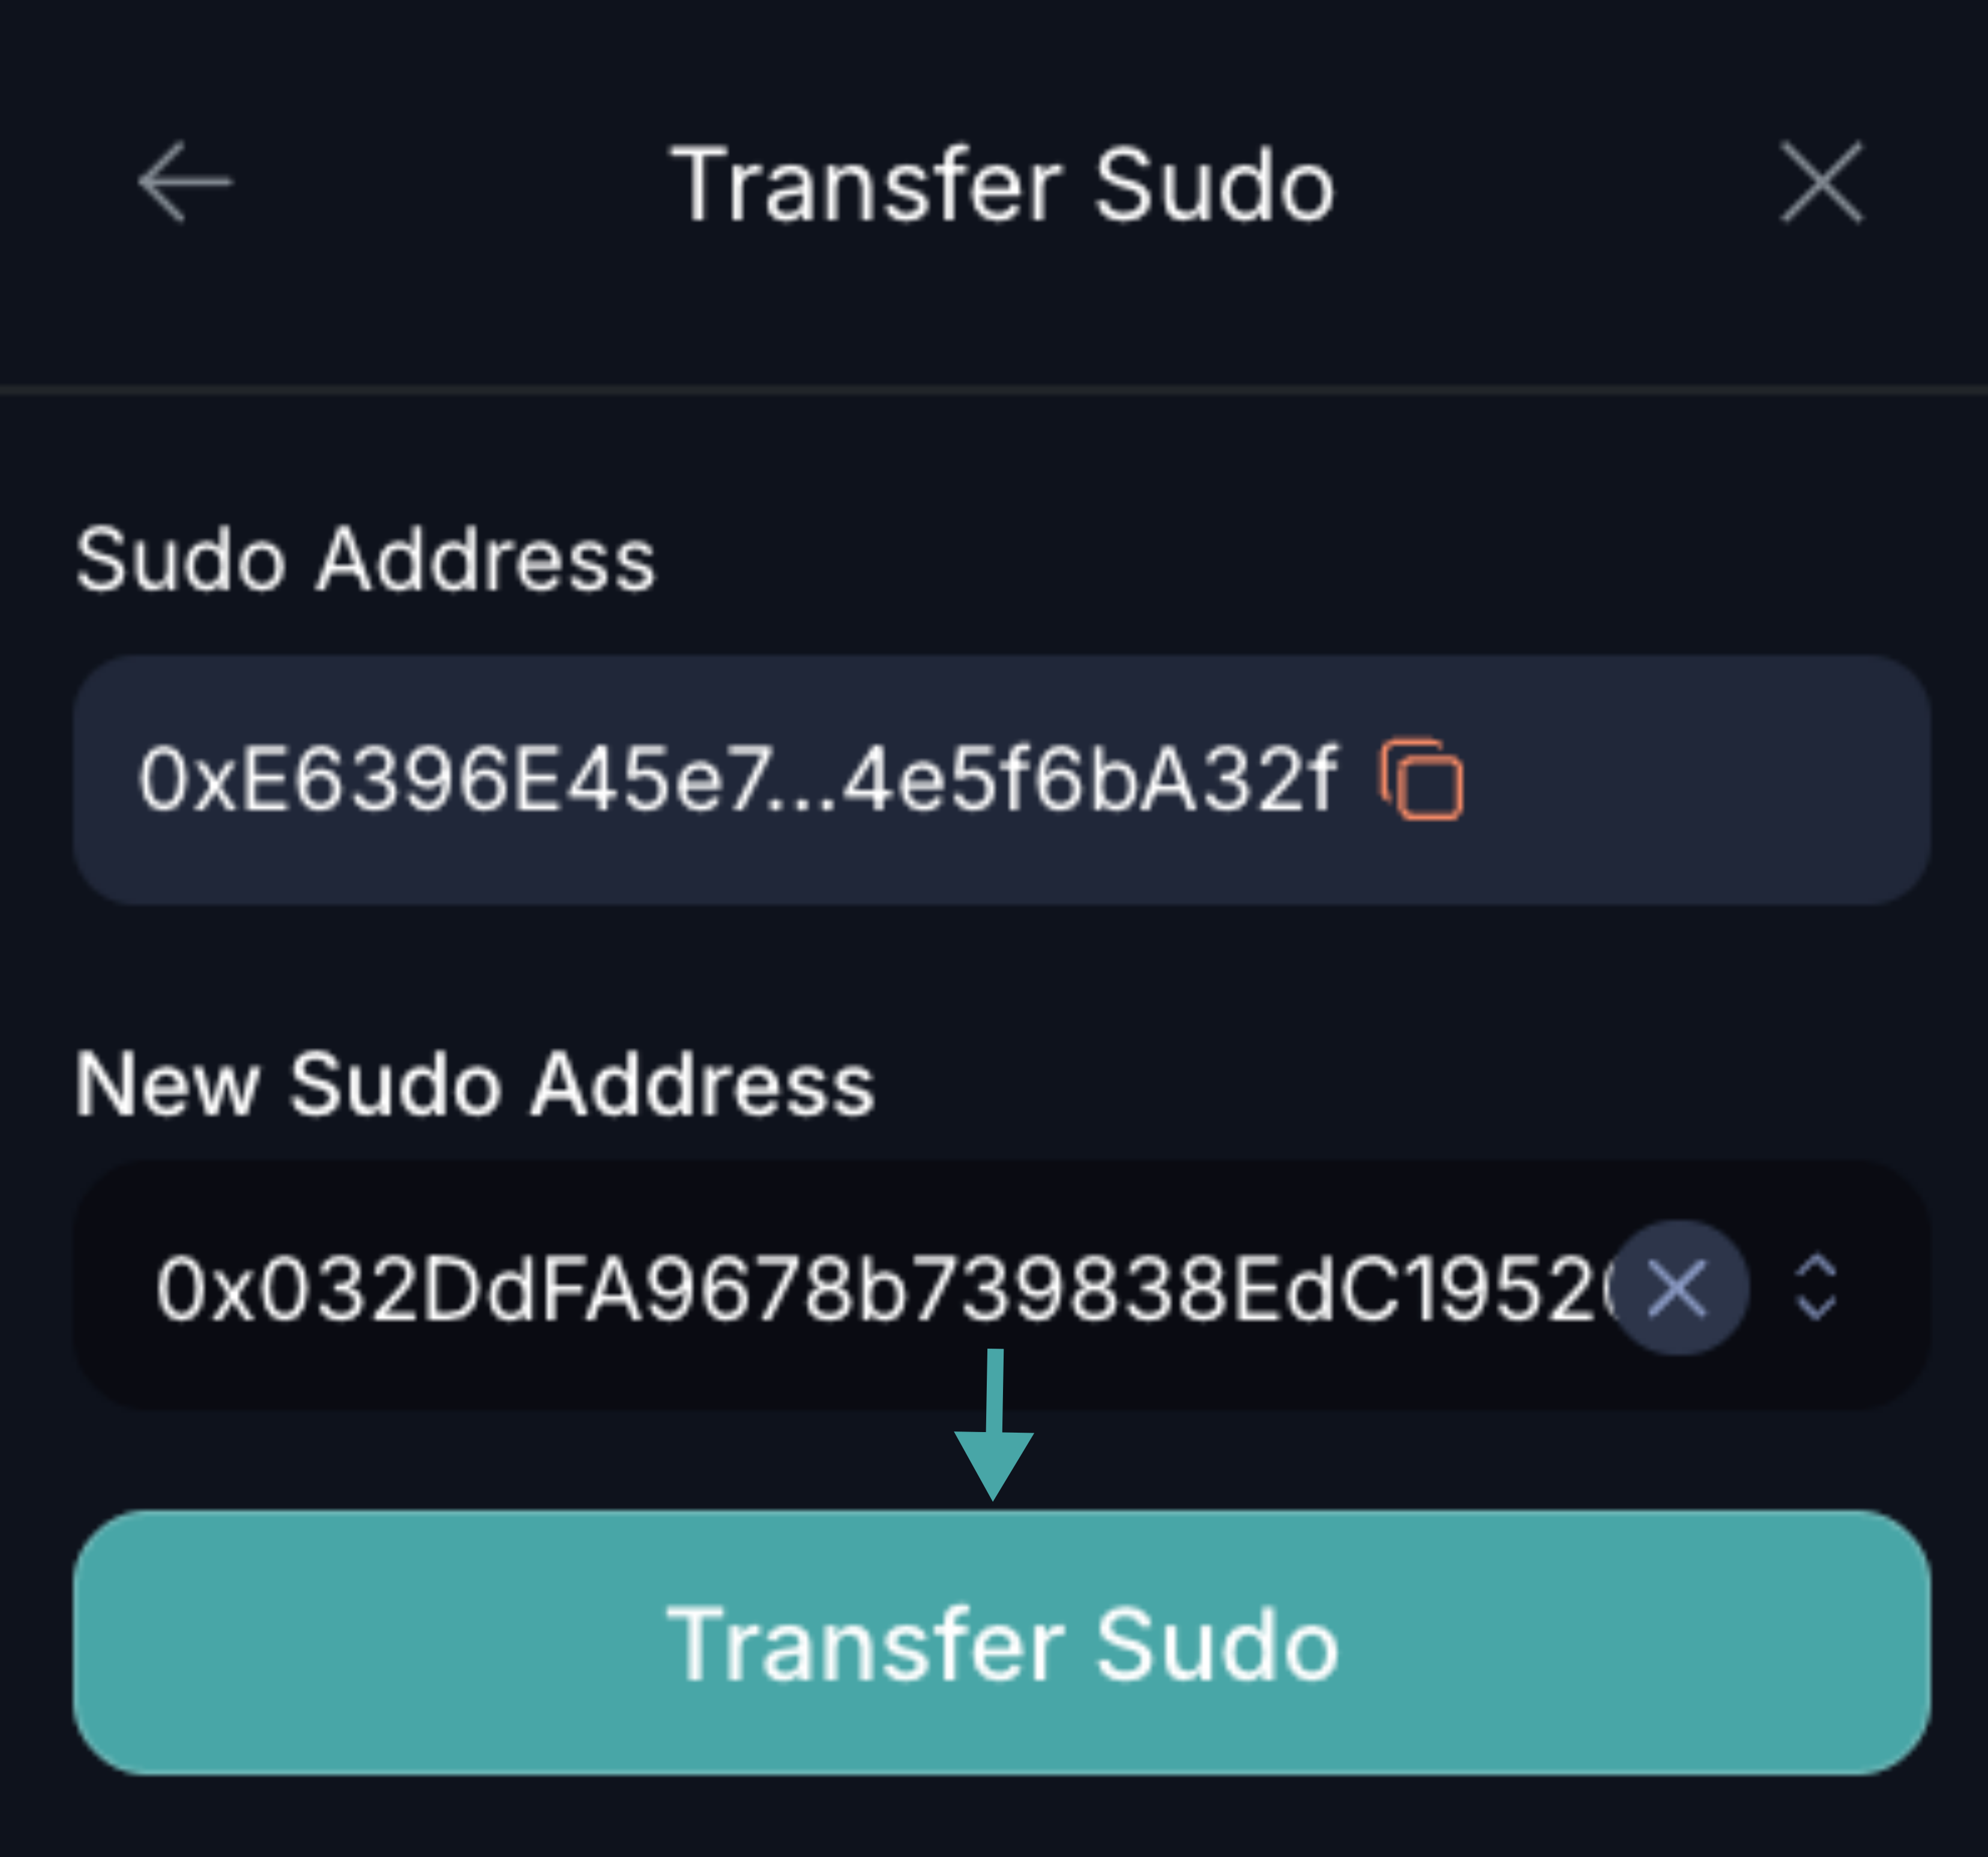
Your multisig is now saved and can be used as sudo for your new chain. Select your newly created multisig, click on Transfer Sudo, sign the transaction, and that's it!
Execute Privileged Actions With a Multisig Setup
The dApp's management panel allows you to dispatch privileged transactions through a user-friendly interface. Among those privileged actions are those related to token management (such as minting tokens or changing the gas dynamics), dispatching runtime upgrades, opening interoperability channels, and others.
When appchain management is configured with a multisig account as sudo, the process involves several steps because the transaction will be executed only when the threshold of valid signatures is met.
The smallest recommended multisig that can be configured is a two-out-of-three. In this setup, the user creating the transaction provides one valid signature, and a second user, holding any of the remaining two valid addresses, signs and executes the transaction, completing the multisig flow.
The following sections show how to create and execute a privileged transaction.
Note
A multisig transaction created through the Tanssi dApp's UI can only be completed using the Tanssi dApp's UI. Similarly, a multisig transaction created with an external tool will not be shown and cannot be completed in the Tanssi dApp.
Create a Multisig Transaction
To create a privileged transaction, head to the Tanssi dApp and connect one of the multisig addresses.
With a multisig participant address connected to the dApp, the Manage button will be visible, granting you access to the management panel, where you can initiate privileged transactions.
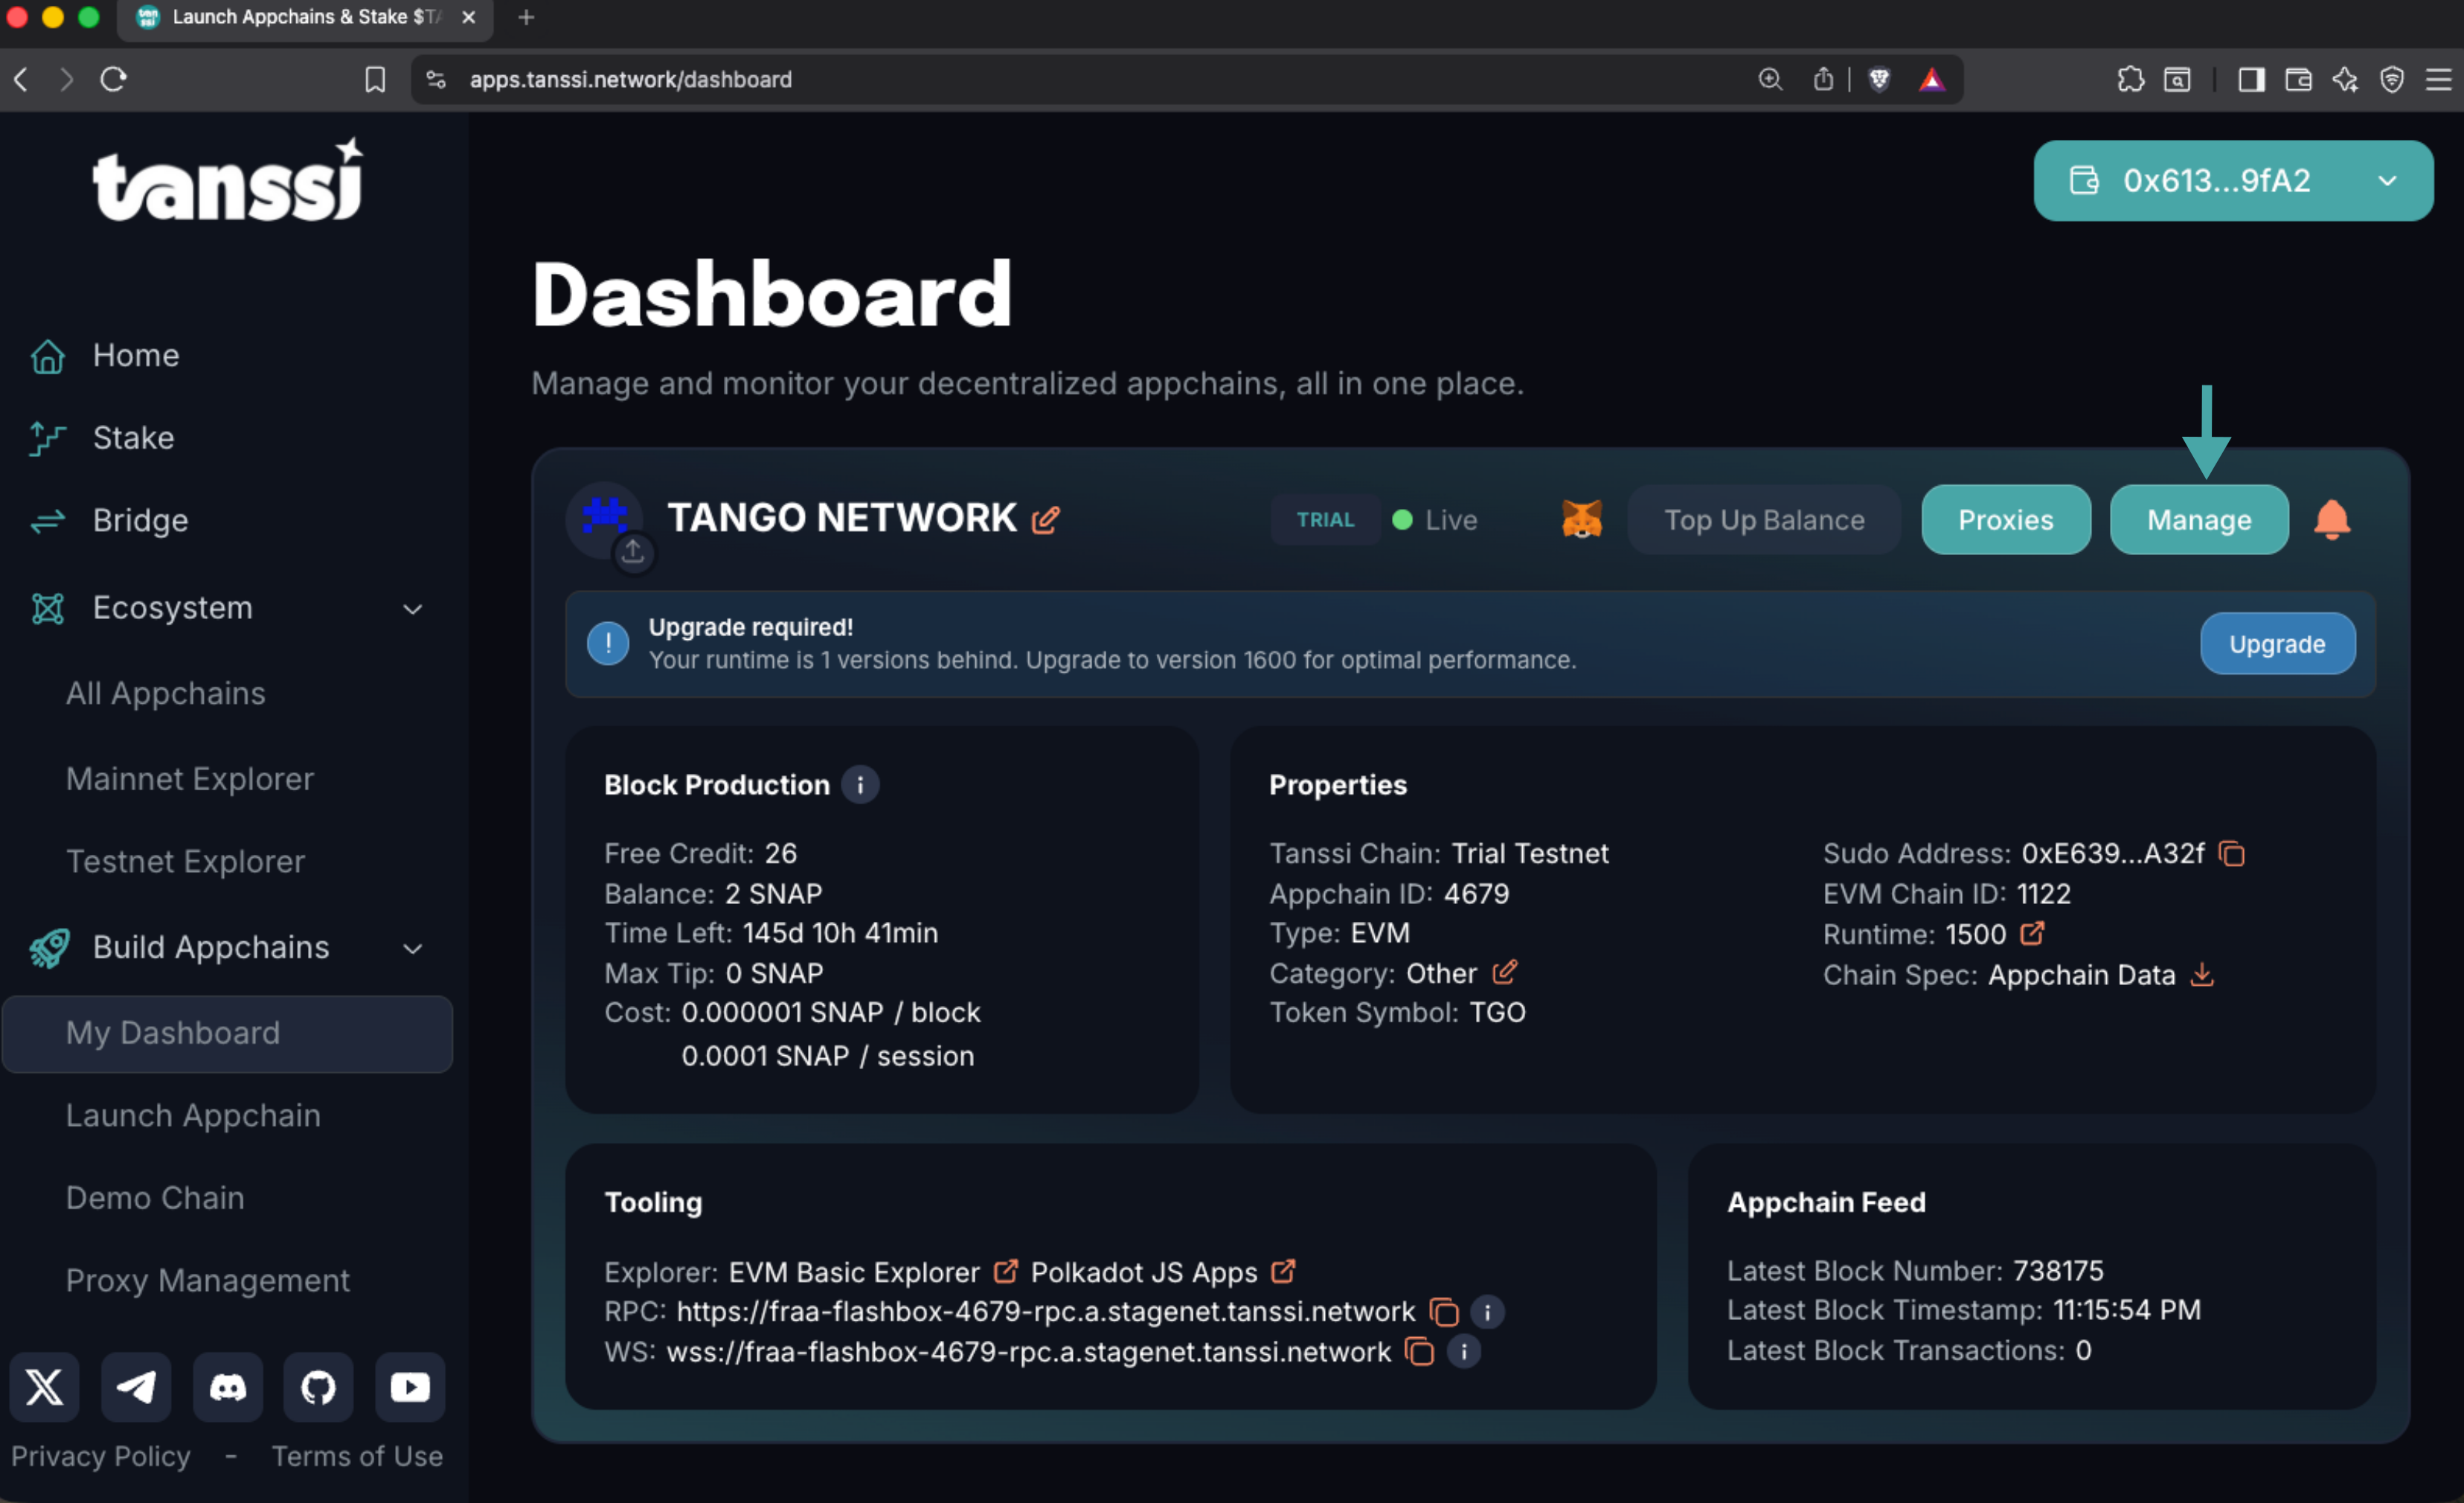
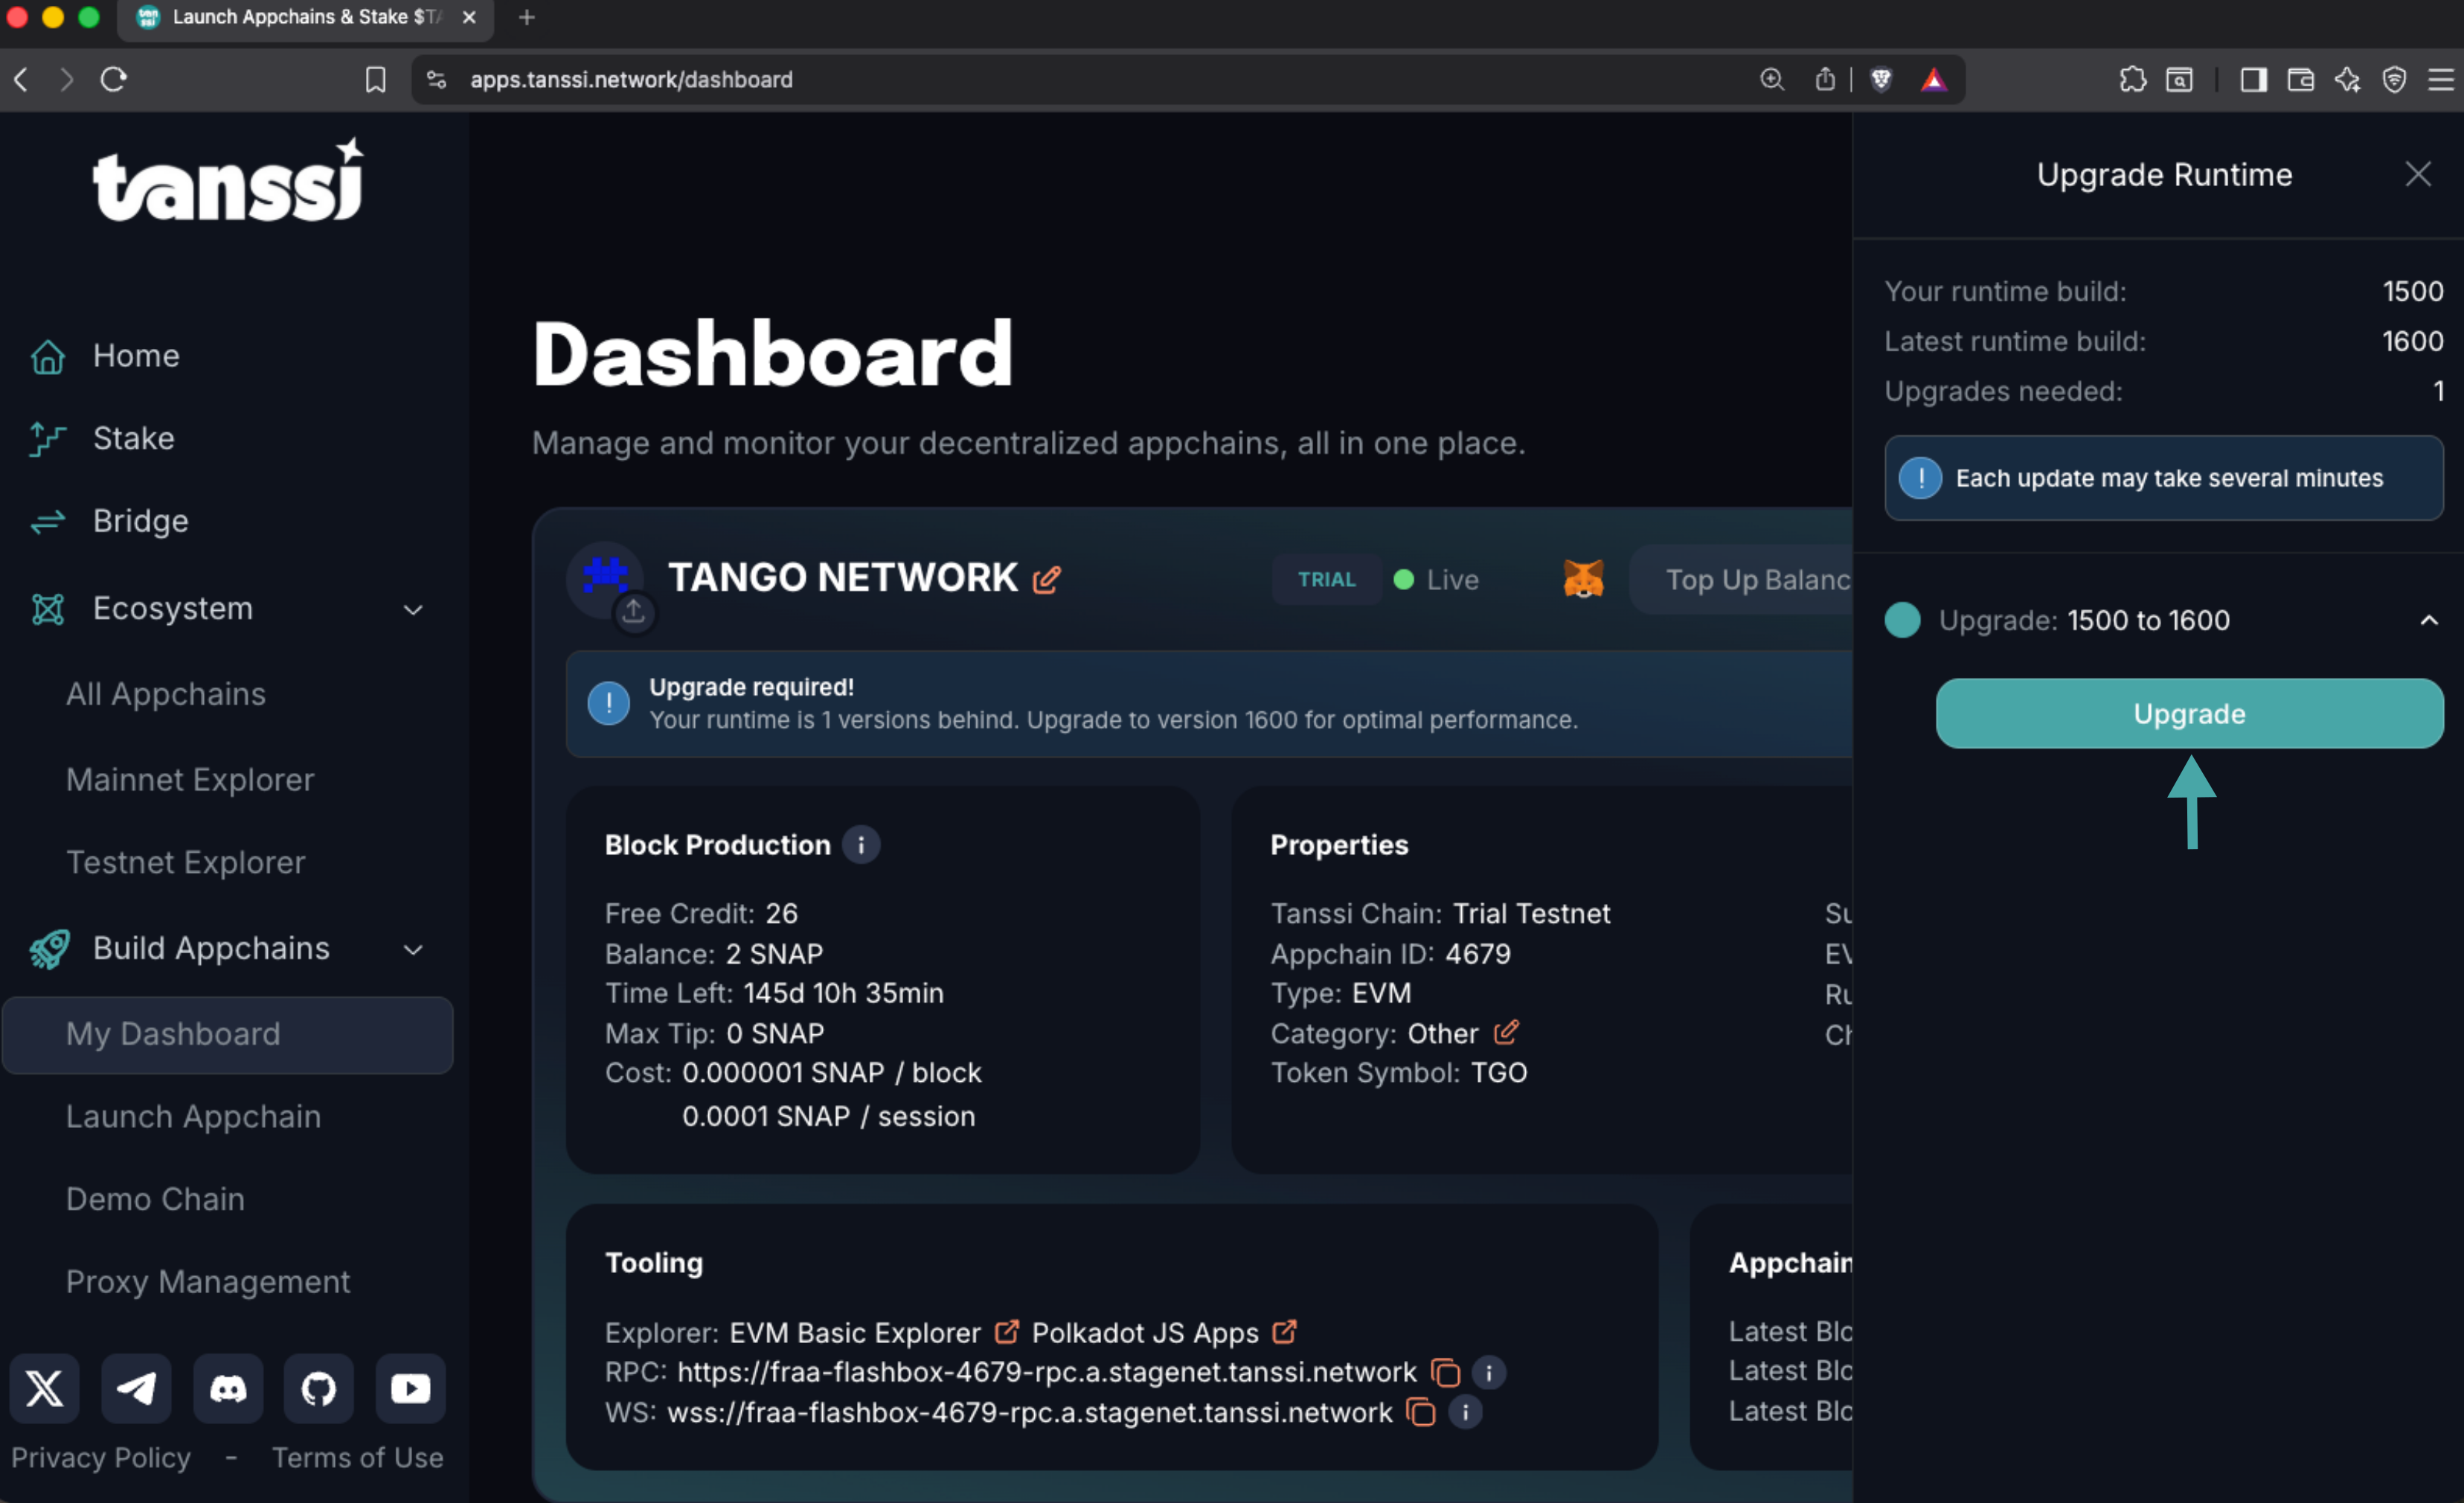
In this example, the appchain's runtime is outdated, and an upgrade is available. We start the runtime upgrade by clicking on the Upgrade button and signing the transaction.
Once the multisig is created, your dashboard will show that there's a new ongoing multisig transaction. Click on View Details to check the multisig's details in the right panel.
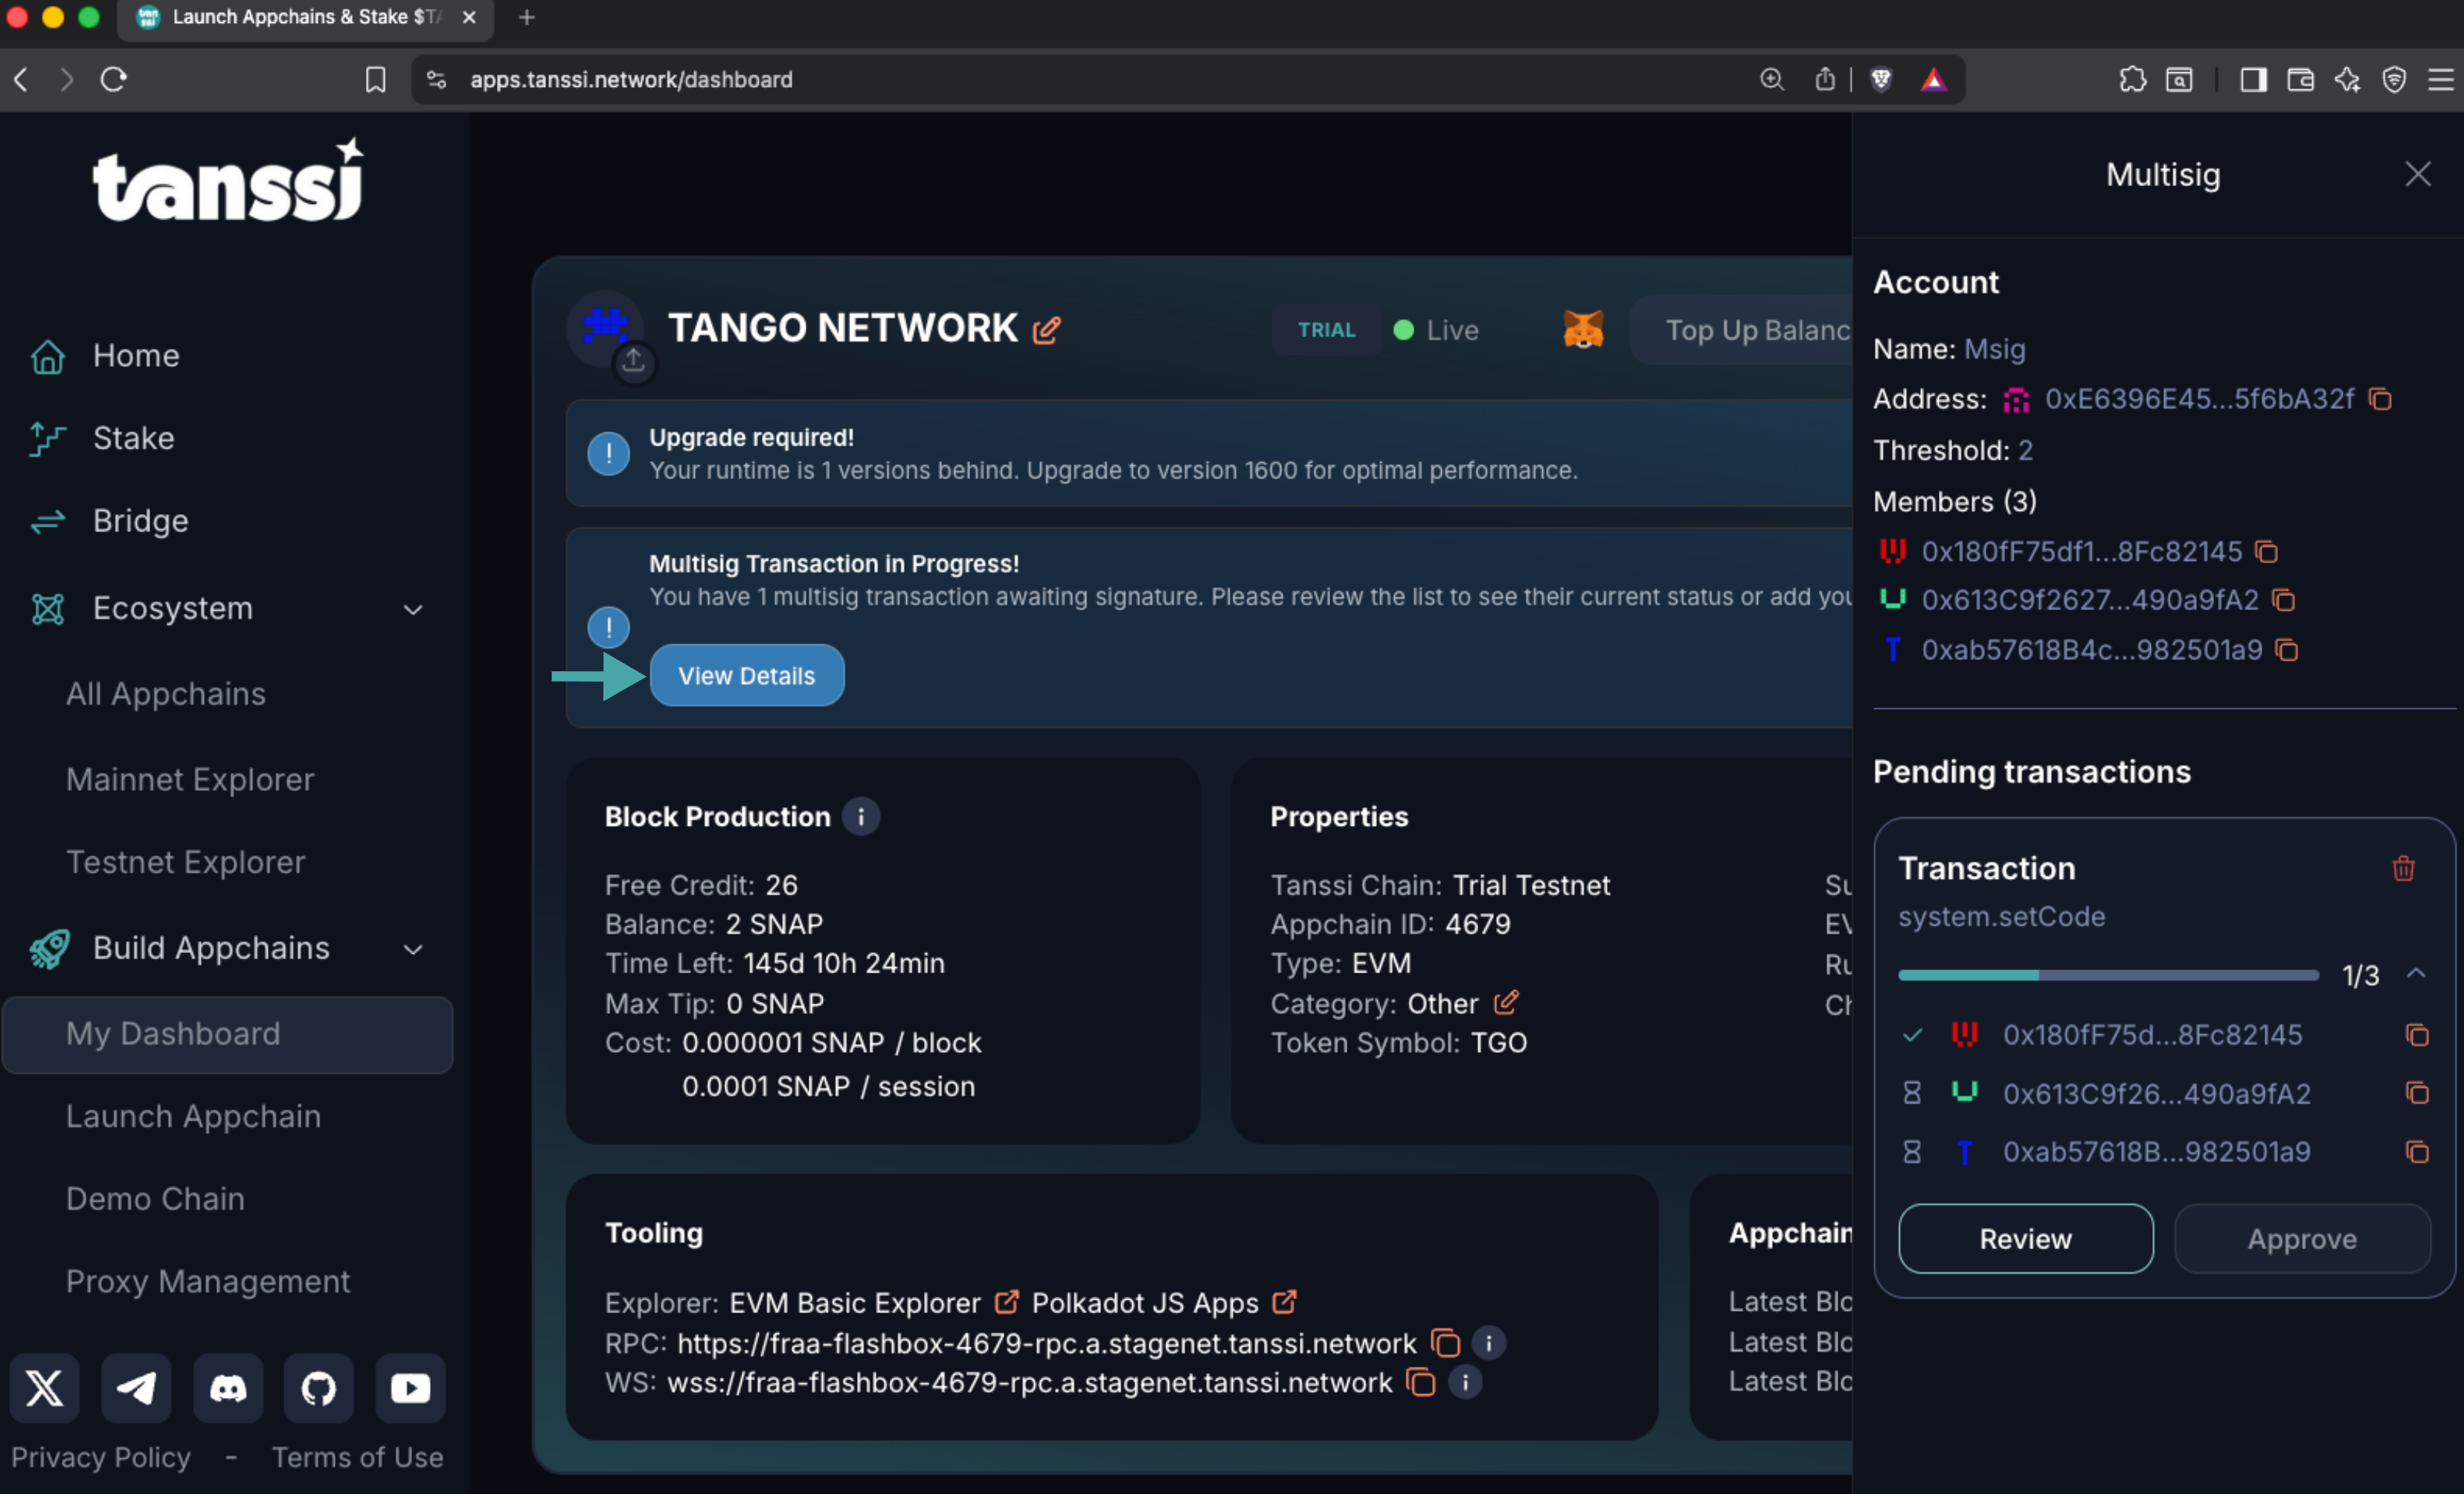
Note
The Approve button is disabled for the multisig transaction creator, since their signature has already been submitted.
Sign a Multisig Transaction
With a multisig participant address connected to the dApp, your dashboard will display the multisig transactions that are awaiting your review and approval. Click on the View Details button, review the transaction details, and sign it.
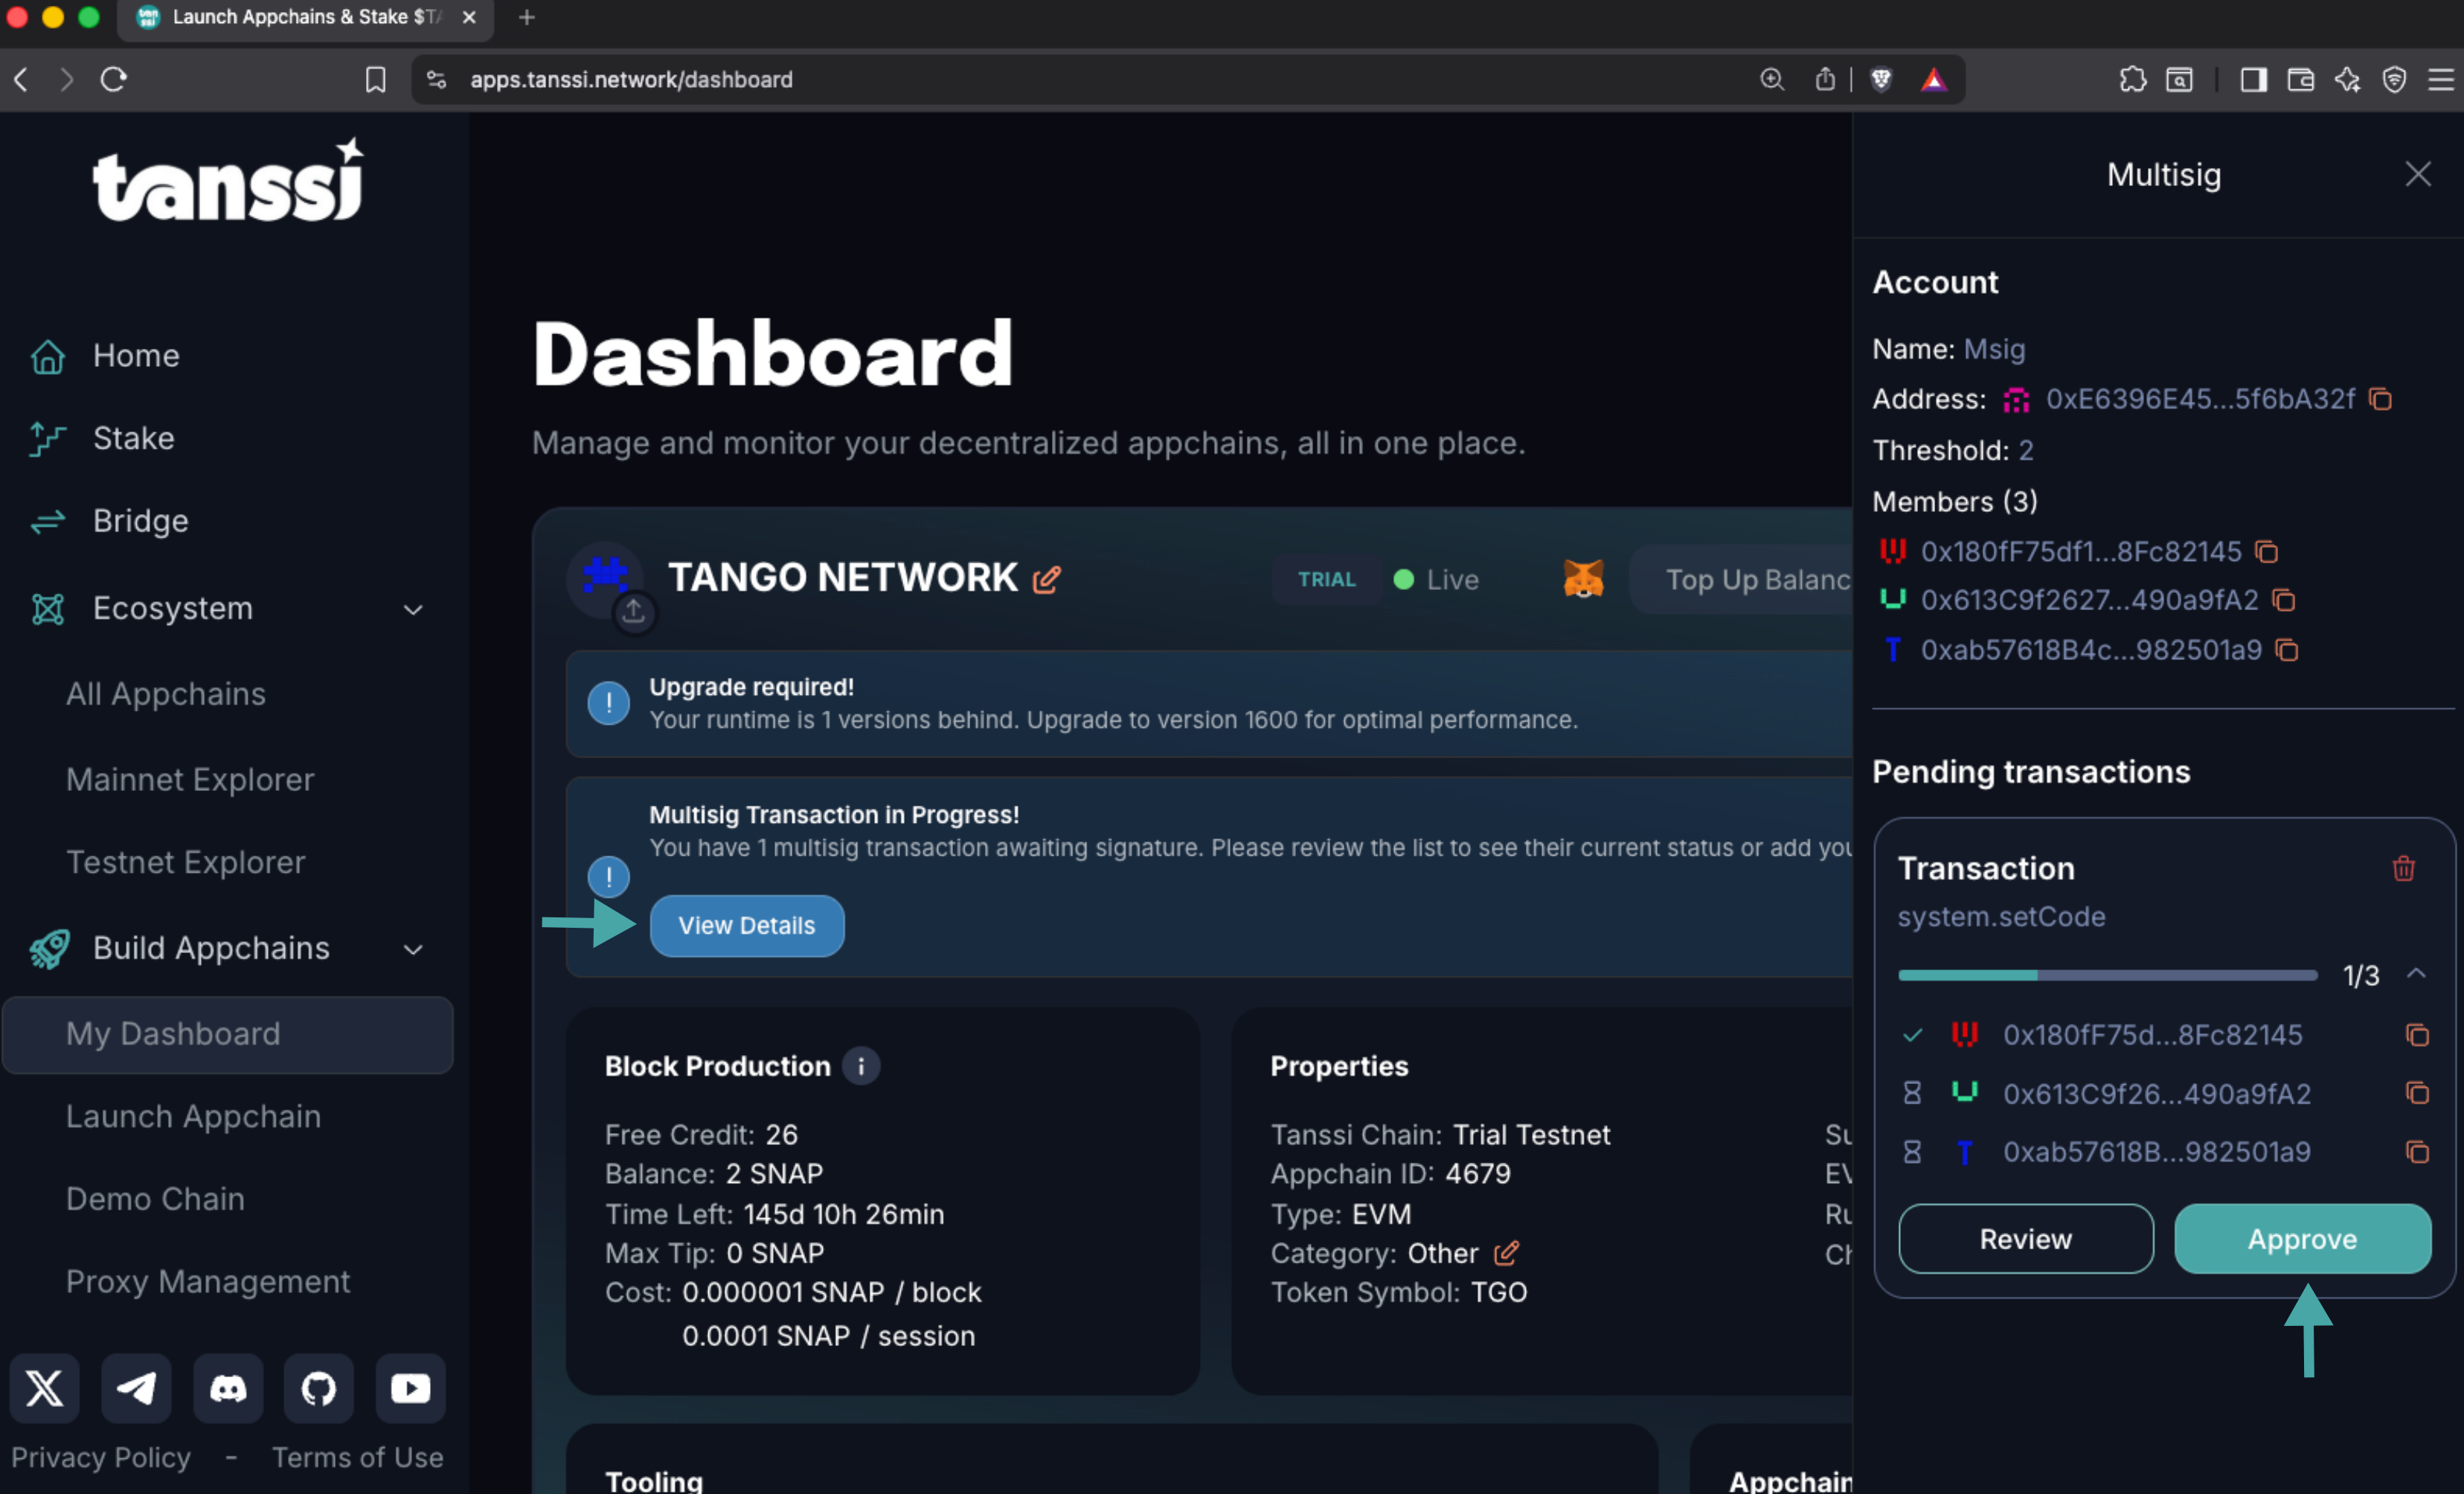
After signing the transaction and reaching the multisig minimum threshold, it is executed immediately, completing the action.
| Created: December 23, 2025