Manage Cross-Chain Communication Channels
Introduction
As presented in the Native Cross-Chain Communication article from the Learn section, all Tanssi-powered networks have an inherent capability to communicate and interoperate with any other network in the ecosystem. This native cross-chain communication feature is possible thanks to the unique infrastructure the networks are built on top of, leveraging the Cross-Consensus Message format (XCM for short), which facilitates communication between different consensus systems.
The first step to enable communication between networks is opening a channel. The process of opening a channel starts by sending a request to the network you want to establish communications with. Once the request has been accepted by the destination chain's governor, a channel will be opened.
In this guide, you'll learn how to use the Tanssi dApp to manage your network's cross-chain communication channels.
Checking Prerequisites
For the examples in this guide, you will need to have the following:
- A Tanssi-powered network (Dedicated) running runtime 500 or above
- The account you used when registering the network, imported into any of the supported wallets
- Your appchain's Sudo account, imported into any of the supported wallets
Note
The network's registration account is always a Substrate one, whereas the network's Sudo account depends on the chain type. If the chain is EVM-compatible, then the Sudo account will be an Ethereum type and, otherwise, a Substrate type.
Retrieving the Registration Account
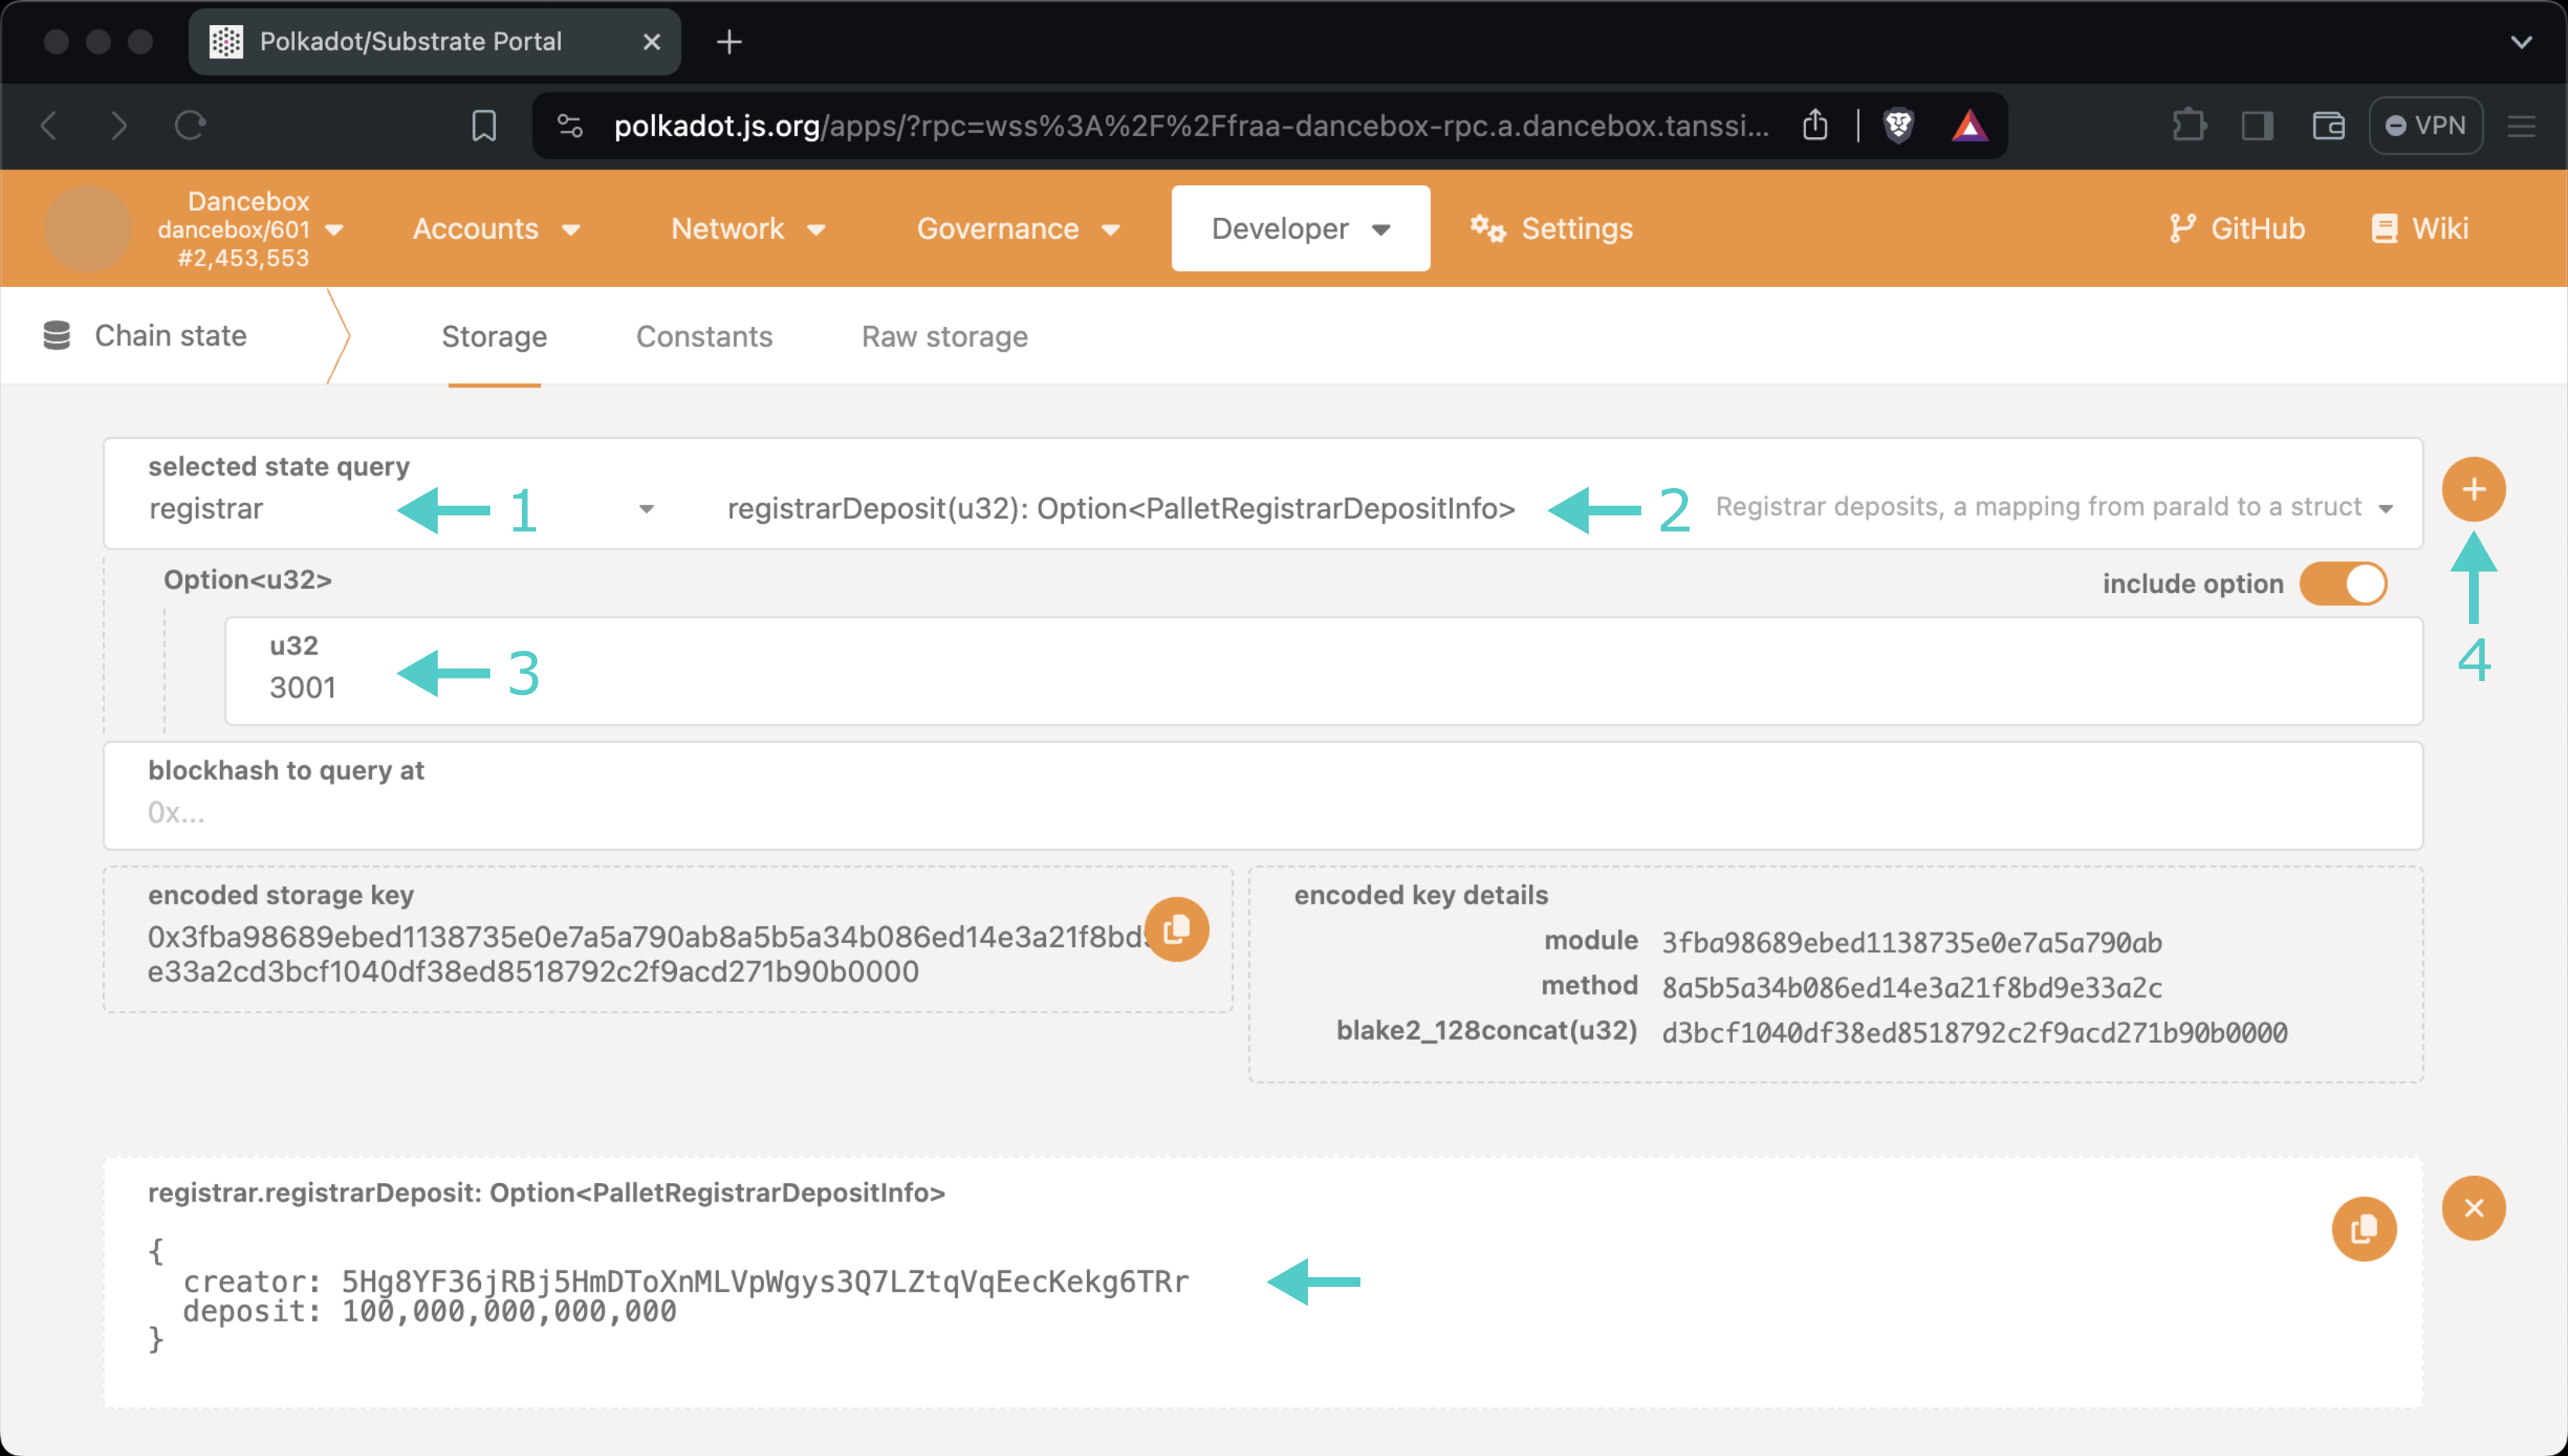
If you're unsure what your registration account is, you can query it directly from the Tanssi orchestrator chain, which keeps records of every registered network. To do so, head to the Chain state section on the Polkadot.js Apps connected to the orchestrator chain for quick trial networks or dedicated networks, and take the following steps:
- Select the registrar storage module
- Select registrarDeposit
- Insert your network ID
- Press + icon
You'll see the registration account at the bottom.
Note
The dApp will show your network in the dashboard only if you have the registration account properly set.
Retrieving the Sudo Account
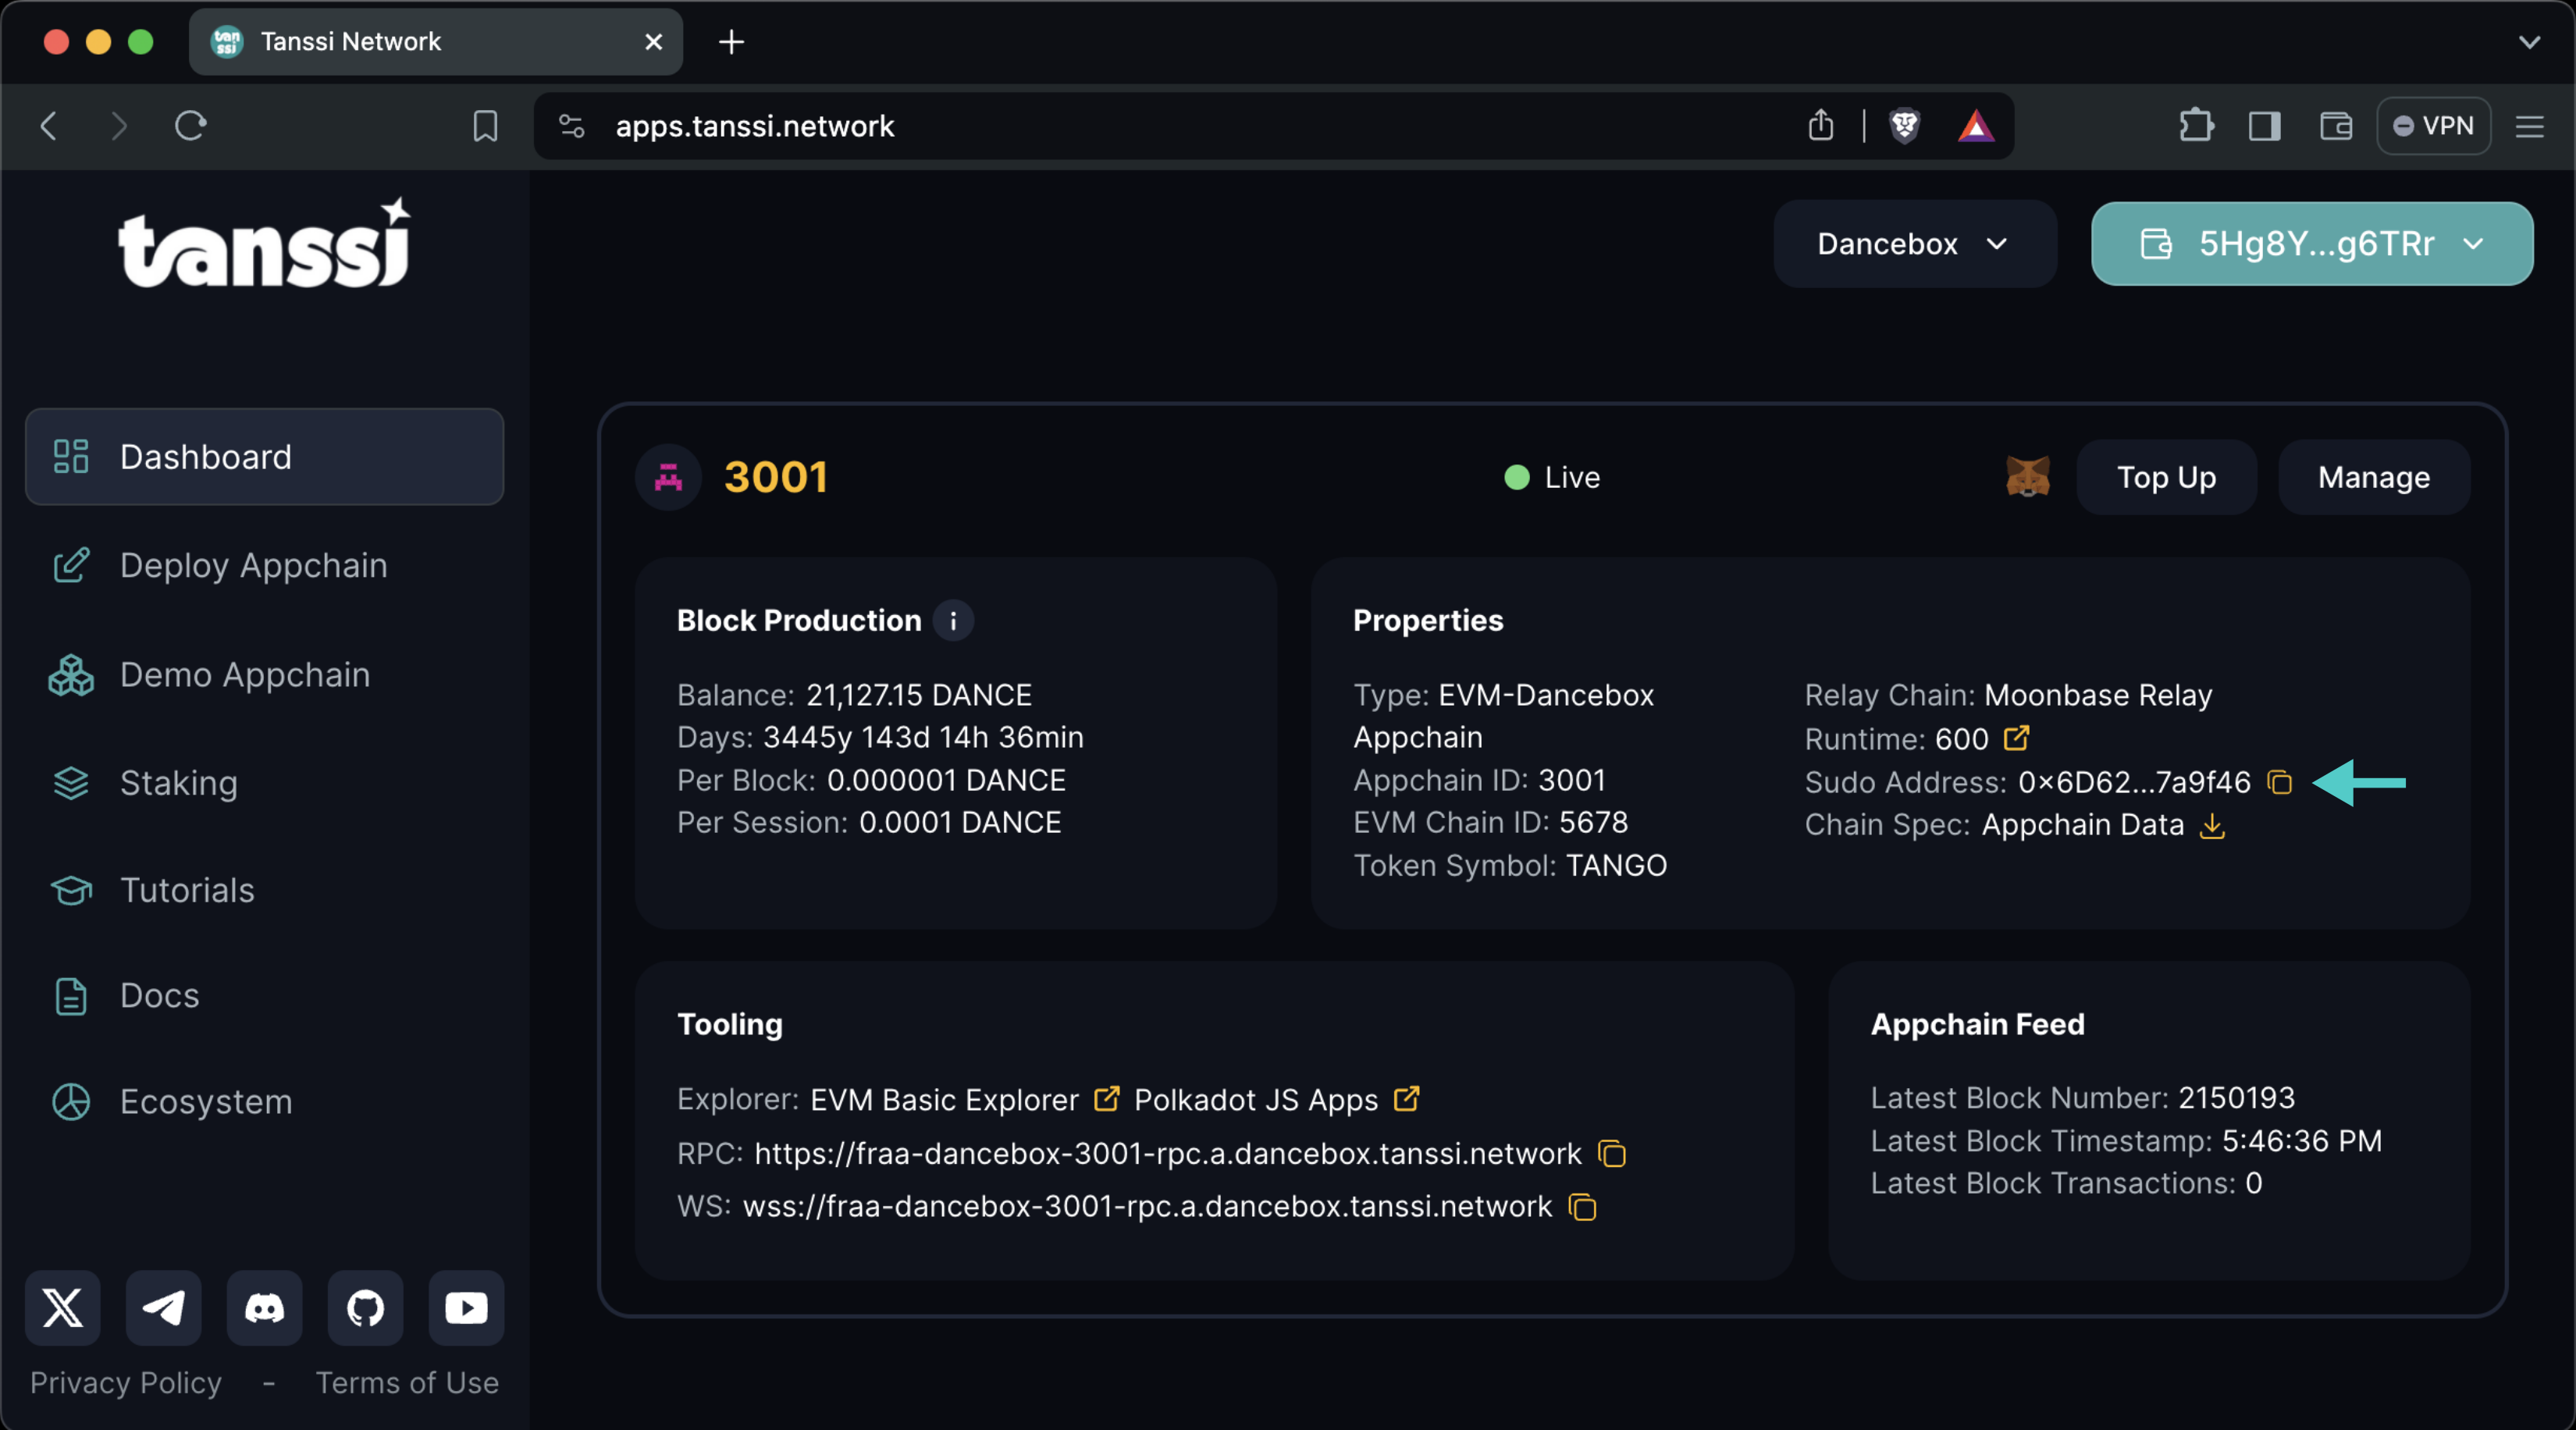
If you're unsure what your Tanssi network's Sudo account is, you can find it in your Tanssi Dashboard underneath the Properties section.
Warning
It's critical to protect your Sudo account key with the utmost security precautions, as it grants privileged access to your Tanssi network.
Accessing the Channel Management Panel
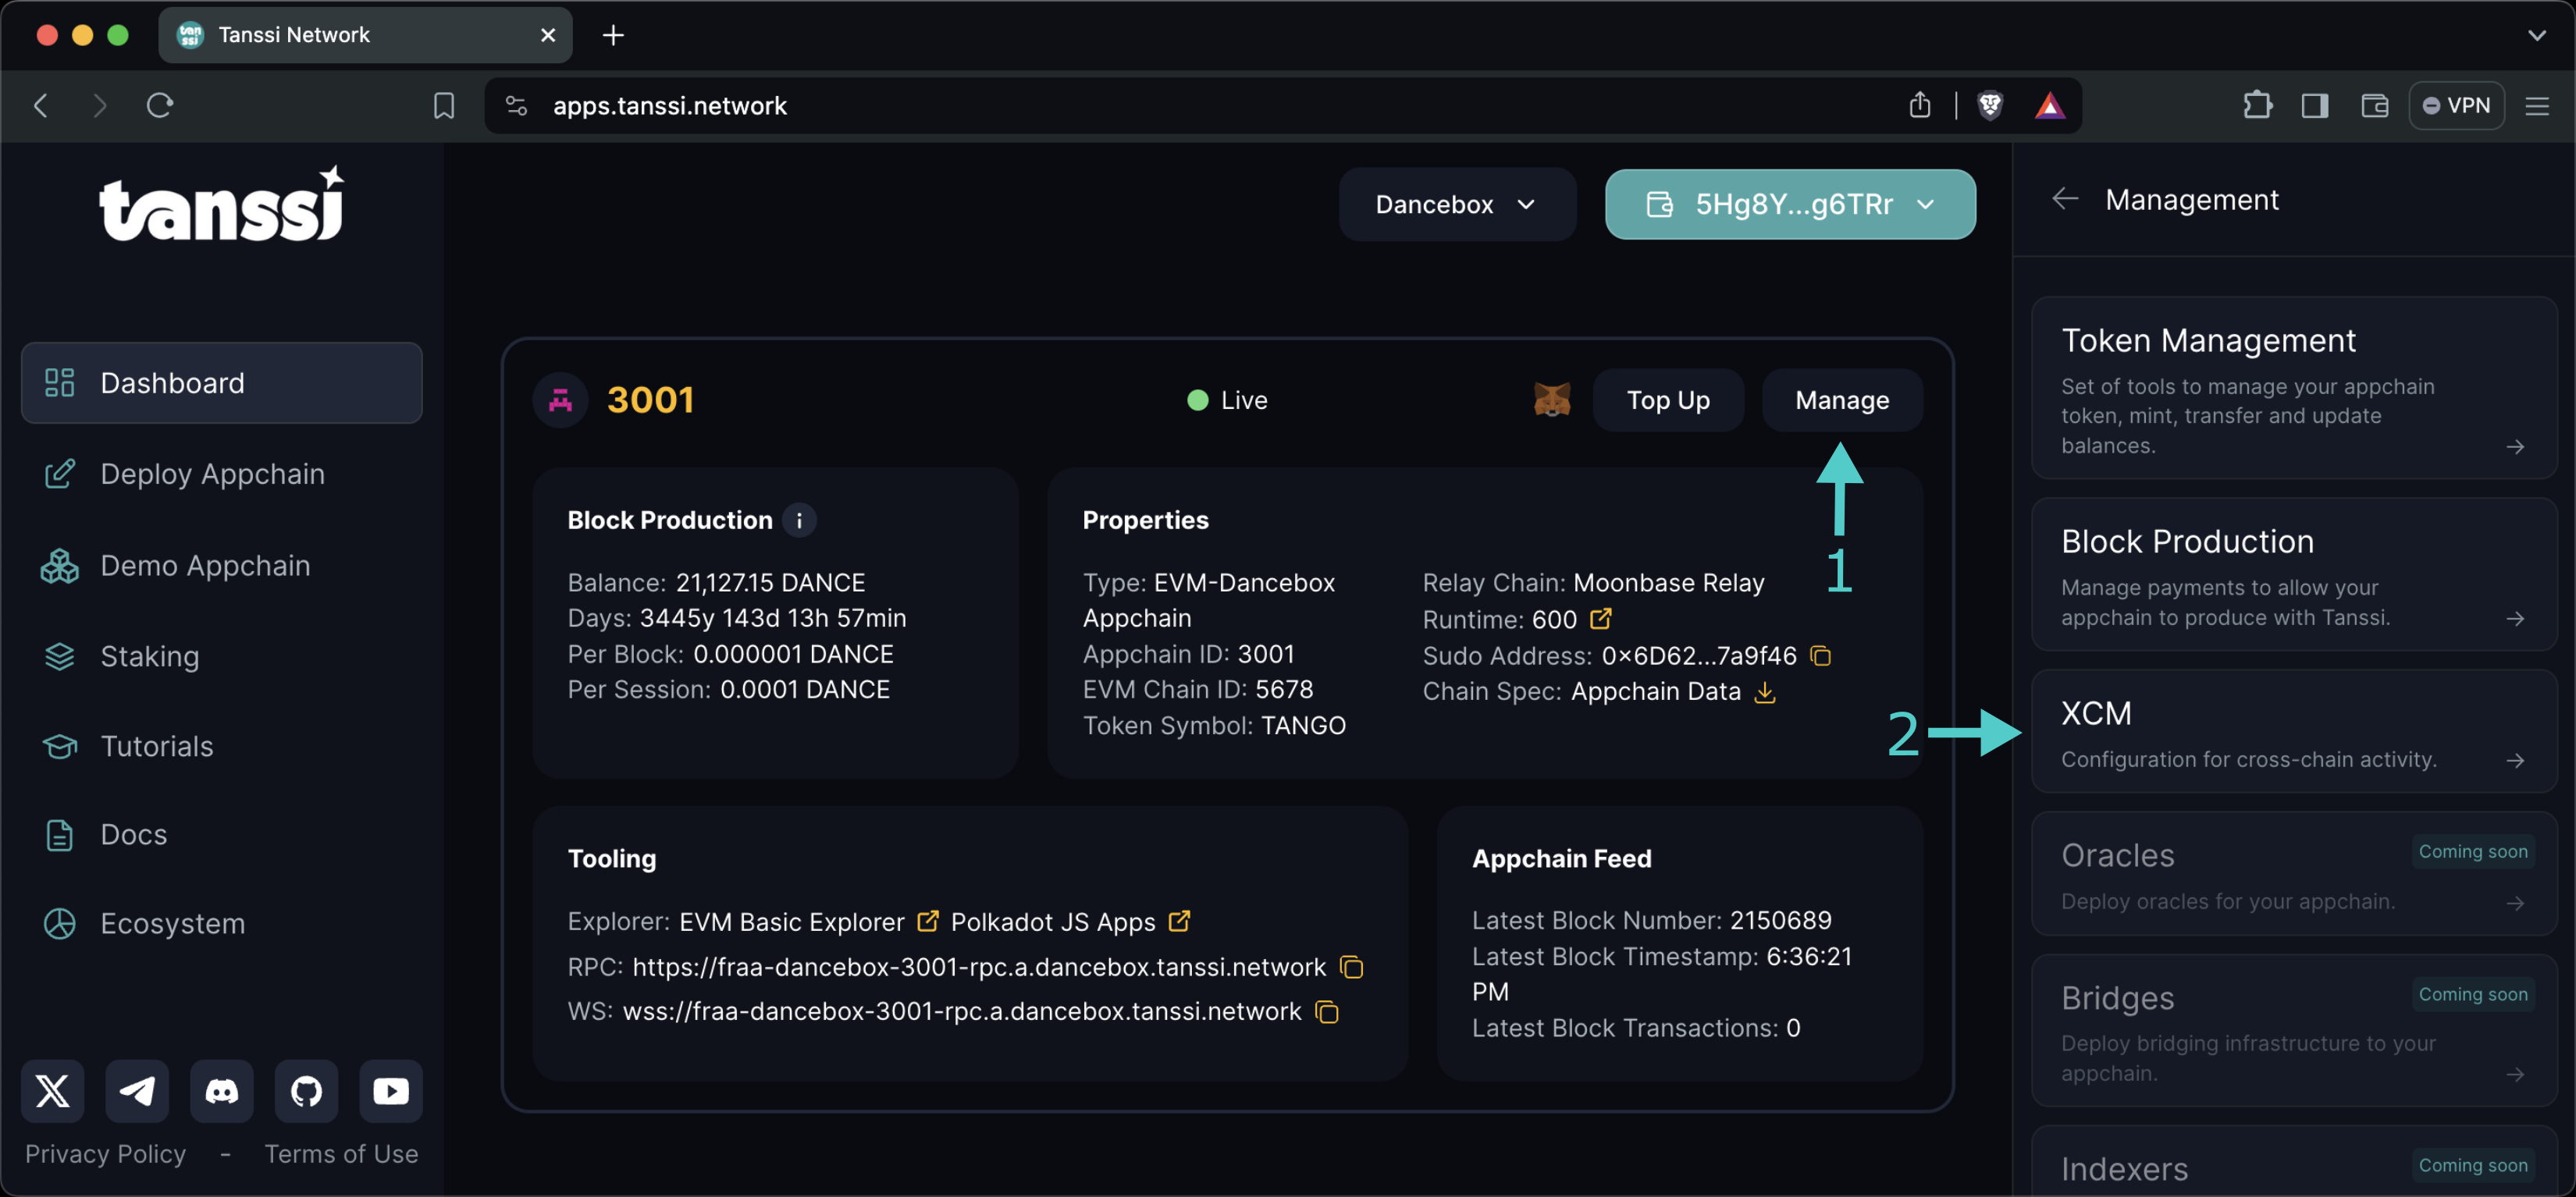
The Tanssi dApp makes it easy for the network governor to manage cross-chain communication configurations. It allows requesting new channels, accepting incoming channel opening requests, closing existing channels, managing external assets, and more. To access the cross-chain management panel, head to the Tanssi dApp, and then:
- Click on the Manage button
- Click on the XCM button
Note
If you don't see your network's details on the dashboard, make sure to comply with the prerequisites.
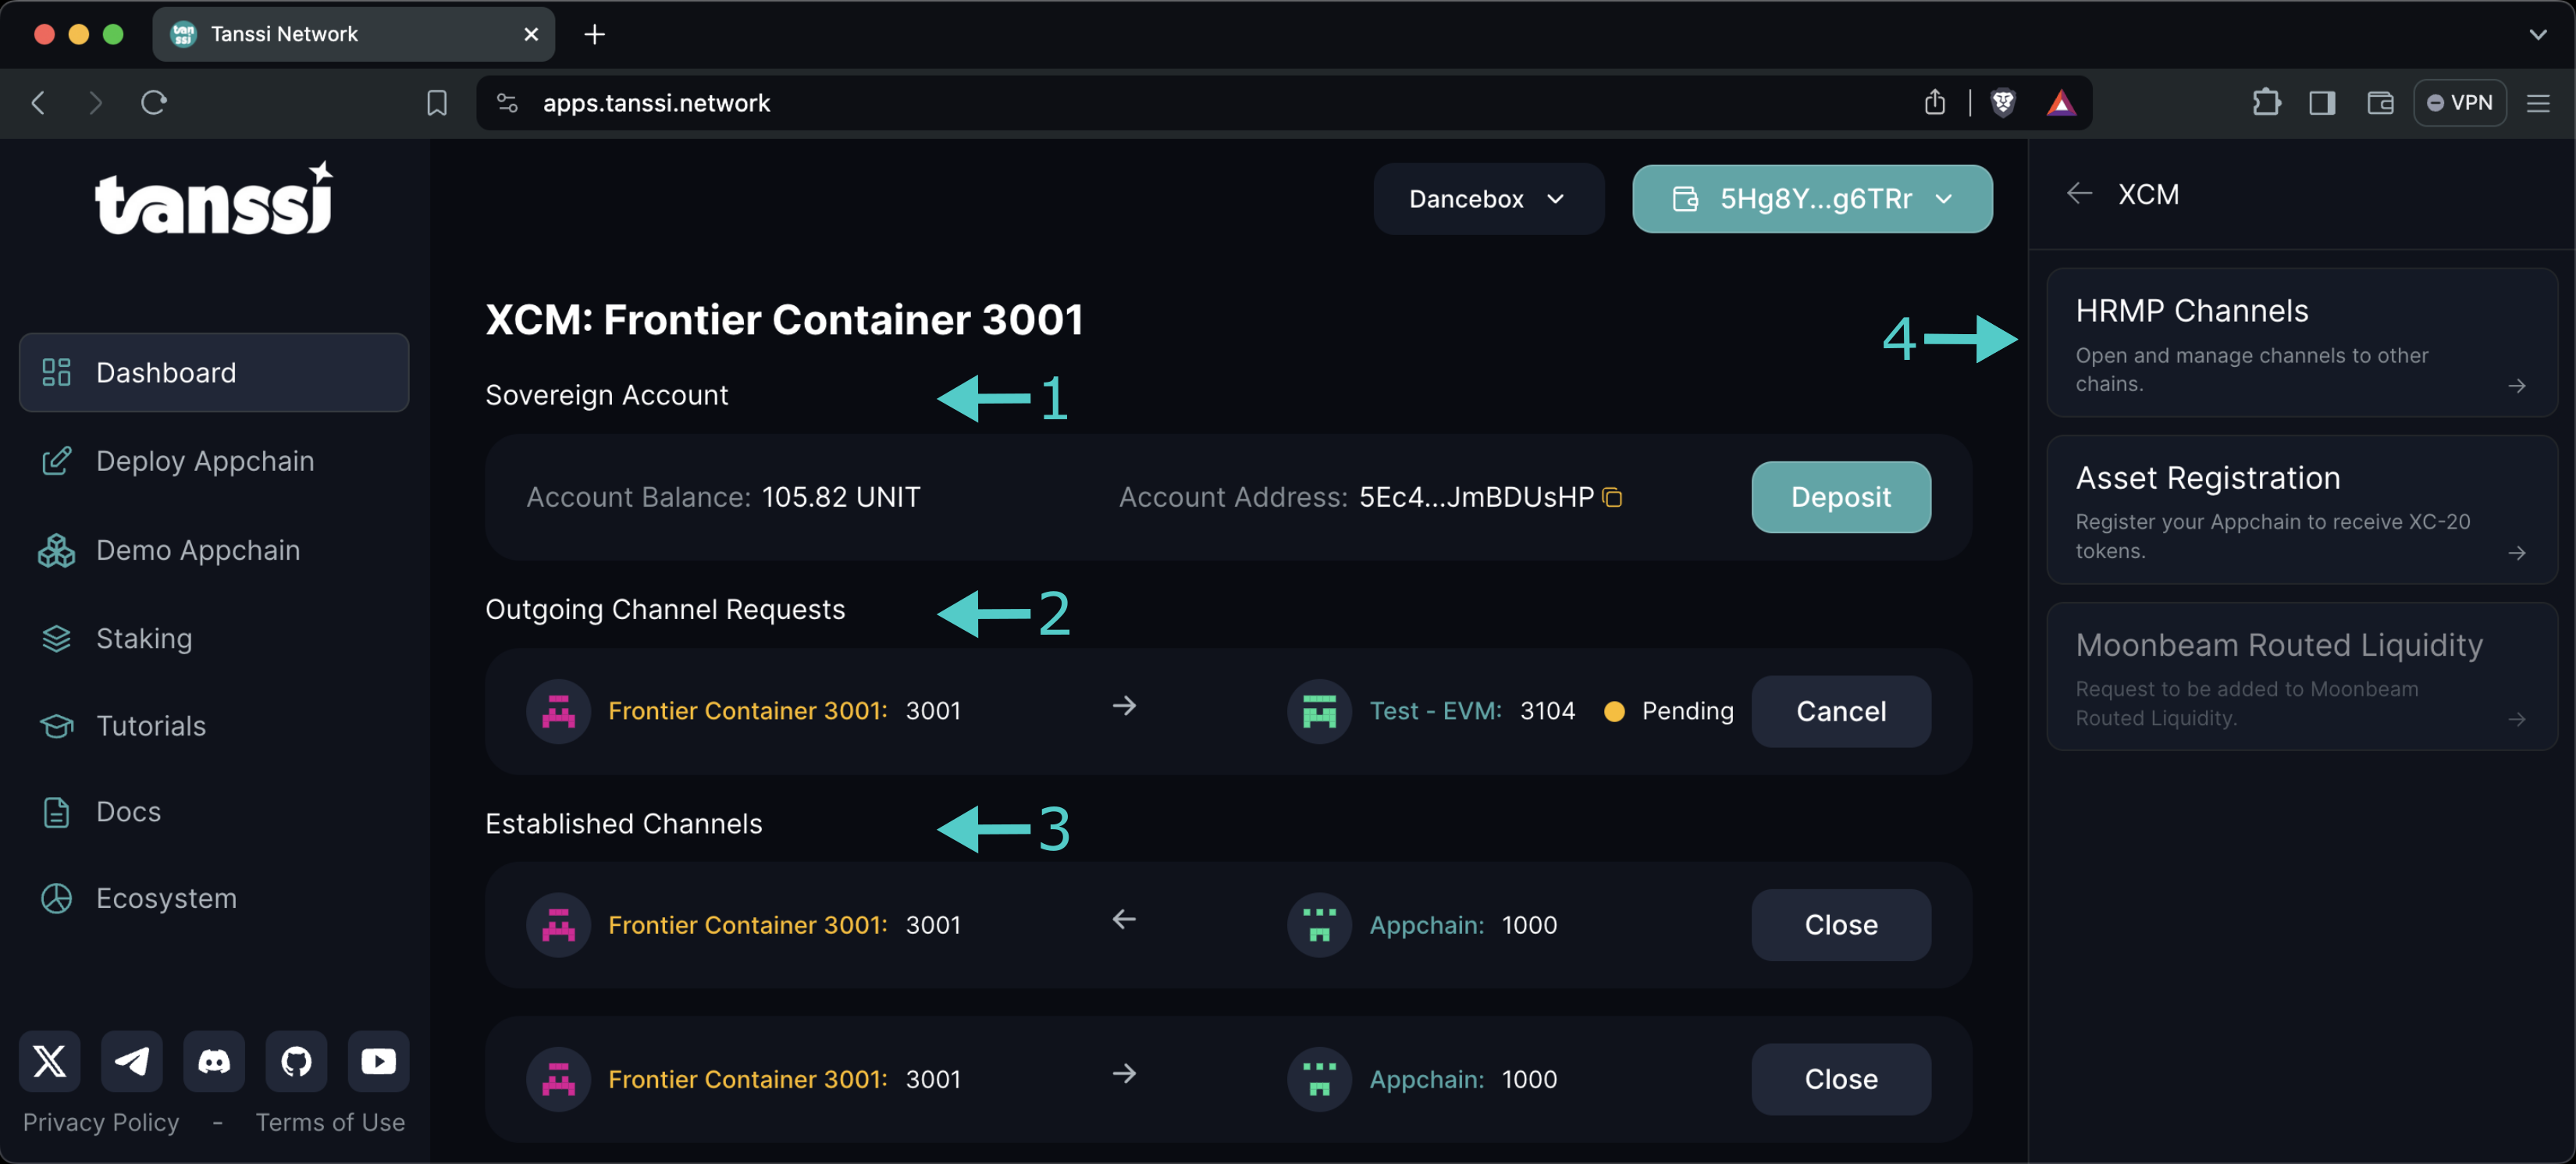
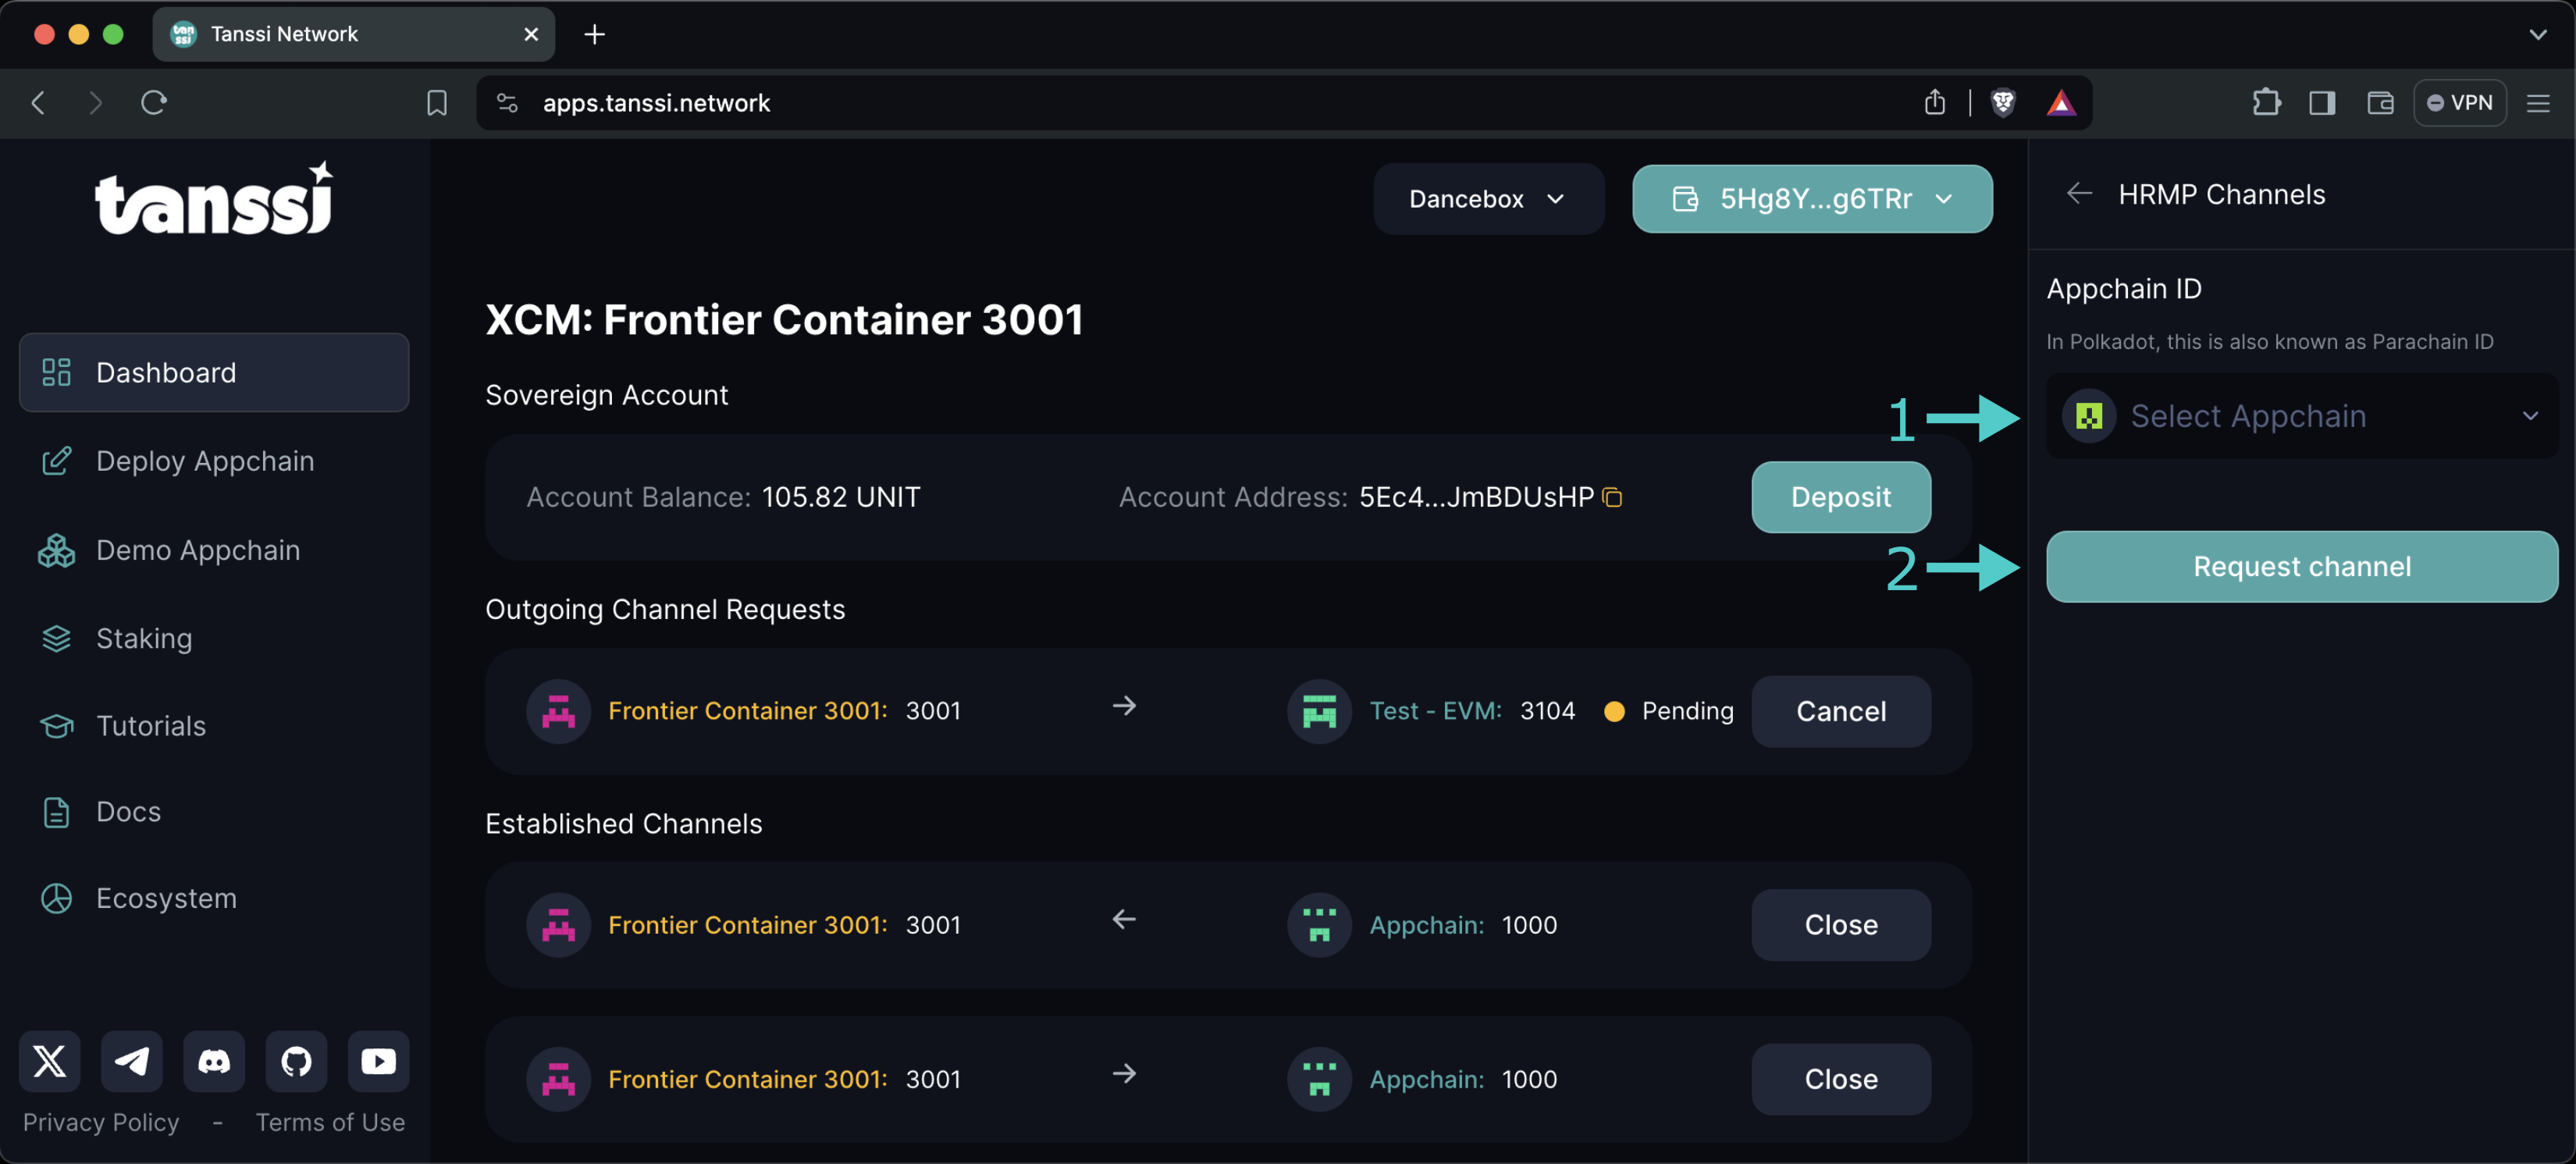
The panel will show your network's communication channels status along with several available actions. The elements you are presented with are:
-
Sovereign account - is a keyless account that belongs to the network in a different consensus system, the relay chain in this case. It can only be used by the network's governor.
Before opening a new channel, the network's sovereign account in the relay chain must be funded with enough tokens to be locked as a channel deposit.
In this section, you can see your network's sovereign account balance, copy its address, and deposit tokens
-
Incoming/Outgoing channel requests - every channel request needs to be accepted by the counterpart before any message can be sent.
In this section, you can see the list of pending outgoing requests and cancel them. You can also see any incoming channel requests your network might have received and accept the channel
-
Established channels - Once the destination chain's governor has accepted the channel request, the channel becomes open and available for message transmission.
In this section, you can see the list of accepted channels your network has, the direction in which the messages flow through the channel, and cancel the channel
-
Request to open new channels - this option allows you to select an existing network within the ecosystem and request a channel to be opened. The next section explains how to do it
Request to Open New Channel
Provided that your network has enough funds for the deposit in its relay chain's sovereign account, the network governor can request to open a new channel with any other network.
To do so, click on HRMP Channels and then:
- Select the network you want to establish a channel with
- Click on Request Channel
You'll be asked to sign the transaction, and once it's gone through, the destination chain will receive the request.
| Created: June 7, 2024
