Smart EVM - Whitelist Contract Deployments
Introduction
EVM-compatible Tanssi-powered networks benefit from a unique feature: the network governor can define which accounts are authorized to deploy smart contracts, forbidding the action for any other non-whitelisted account.
This feature brings several key benefits that might be a great fit for different use cases or contexts. Some of those benefits are:
- Enhanced Security - by restricting deployment to trusted accounts, the risk of deploying malicious or vulnerable smart contracts is reduced
- Quality Assurance - known and vetted accounts can be required to follow specific coding standards and undergo thorough testing before deployment
- Regulatory Compliance - uses cases that are highly regulated can limit deployment to ensure that smart contracts meet legal and compliance requirements
- Spam and Abuse Prevention - prevent bad actors from deploying large numbers of unnecessary or harmful contracts
In this guide, you'll learn how to use the Sudo account to manage the whitelisted accounts that can deploy smart contracts on your network.
Checking Prerequisites
For the examples in this guide, you will need to have the following:
- An EVM-compatible Tanssi-powered network (Quick Trial or Dedicated) running runtime 700 or above. Any new network deployment based on the EVM template will do
- Your network's Sudo account connected to your network's Polkadot.js Apps. You can refer to the Managing Sudo guide for instructions on injecting your Sudo account into Polkadot.js Apps
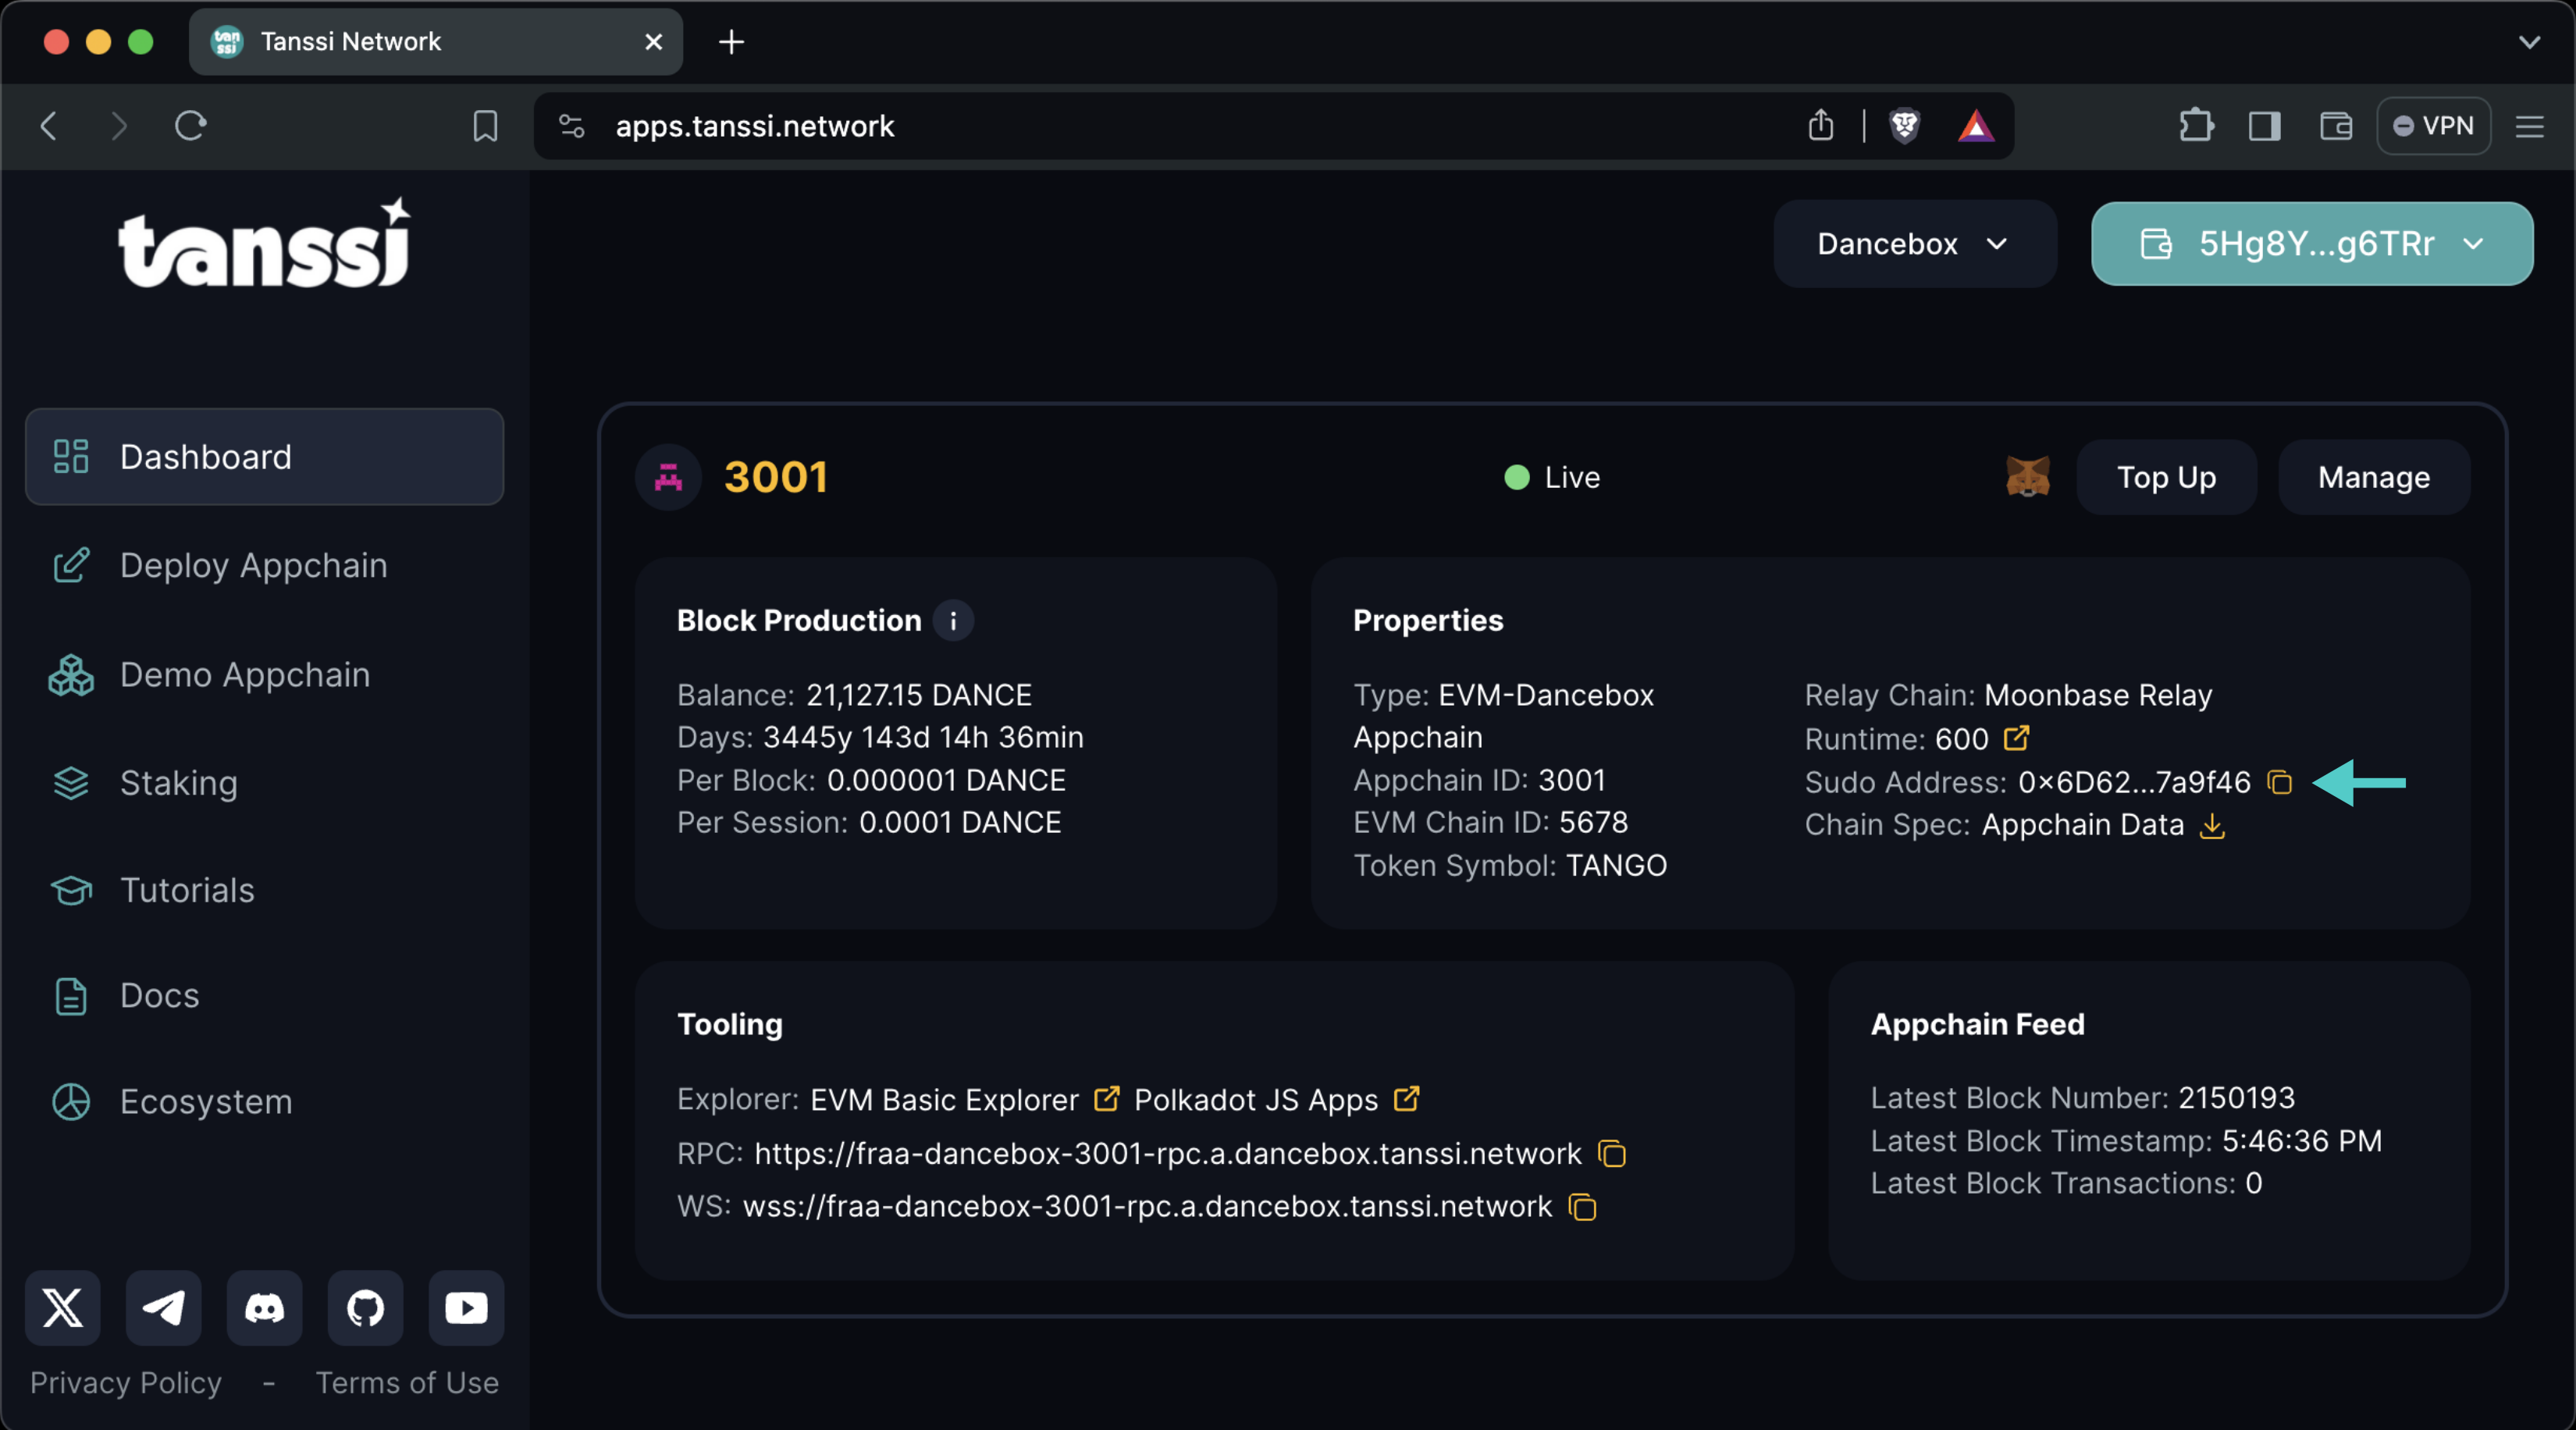
If you're unsure what your Tanssi network's Sudo account is, you can find it in your Tanssi Dashboard underneath the Properties section.
Warning
It's critical to protect your Sudo account key with the utmost security precautions, as it grants privileged access to your Tanssi network.
Getting Started
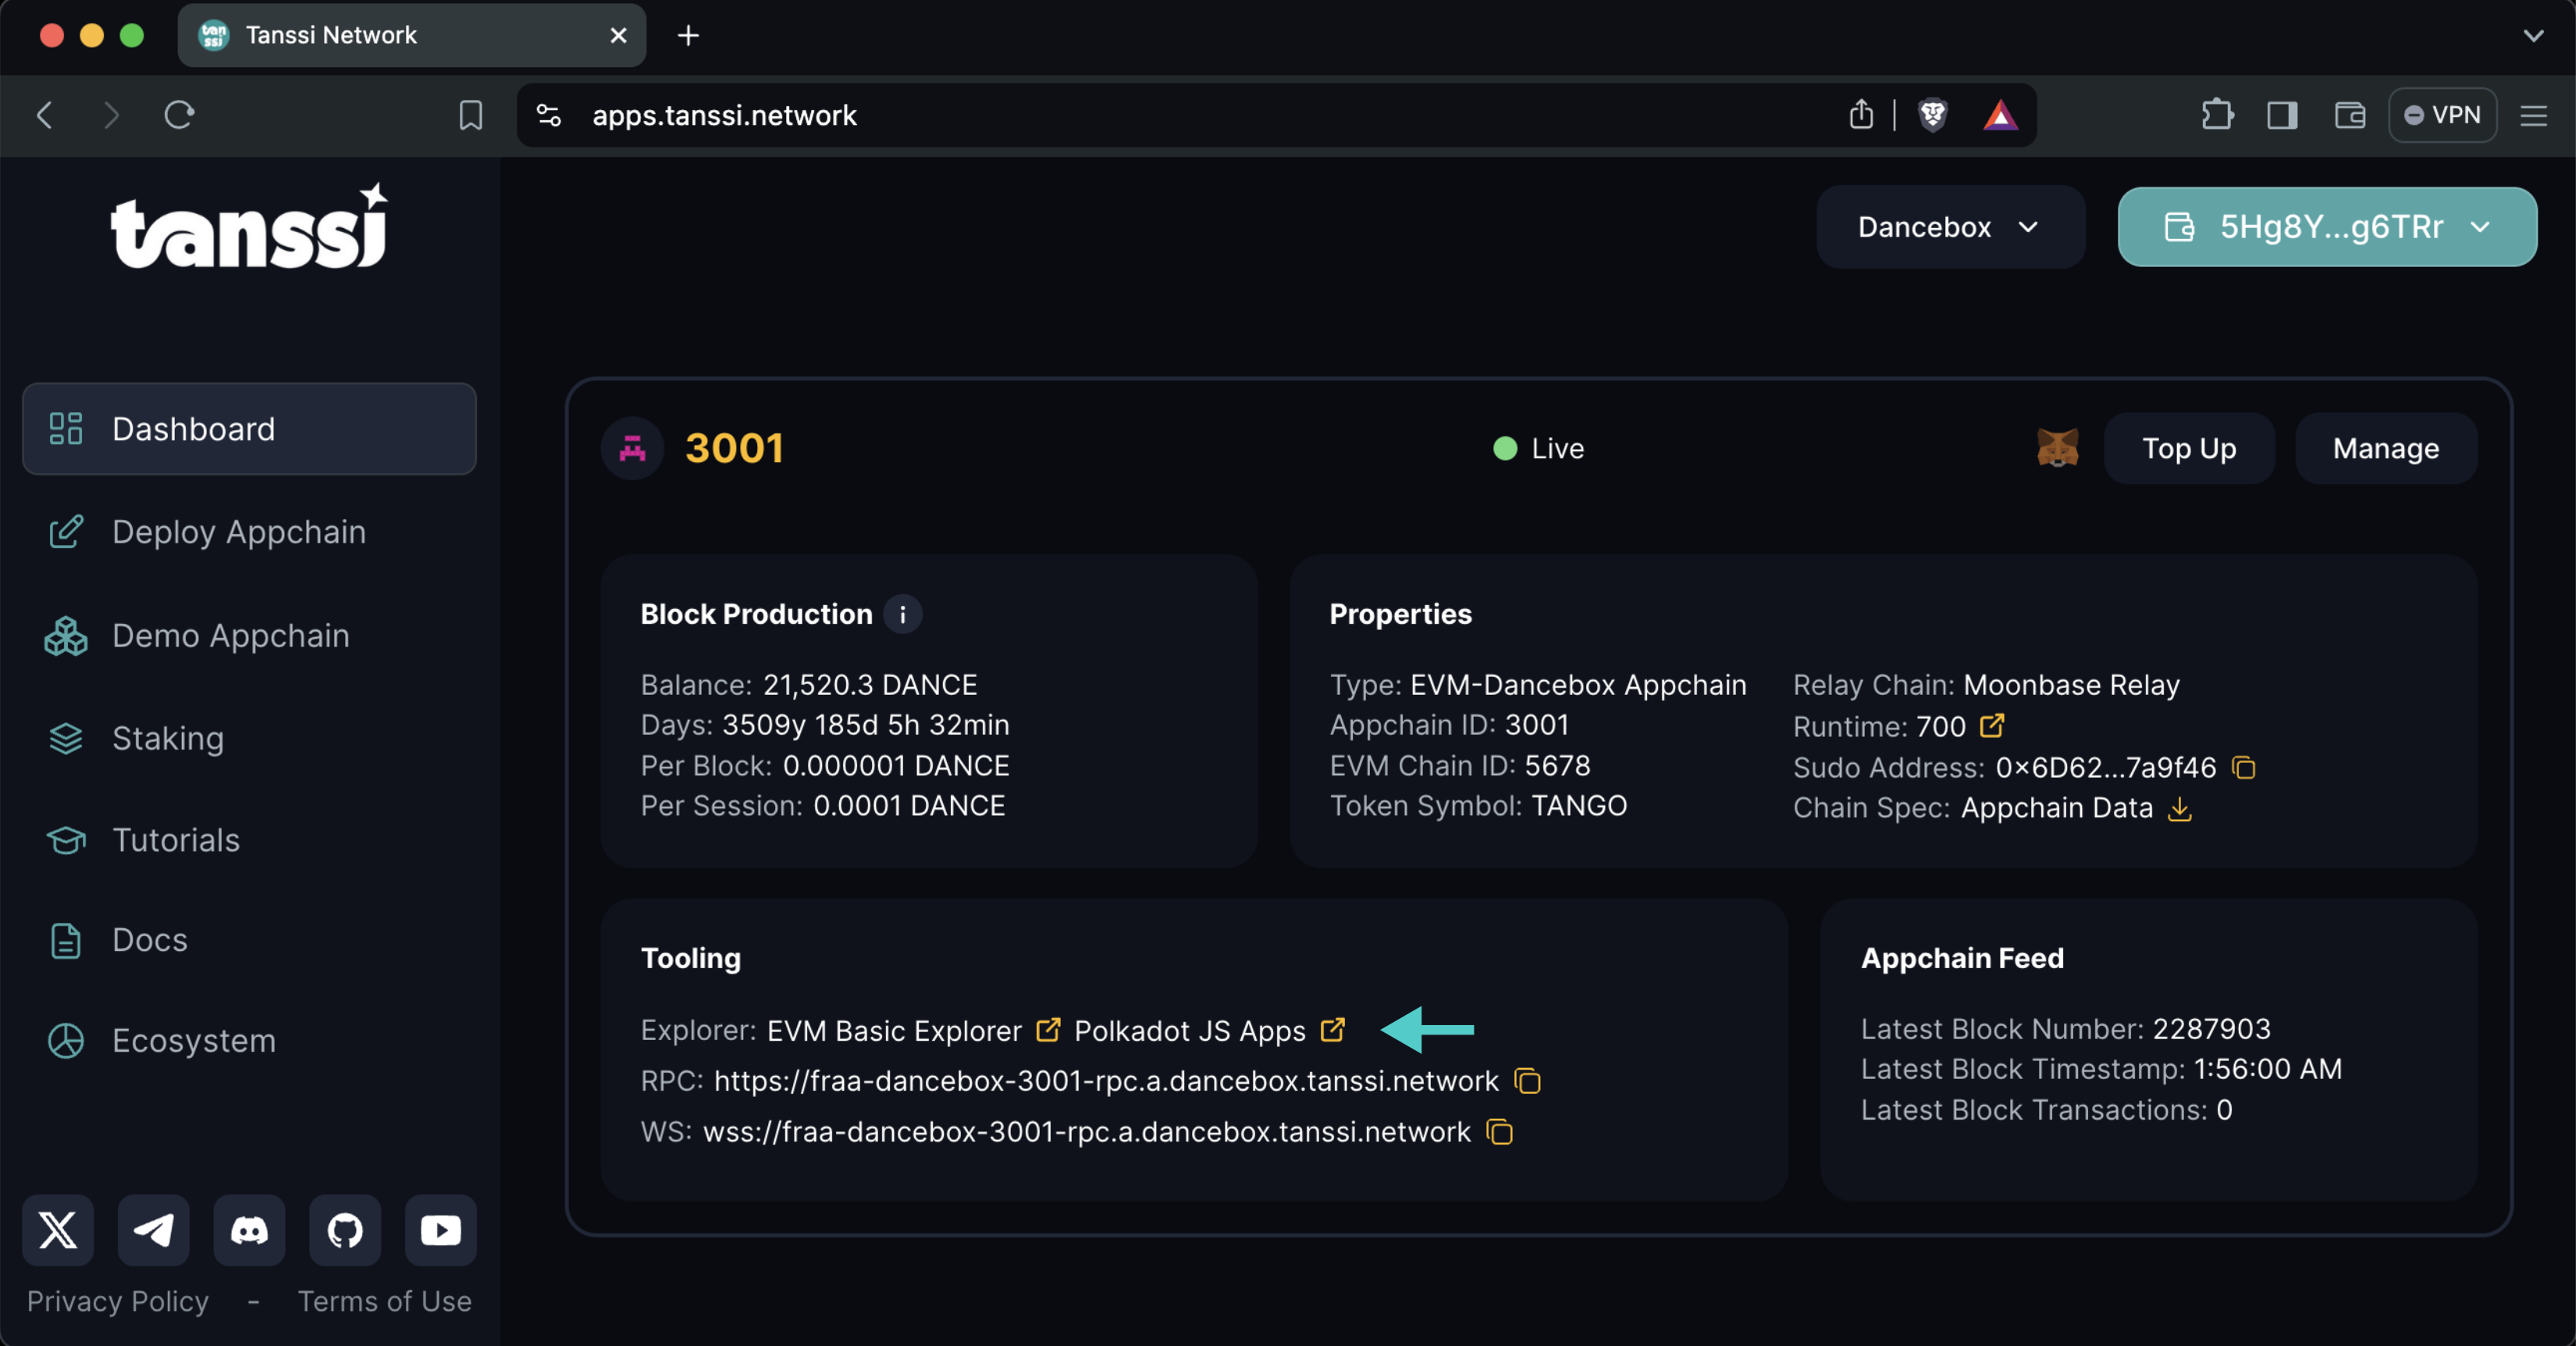
To follow the next sections of this guide, head to Polkadot.js Apps for your Tanssi network. The Polkadot.js Apps link for your Tanssi network can be found in your Tanssi Dashboard underneath the Tooling section.
Once in Polkadot.js Apps, navigate to the Developer tab and click on Sudo.
Note
If you do not see Sudo in this menu, then you have not associated the Sudo account with Polkadot.js Apps. Make sure that your Sudo account is injected by your wallet and connected to Polkadot.js Apps.
Whitelisting Accounts
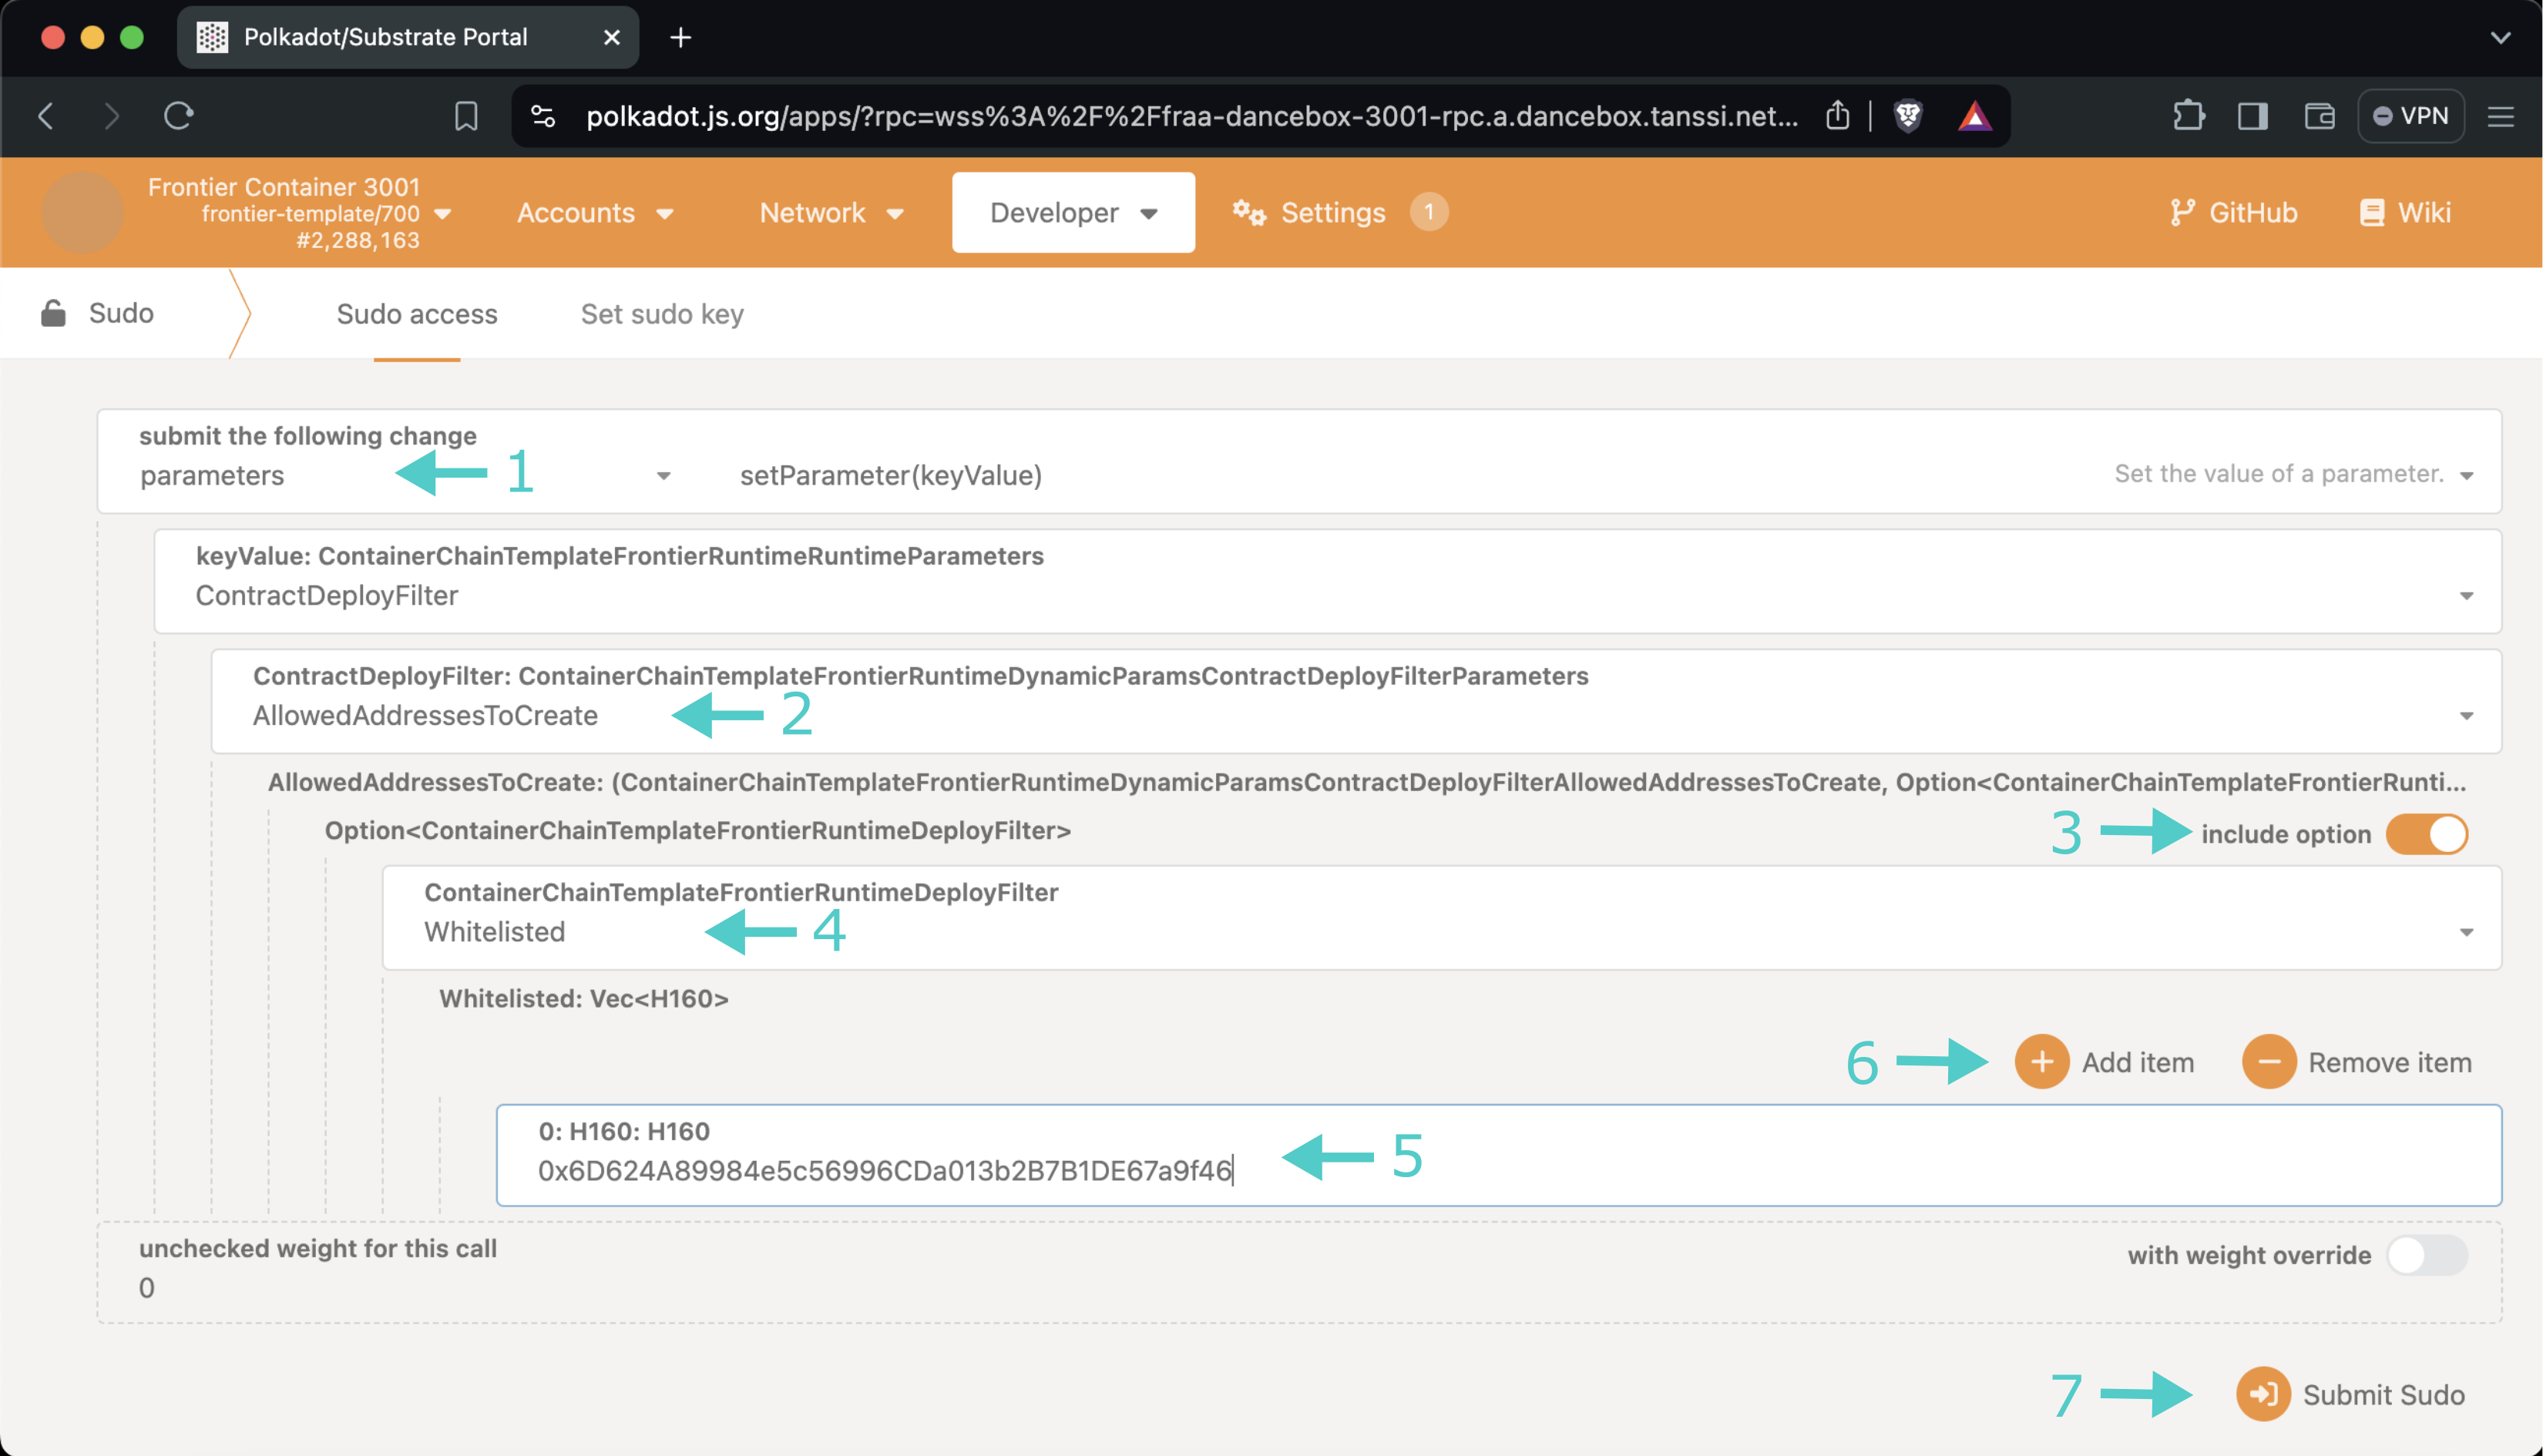
To define the accounts that will have authorization to deploy smart contracts, get your Polkadot.js Apps started and then take the following steps:
- Select the parameters pallet. setParameter will be automatically selected in the functions selector and ContractDeployFilter in the keyValue parameter
- Two options will be available in the ContractDeployFilter selector: AllowedAddressesToCreate and AllowedAddressesToCreateInner. Select the AllowedAddressesToCreate option if you want to whitelist the accounts for smart contract deployments and the latter to whitelist the accounts for indirect (via a smart contract call) smart contract deployments
- Toggle the Include option switch
- Select the Whitelisted option
- Insert the whitelisted account
- If you need to insert more than one account, click on Add item
- Press Submit Sudo and confirm the transaction in your wallet
These same steps can be repeated at any moment to remove an account from the whitelist or to add new ones.
Restoring Permissions to Deploy Smart Contracts
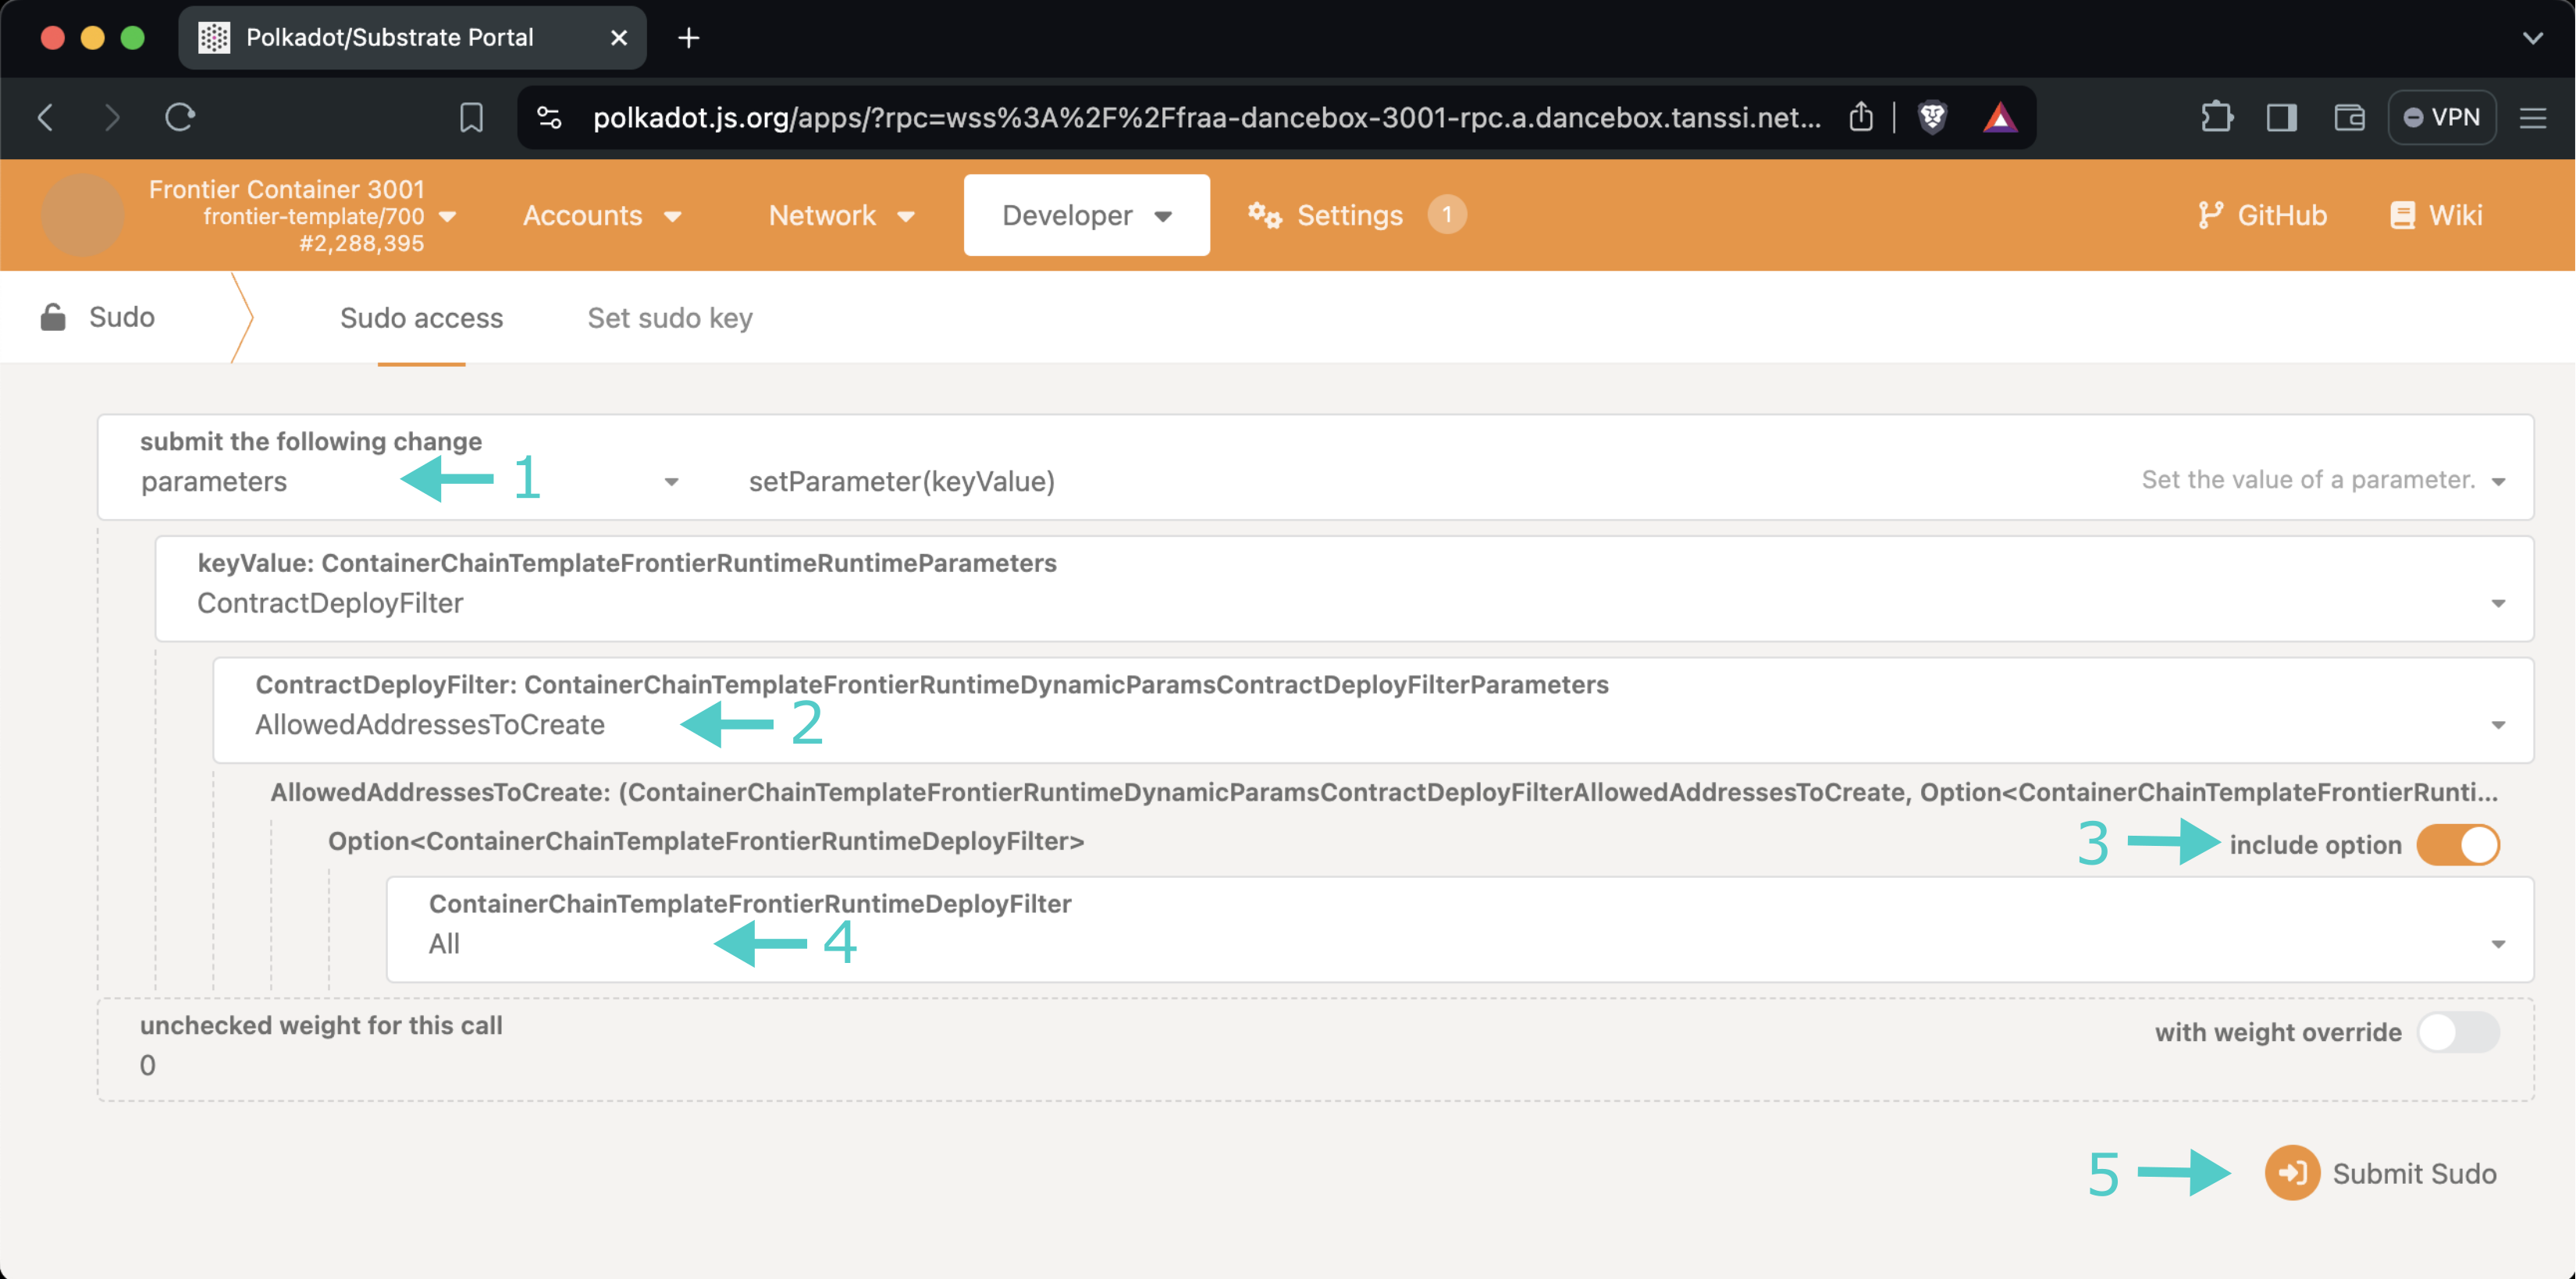
If you previously authorized some accounts to deploy smart contracts and want to allow any account to deploy smart contracts (as long as they can cover regular transaction fees), then get your Polkadot.js Apps started and take the following steps:
- Select the parameters pallet. setParameter will be automatically selected in the functions selector and ContractDeployFilter in the keyValue parameter
- Two options will be available in the ContractDeployFilter selector: AllowedAddressesToCreate and AllowedAddressesToCreateInner. Select the AllowedAddressesToCreate option if you want to clear the whitelist for smart contract deployments and the latter to clear the whitelist for indirect (via a smart contract call) smart contract deployments
- Toggle the Include option switch
- Select the All option
- Press Submit Sudo and confirm the transaction in your wallet
Query the Whitelisted Accounts
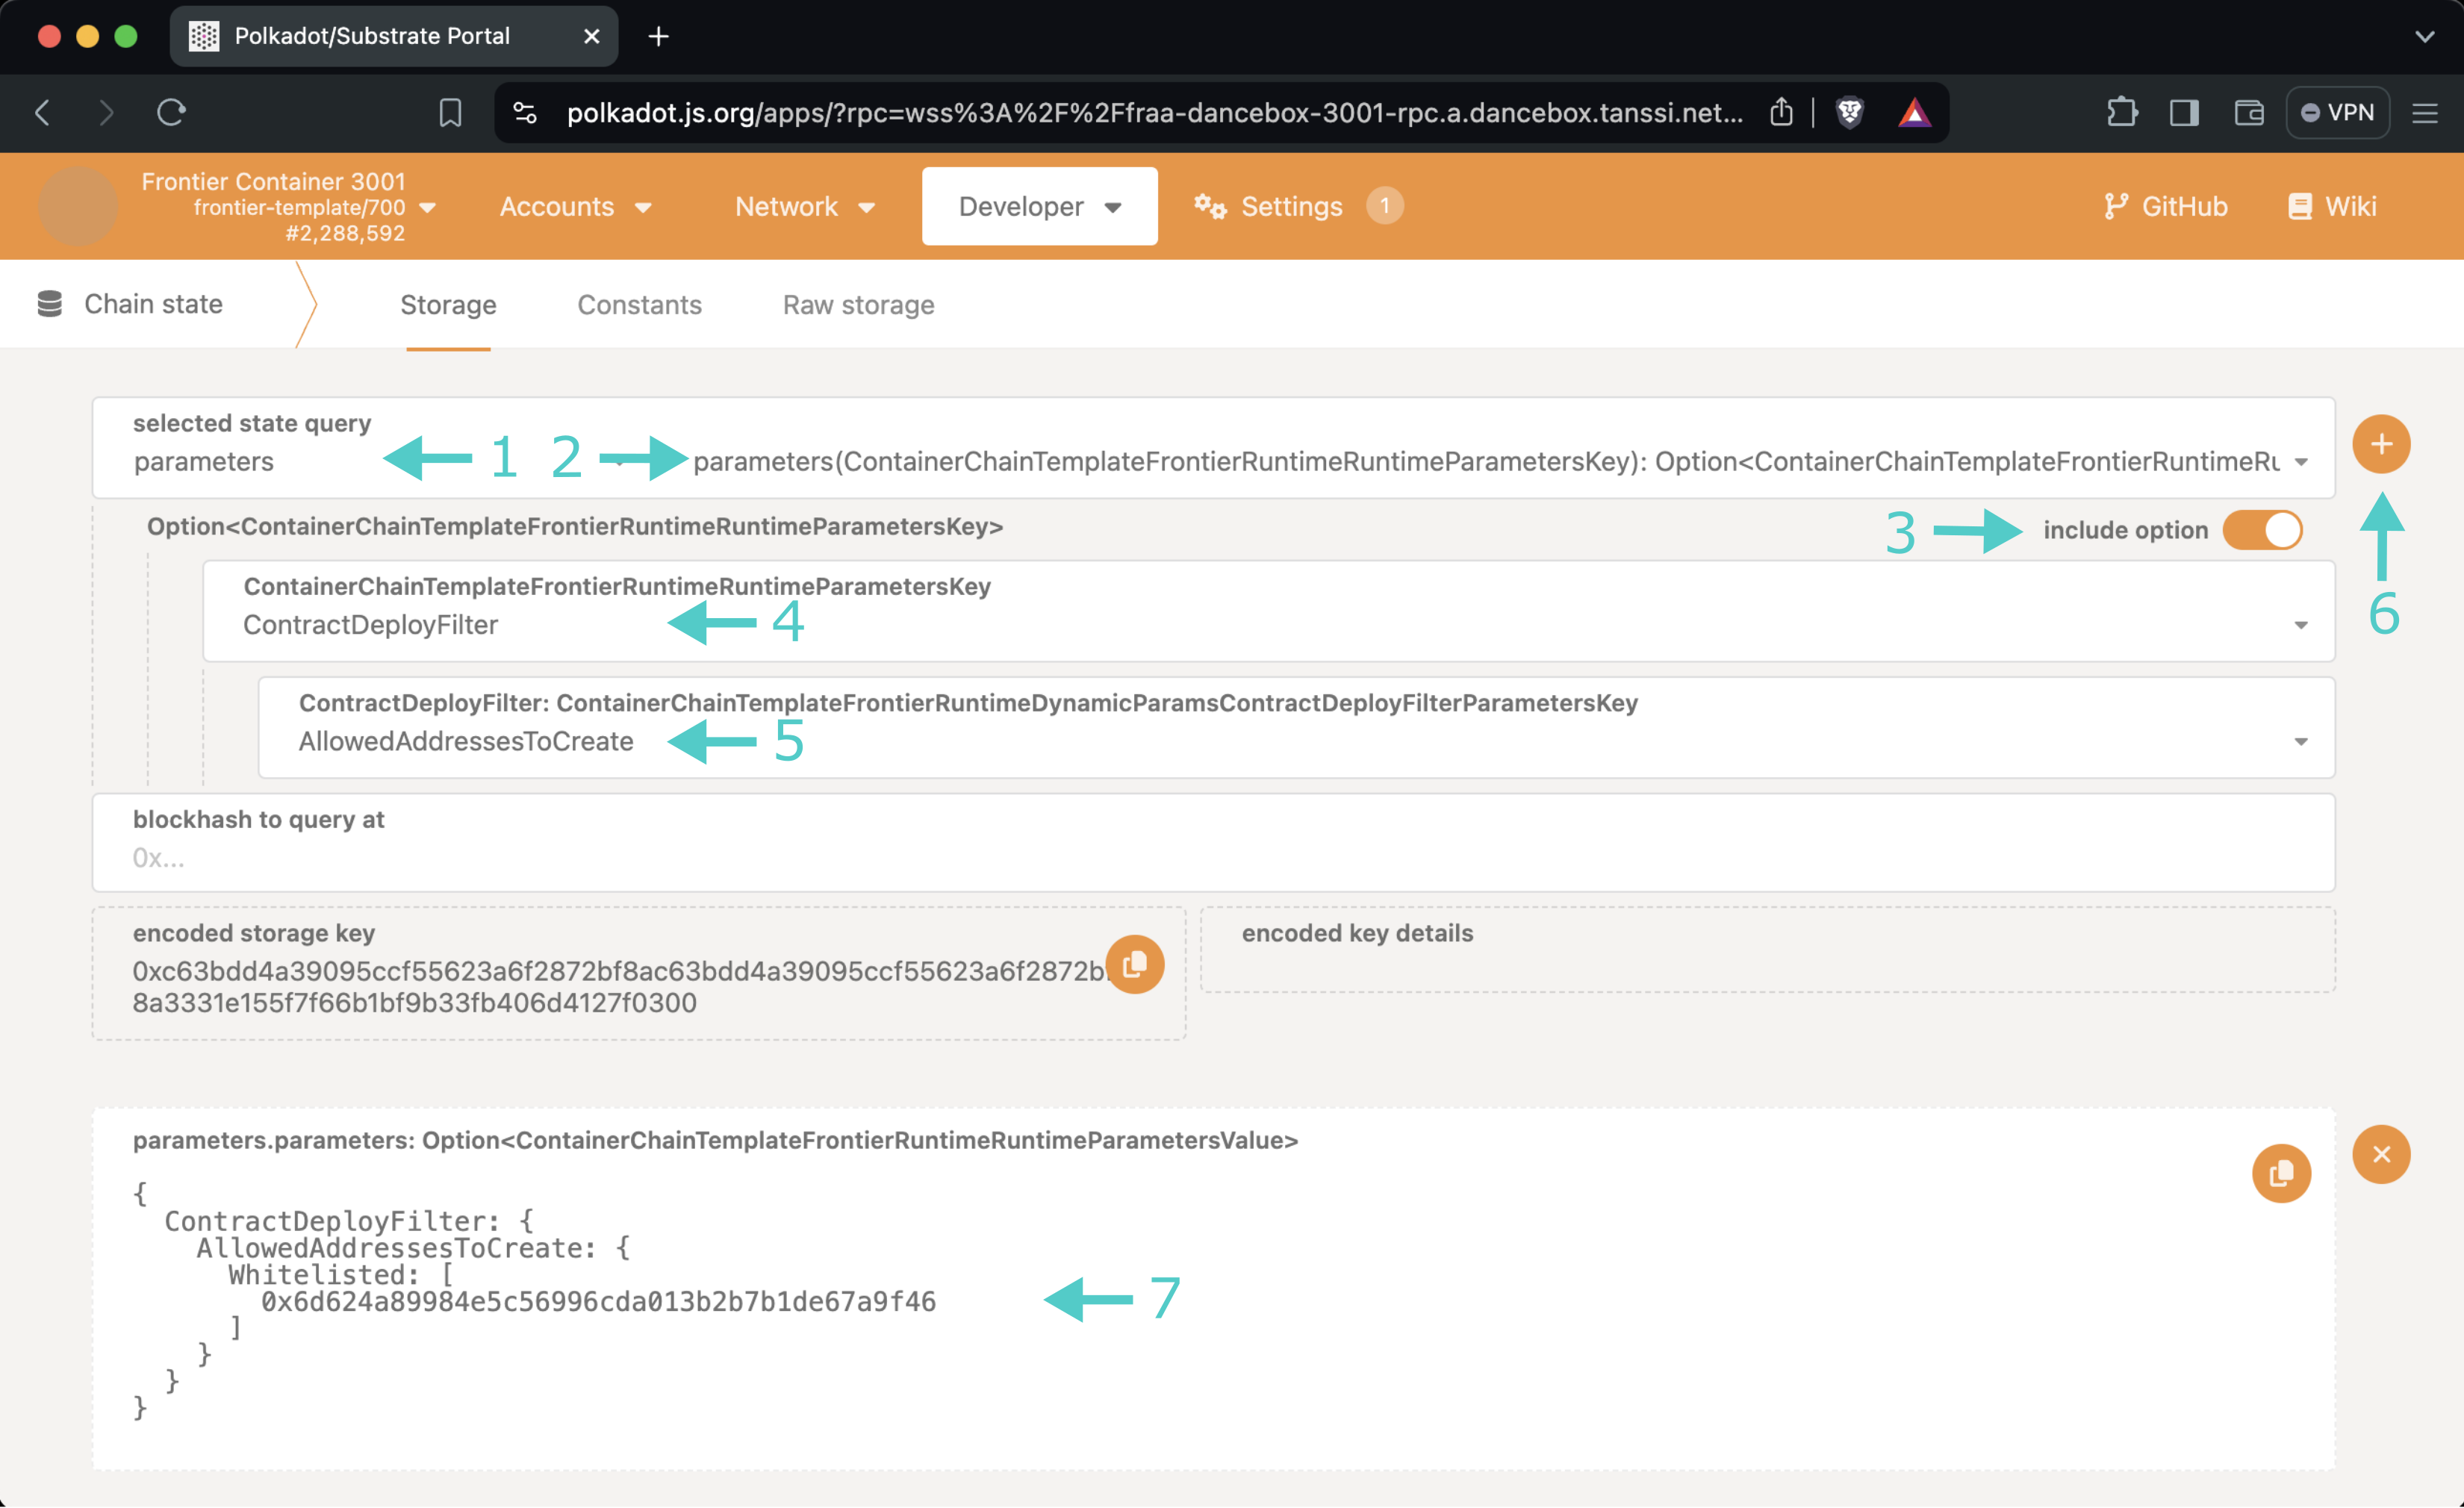
To get the current configuration containing the whitelisted accounts that can deploy smart contracts, go to Polkadot.js Apps (as explained in the Getting Started section), navigate to the Developer tab, click on Chain state, and take the following steps:
- Select the parameters storage
- Select the parameters(ContainerChainTemplateFrontierRuntimeParametersKey) option
- Make sure that the Include option switch is on
- Make sure that the ContractDeployFilter option is selected
- Two options will be available in the ContractDeployFilter selector: AllowedAddressesToCreate and AllowedAddressesToCreateInner. Select the AllowedAddressesToCreate option if you want to query the whitelist for smart contract deployments and the latter to query the whitelist for indirect (via a smart contract call) smart contract deployments
- Click the + button
- The current configuration will be displayed
| Created: June 26, 2024
