Managing Your Network's Sudo Account
Introduction
Sudo is a module that enables privileged runtime calls to be dispatched when called from the Sudo account. Sudo is sometimes colloquially referred to as a superuser or god-like account. There can only be a single Sudo account at a time. However, the Sudo keys can be rotated to give Sudo privileges to a new account.
All Tanssi-powered networks come with the Sudo pallet by default, and you're required to designate an account as the Sudo address when launching your network. This enables you to perform privileged actions to manage your chain, such as upgrading your runtime or minting new native tokens. While the Sudo pallet is required to launch your Tanssi network on the TestNet, you can decommission the Sudo pallet and transition to decentralized governance after the MainNet launch.
In the following guide, you'll learn how to view the current Sudo account for your network and how to change it, alongside importing it into Polkadot.js Apps. There are similar guides in this section explaining how to use the Sudo account to perform privileged actions, such as upgrading your runtime and minting native tokens.
Checking Prerequisites
For the examples in this guide, you will need to have the following:
- A Tanssi-powered network (Quick Trial or Dedicated)
- Your network's Sudo account connected to your network's Polkadot.js Apps
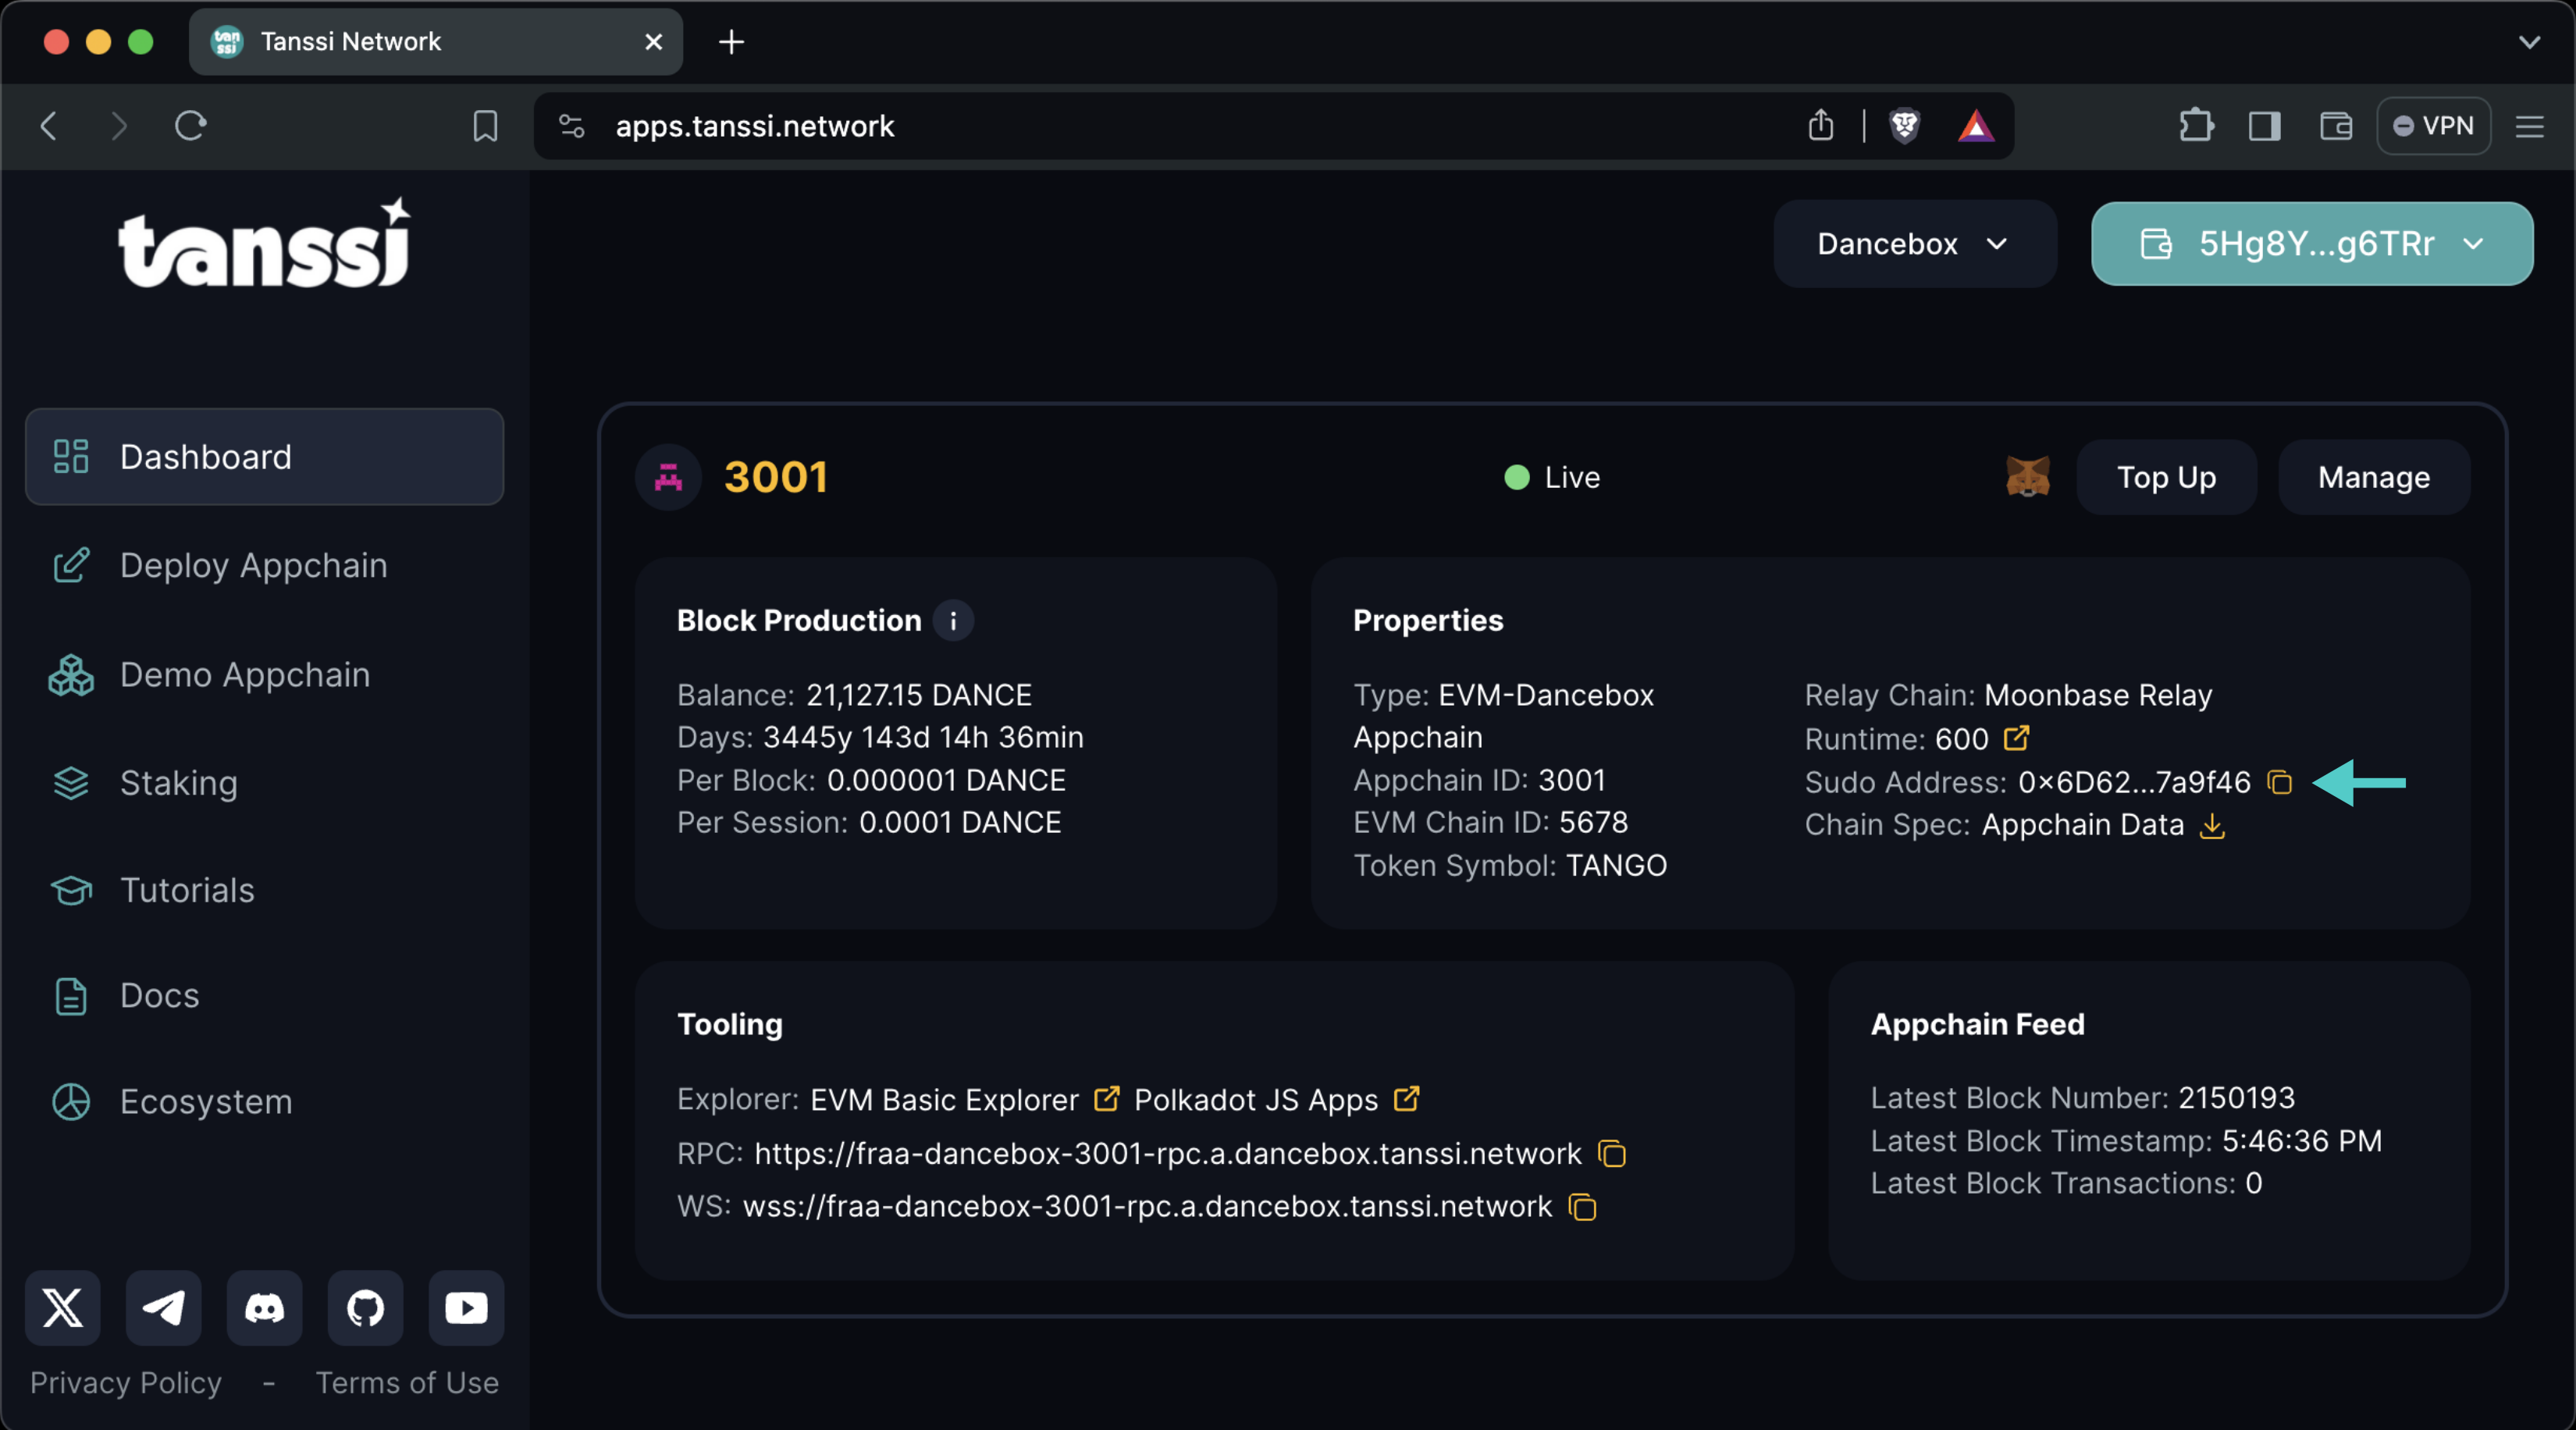
If you're unsure what your Tanssi network's Sudo account is, you can find it in your Tanssi Dashboard underneath the Properties section.
Warning
It's critical to protect your Sudo account key with the utmost security precautions, as it grants privileged access to your Tanssi network.
Configuring Polkadot.js Apps
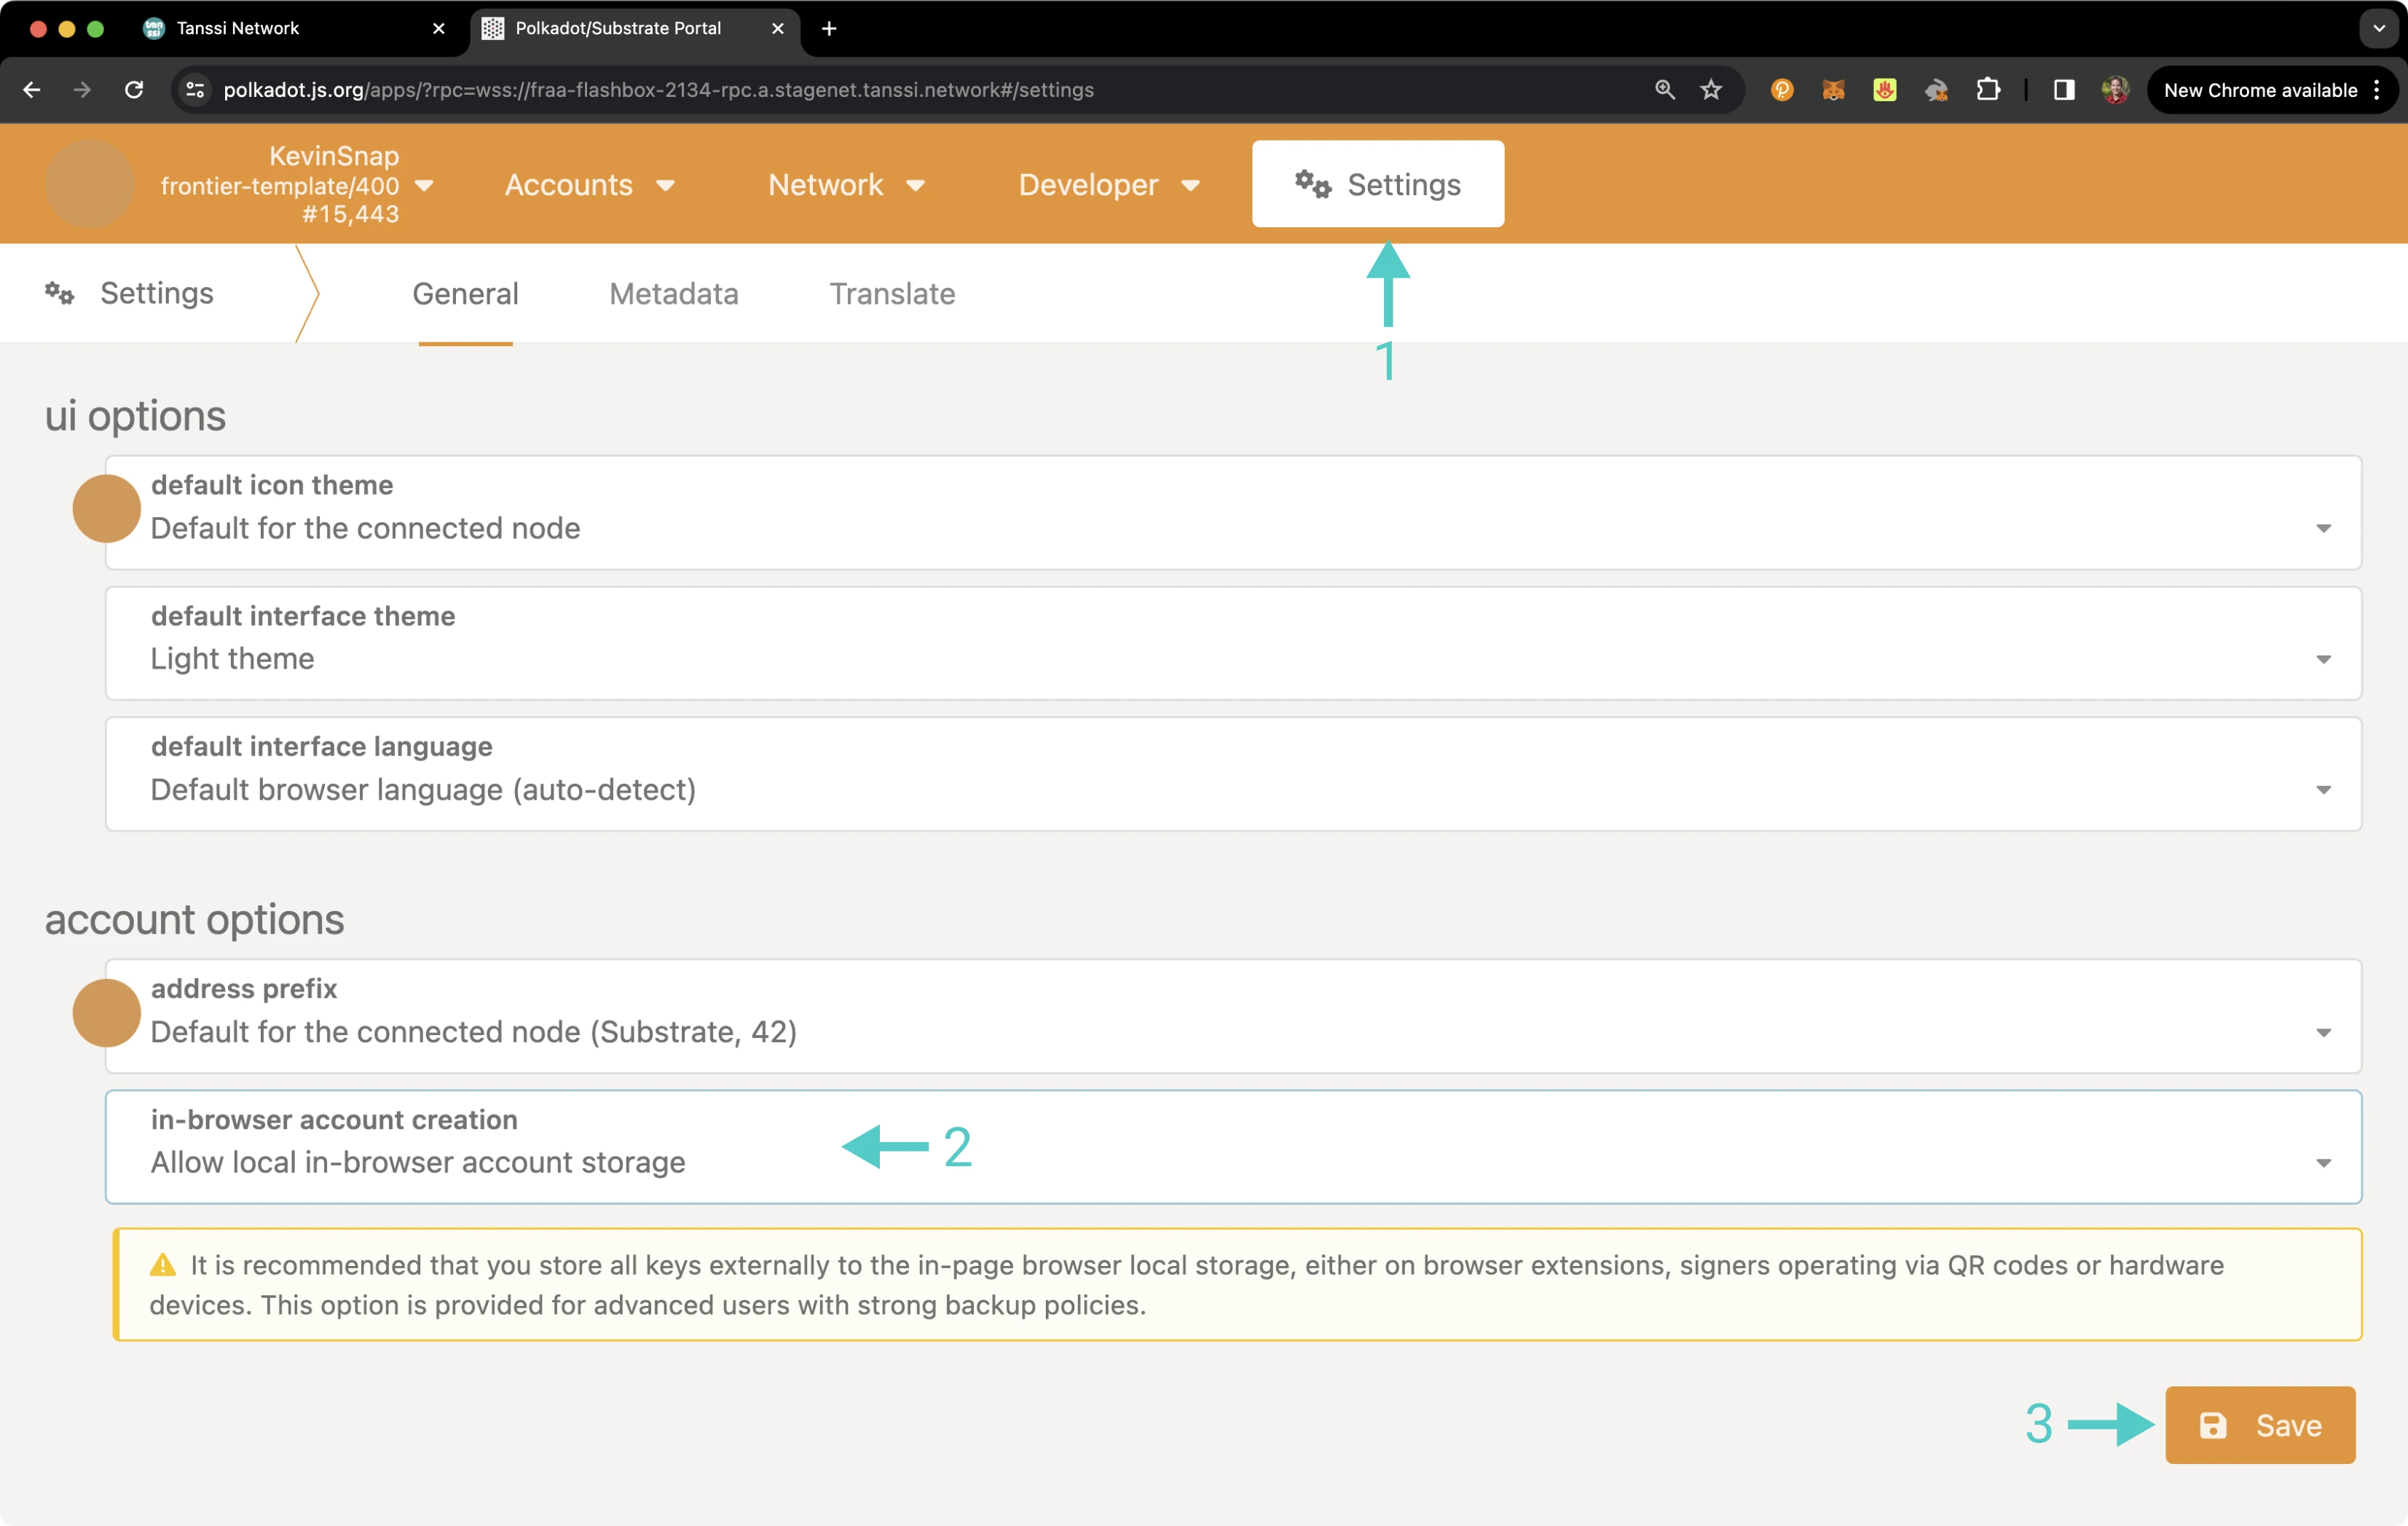
After navigating to Polkadot.js Apps for your network, you'll need to add your Sudo account. Injecting your Sudo account into Polkadot.js Apps from a browser extension is considered safer than storing accounts directly in the browser. However, you can still import your Sudo account directly into the browser's cache. This method does not require the use of any extensions. To import an account into Polkadot.js in this manner, take the following steps:
- Click on Settings
- Under in-browser account creation select Allow local in-browser account creation
- Press Save
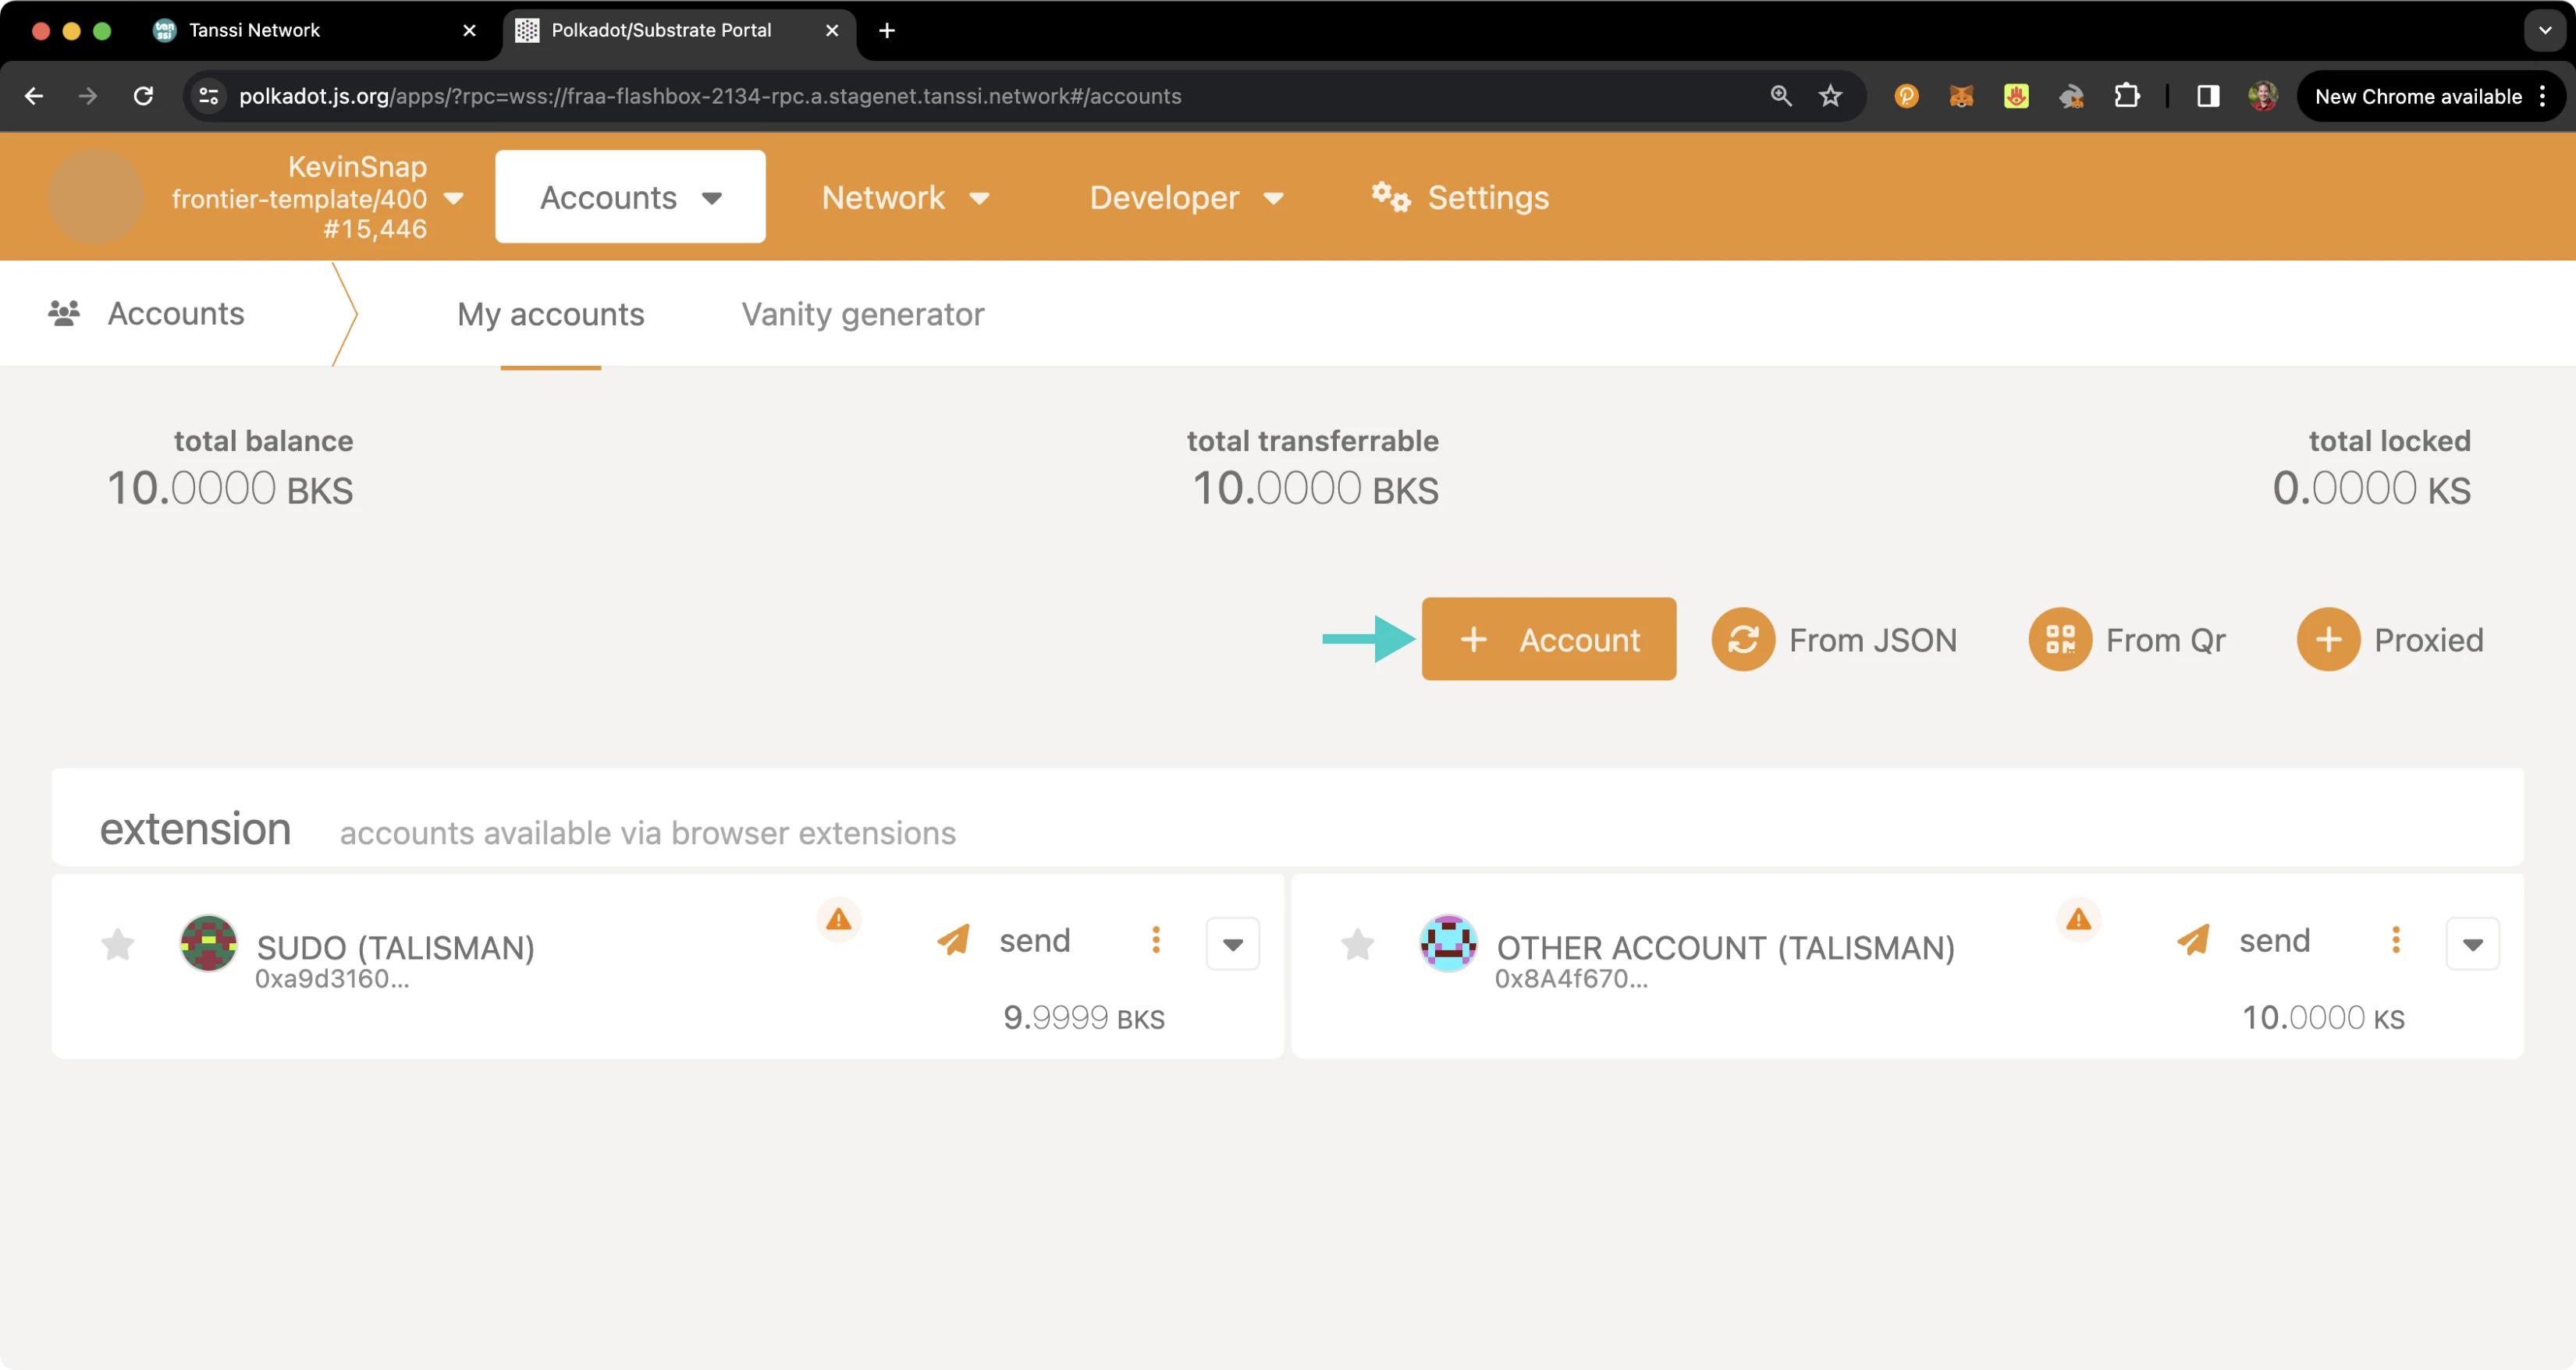
Then, head back to the accounts tab and press Account. You'll then be able to replace the pre-generated private key with that of your Sudo account.
Warning
In-browser key storage is not suitable for production environments. This example is provided for demonstration purposes only in a TestNet environment.
Changing the Sudo Account
Changing your Tanssi-powered network's Sudo account is a straightforward process. Also known as rotating your Sudo keys, this process will remove Sudo access from the existing Sudo account and grant it to the new account. There can only be one Sudo account at any time. However, you are free to change the Sudo account as often as you would like.
Prior to getting started, make sure that you have your existing Sudo account accessible in Polkadot.js Apps. Then, take the following steps:
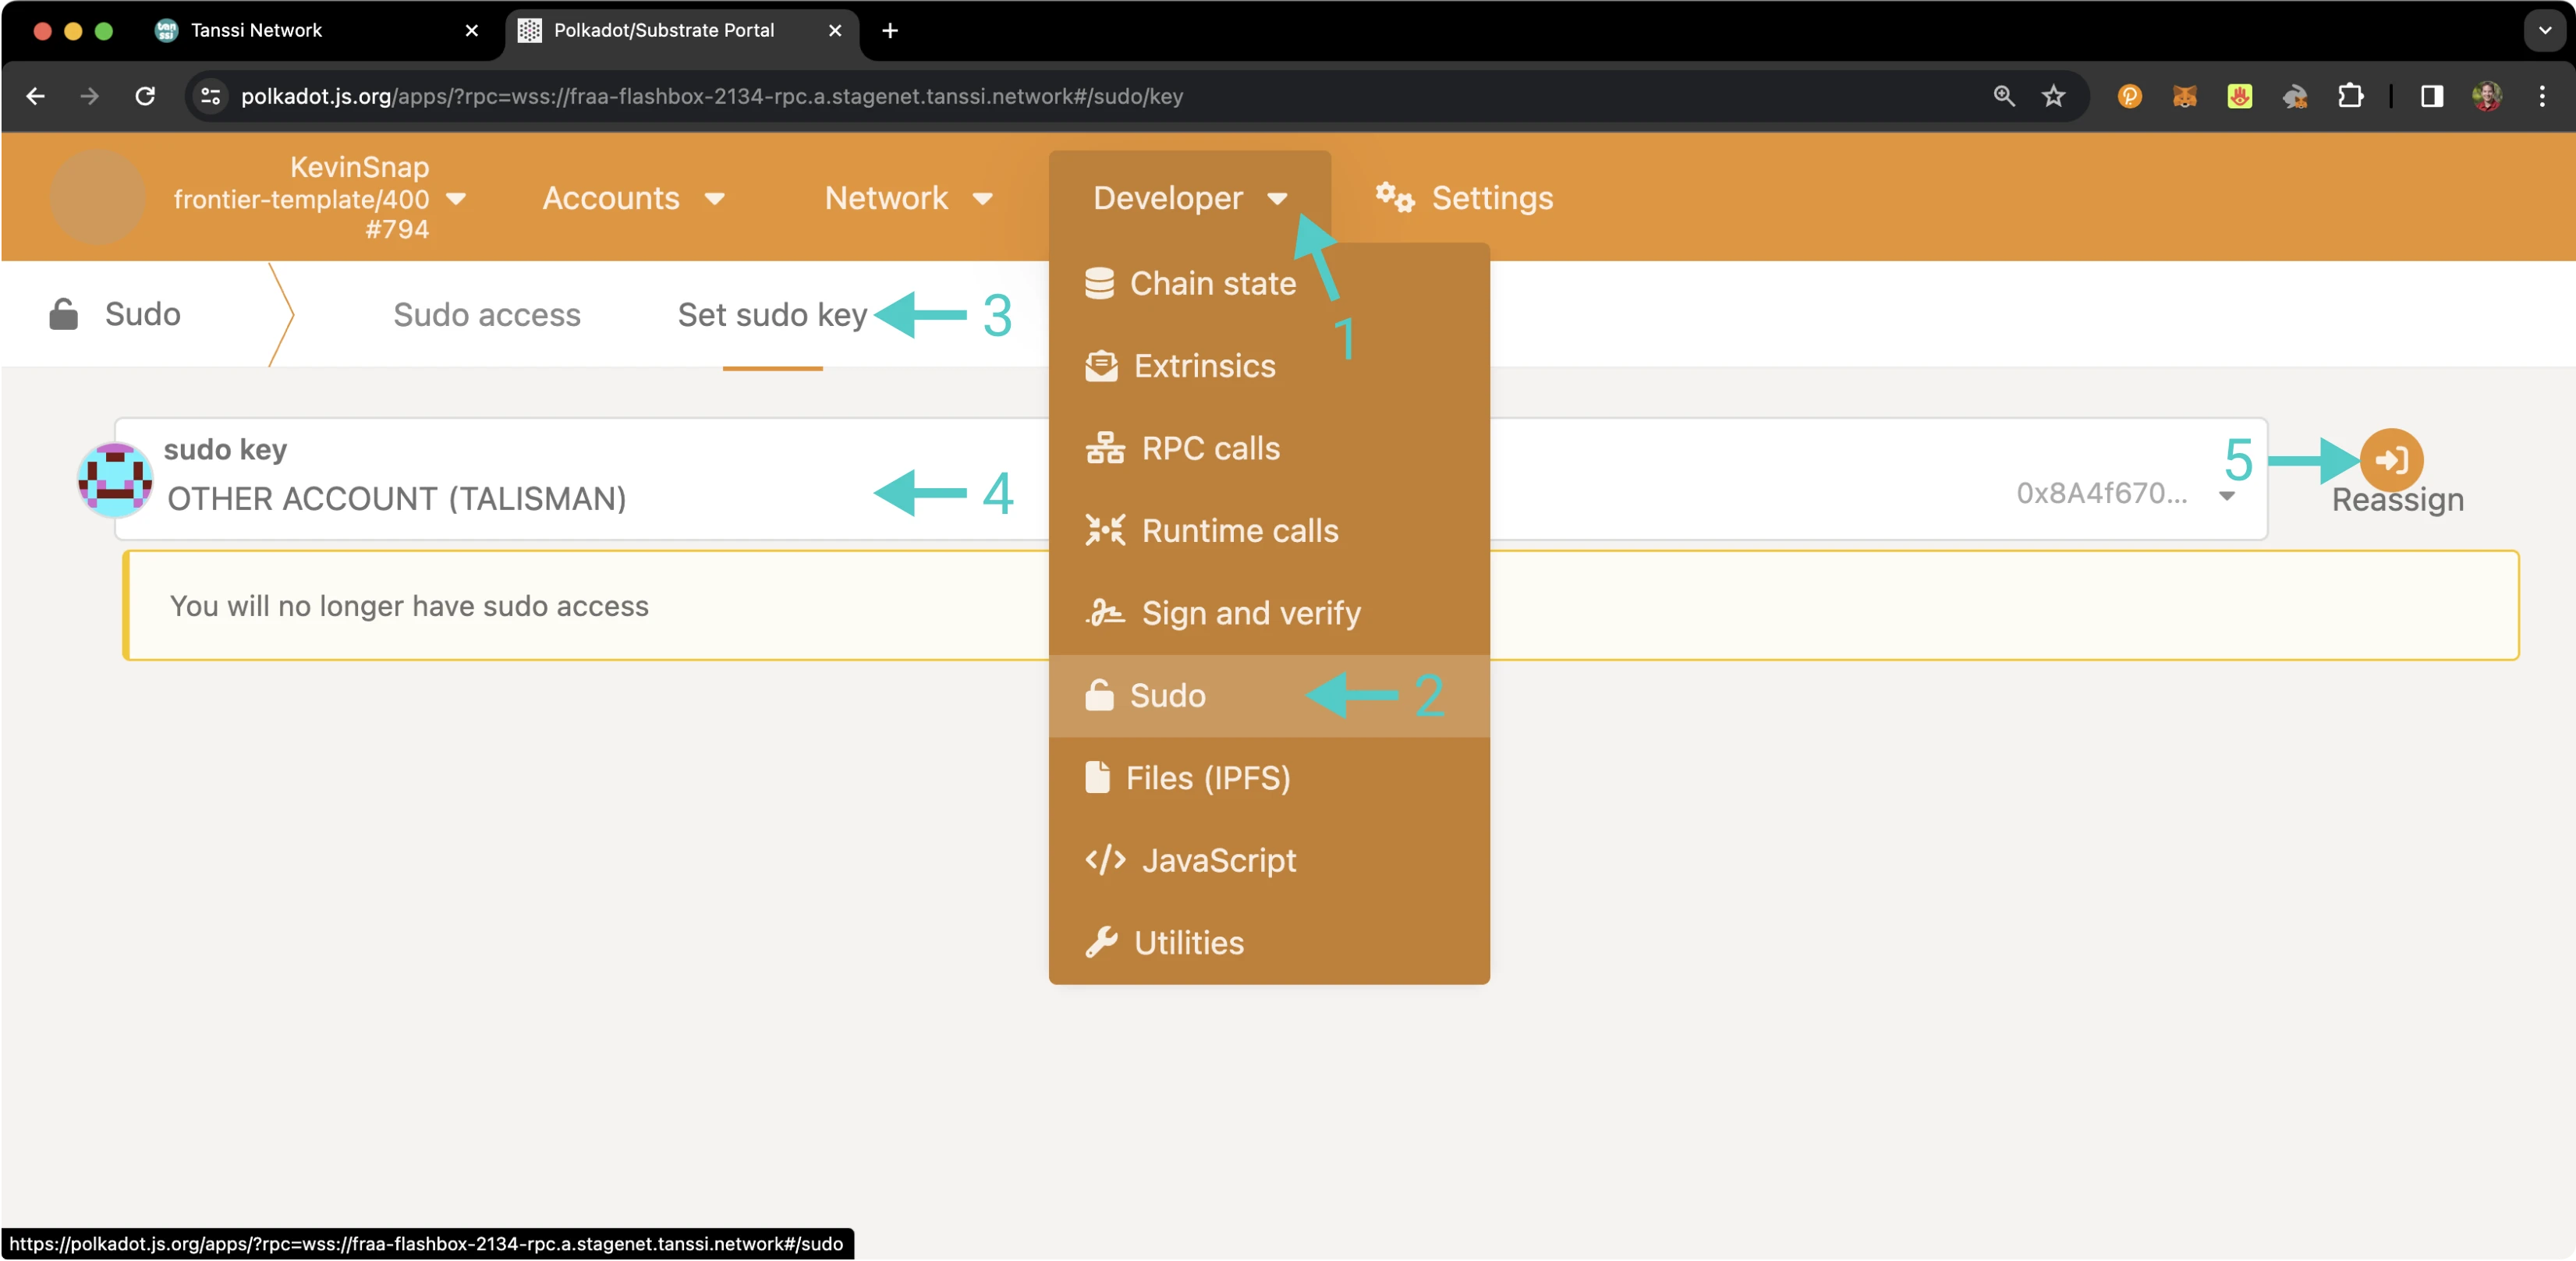
- Navigate to the Developer Tab of Polkadot.js Apps for your network
- Click on Sudo. If you do not see Sudo in this menu, then you have not associated the Sudo account with Polkadot.js Apps. Make sure that your Sudo account is injected by your wallet and connected to Polkadot.js Apps
- Select the Set Sudo key heading
- Select the new account you'll transfer Sudo privileges to
- Press Reassign and confirm the transaction in your wallet
Note
Ensure that you have access to the new Sudo account. Once Sudo is transferred, it cannot be undone without access to the current Sudo key.
And that's it! The Developer Portal section has plenty more guides on how to manage your Tanssi network.
| Created: March 13, 2024


