Using Foundry to Deploy to Your EVM Network
Introduction
Foundry is an Ethereum development environment written in Rust that helps developers manage dependencies, compile projects, run tests, deploy contracts, and interact with blockchains from the command line. Foundry can directly interact with the Ethereum API of Tanssi-powered EVM networks, so it can be used to deploy and interact with smart contracts on your Tanssi network.
There are four tools that make up Foundry:
- Forge - compiles, tests, and deploys contracts
- Cast - a command line interface for interacting with contracts
- Anvil - a local TestNet node for development purposes that can fork preexisting networks
- Chisel - a Solidity REPL for quickly testing Solidity snippets
This guide will cover how to use Foundry to compile, deploy, and debug Ethereum smart contracts on the demo EVM network. You can follow the same steps to perform these actions on your Tanssi EVM network by replacing the RPC URL and Chain ID shown in the examples.
Checking Prerequisites
To get started, you will need the following:
- An account with funds
- Foundry installed
Creating a Foundry Project
You will need to create a Foundry project if you don't already have one. You can create one by completing the following steps:
-
Install Foundry with the below commands. The Windows instructions are noticeably different as you'll have to install Rust and then build Foundry from source
curl -L https://foundry.paradigm.xyz | bash foundryupcurl -L https://foundry.paradigm.xyz | bash foundryupcurl --proto '=https' --tlsv1.2 -sSf https://sh.rustup.rs/ | sh cargo install --git https://github.com/foundry-rs/foundry foundry-cli anvil --bins --lockedAfter installing, you may need to restart your terminal session or add
foundryupto your PATH. -
Create the project, which will create a folder with three folders within it:
forge init foundry
You may get an error, such as The target directory is a part of or on its own an already initialized git repository, and it requires clean working and staging areas, including no untracked files. To solve this, you can add files and make a commit if you are maintaining this project within a GitHub repository. Otherwise, you can make a dummy commit without pushing. If you run forge init foundry once more, you'll no longer have the error.
With the default project created, you should see three folders.
lib- all of the project's dependencies in the form of git submodulessrc- where to put your smart contracts (with functionality)test- where to put the forge tests for your project, which are written in Solidity
In addition to these three folders, a git project will also be created along with a prewritten .gitignore file with relevant file types and folders ignored.
The Source Folder
The preconfigured foundry repo includes Counter.sol in the src folder, as well as a Counter.s.sol in the script folder and Counter.t.sol in the test folder. You should delete these files to avoid errors when trying to compile and deploy MyToken.sol. You can do so with the following command:
rm src/Counter.sol script/Counter.s.sol test/Counter.t.sol
In the following steps, you will be deploying an ERC-20 contract. In the contracts directory, you can create the MyToken.sol file:
cd src
touch MyToken.sol
Open the file and add the following contract to it:
pragma solidity ^0.8.0;

// Import OpenZeppelin Contract
import "openzeppelin-contracts/contracts/token/ERC20/ERC20.sol";

// This ERC-20 contract mints the specified amount of tokens to the contract creator
contract MyToken is ERC20 {
  constructor(uint256 initialSupply) ERC20("MyToken", "MYTOK") {
    _mint(msg.sender, initialSupply);
  }
}
Before you attempt to compile, install OpenZeppelin contracts as a dependency. You may have to commit previous changes to git beforehand. By default, Foundry uses git submodules instead of npm packages, so the traditional npm import path and command are not used. Instead, use the name of OpenZeppelin's GitHub repository:
forge install OpenZeppelin/openzeppelin-contracts
Compiling Solidity
Once all dependencies have been installed, you can compile the contract:
forge build

After compilation, two folders will be created: out and cache. The ABI and bytecode for your contracts will be contained within the out folder. These two folders are already ignored by the .gitignore included in the default Foundry project initialization.
Deploying the Contract
Deploying the contract with Forge takes a single command, but you will need to include an RPC endpoint, a funded private key, and constructor arguments. MyToken.sol asks for an initial supply of tokens in its constructor, so the following command includes 100 as a constructor argument. You can deploy the MyToken.sol contract using the following command modified for the correct network:
forge create --rpc-url https://services.tanssi-testnet.network/dancelight-2001/ \
--constructor-args 100 \
--private-key INSERT_YOUR_PRIVATE_KEY \
src/MyToken.sol:MyToken
After a few seconds, the contract is deployed, and you should see the address in the terminal.
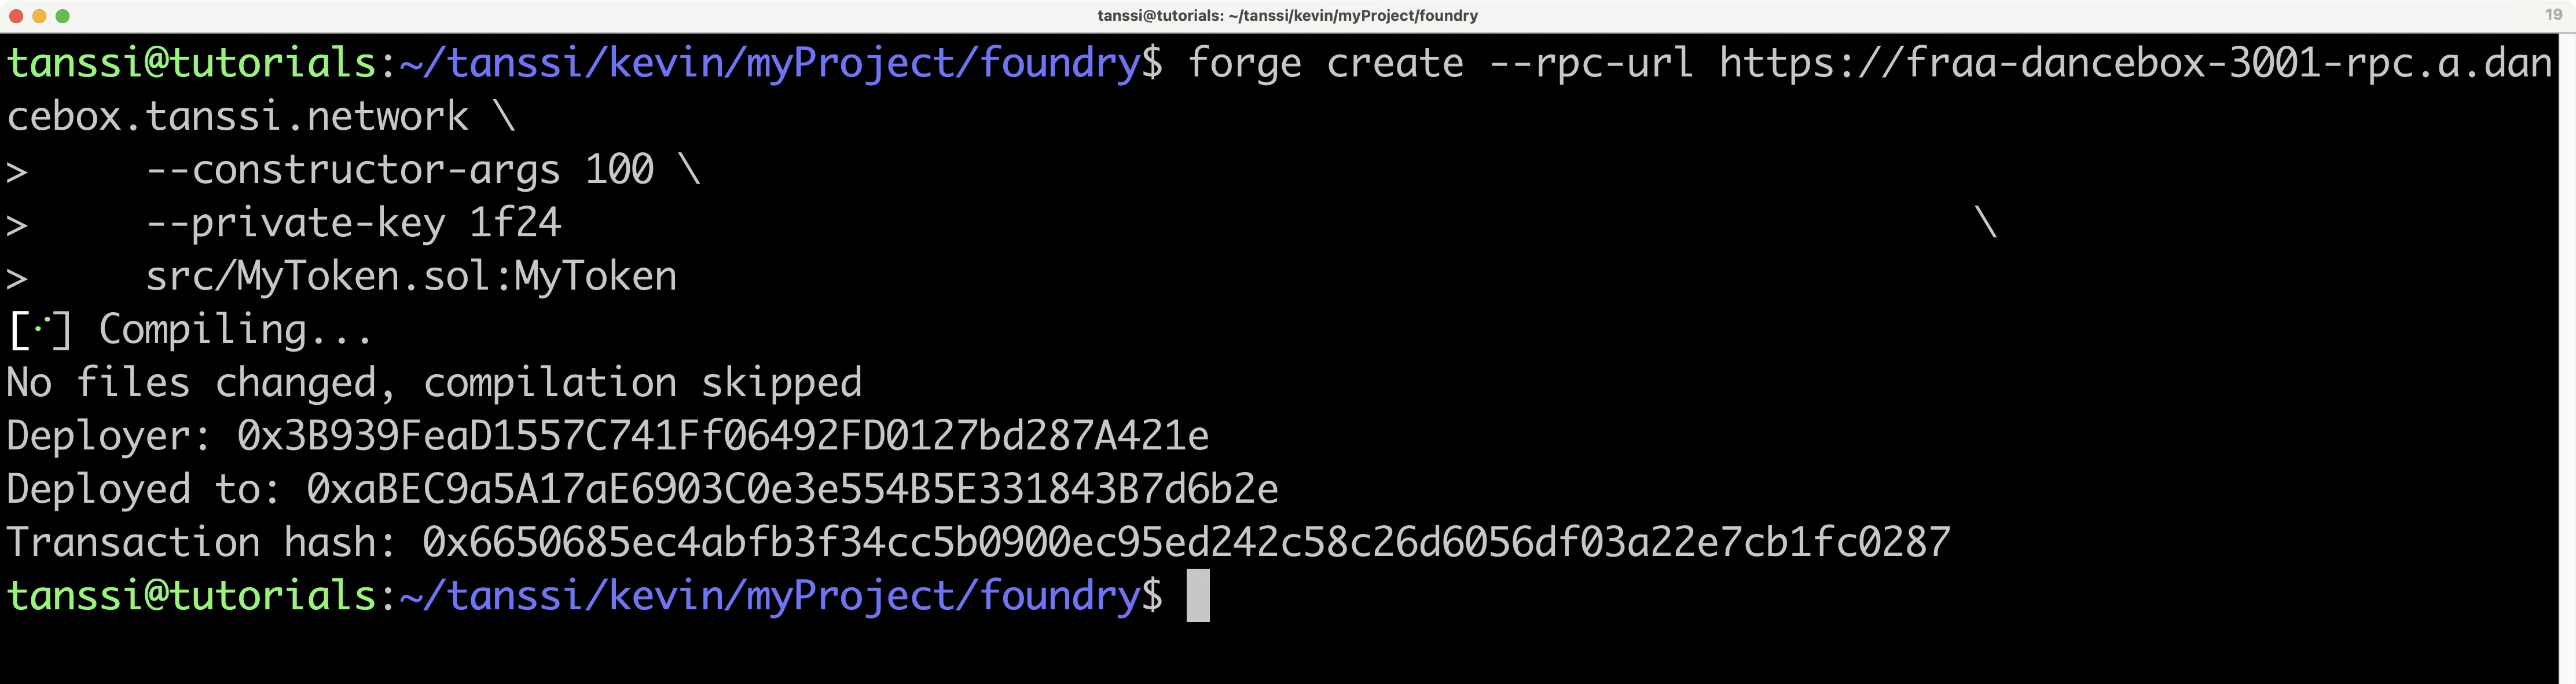
Congratulations, your contract is live! Save the address, as you will use it to interact with this contract instance in the next step.
Interacting with the Contract
Foundry includes Cast, a CLI for performing Ethereum RPC calls.
Try to retrieve your token's name using Cast, where INSERT_YOUR_CONTRACT_ADDRESS is the address of the contract that you deployed in the previous section:
cast call INSERT_YOUR_CONTRACT_ADDRESS "name()" --rpc-url https://services.tanssi-testnet.network/dancelight-2001/
You should get this data in hexadecimal format:
0x000000000000000000000000000000000000000000000000000000000000002000000000000000000000000000000000000000000000000000000000000000074d79546f6b656e00000000000000000000000000000000000000000000000000
This is far from readable, but you can use Cast to convert it into your desired format. In this case, the data is text, so you can convert it into ASCII characters to see "My Token":

cast --to-ascii 0x000000000000000000000000000000000000000000000000000000000000002000000000000000000000000000000000000000000000000000000000000000074d79546f6b656e00000000000000000000000000000000000000000000000000
You can also mutate data with Cast as well. Try burning tokens by sending them to the zero address.
cast send --private-key INSERT_YOUR_PRIVATE_KEY \
--rpc-url https://services.tanssi-testnet.network/dancelight-2001/ \
--chain 5678 \
INSERT_YOUR_CONTRACT_ADDRESS \
"transfer(address,uint256)" 0x0000000000000000000000000000000000000001 1
The transaction will be signed by your EVM account and be broadcast to the network. The output should look similar to:
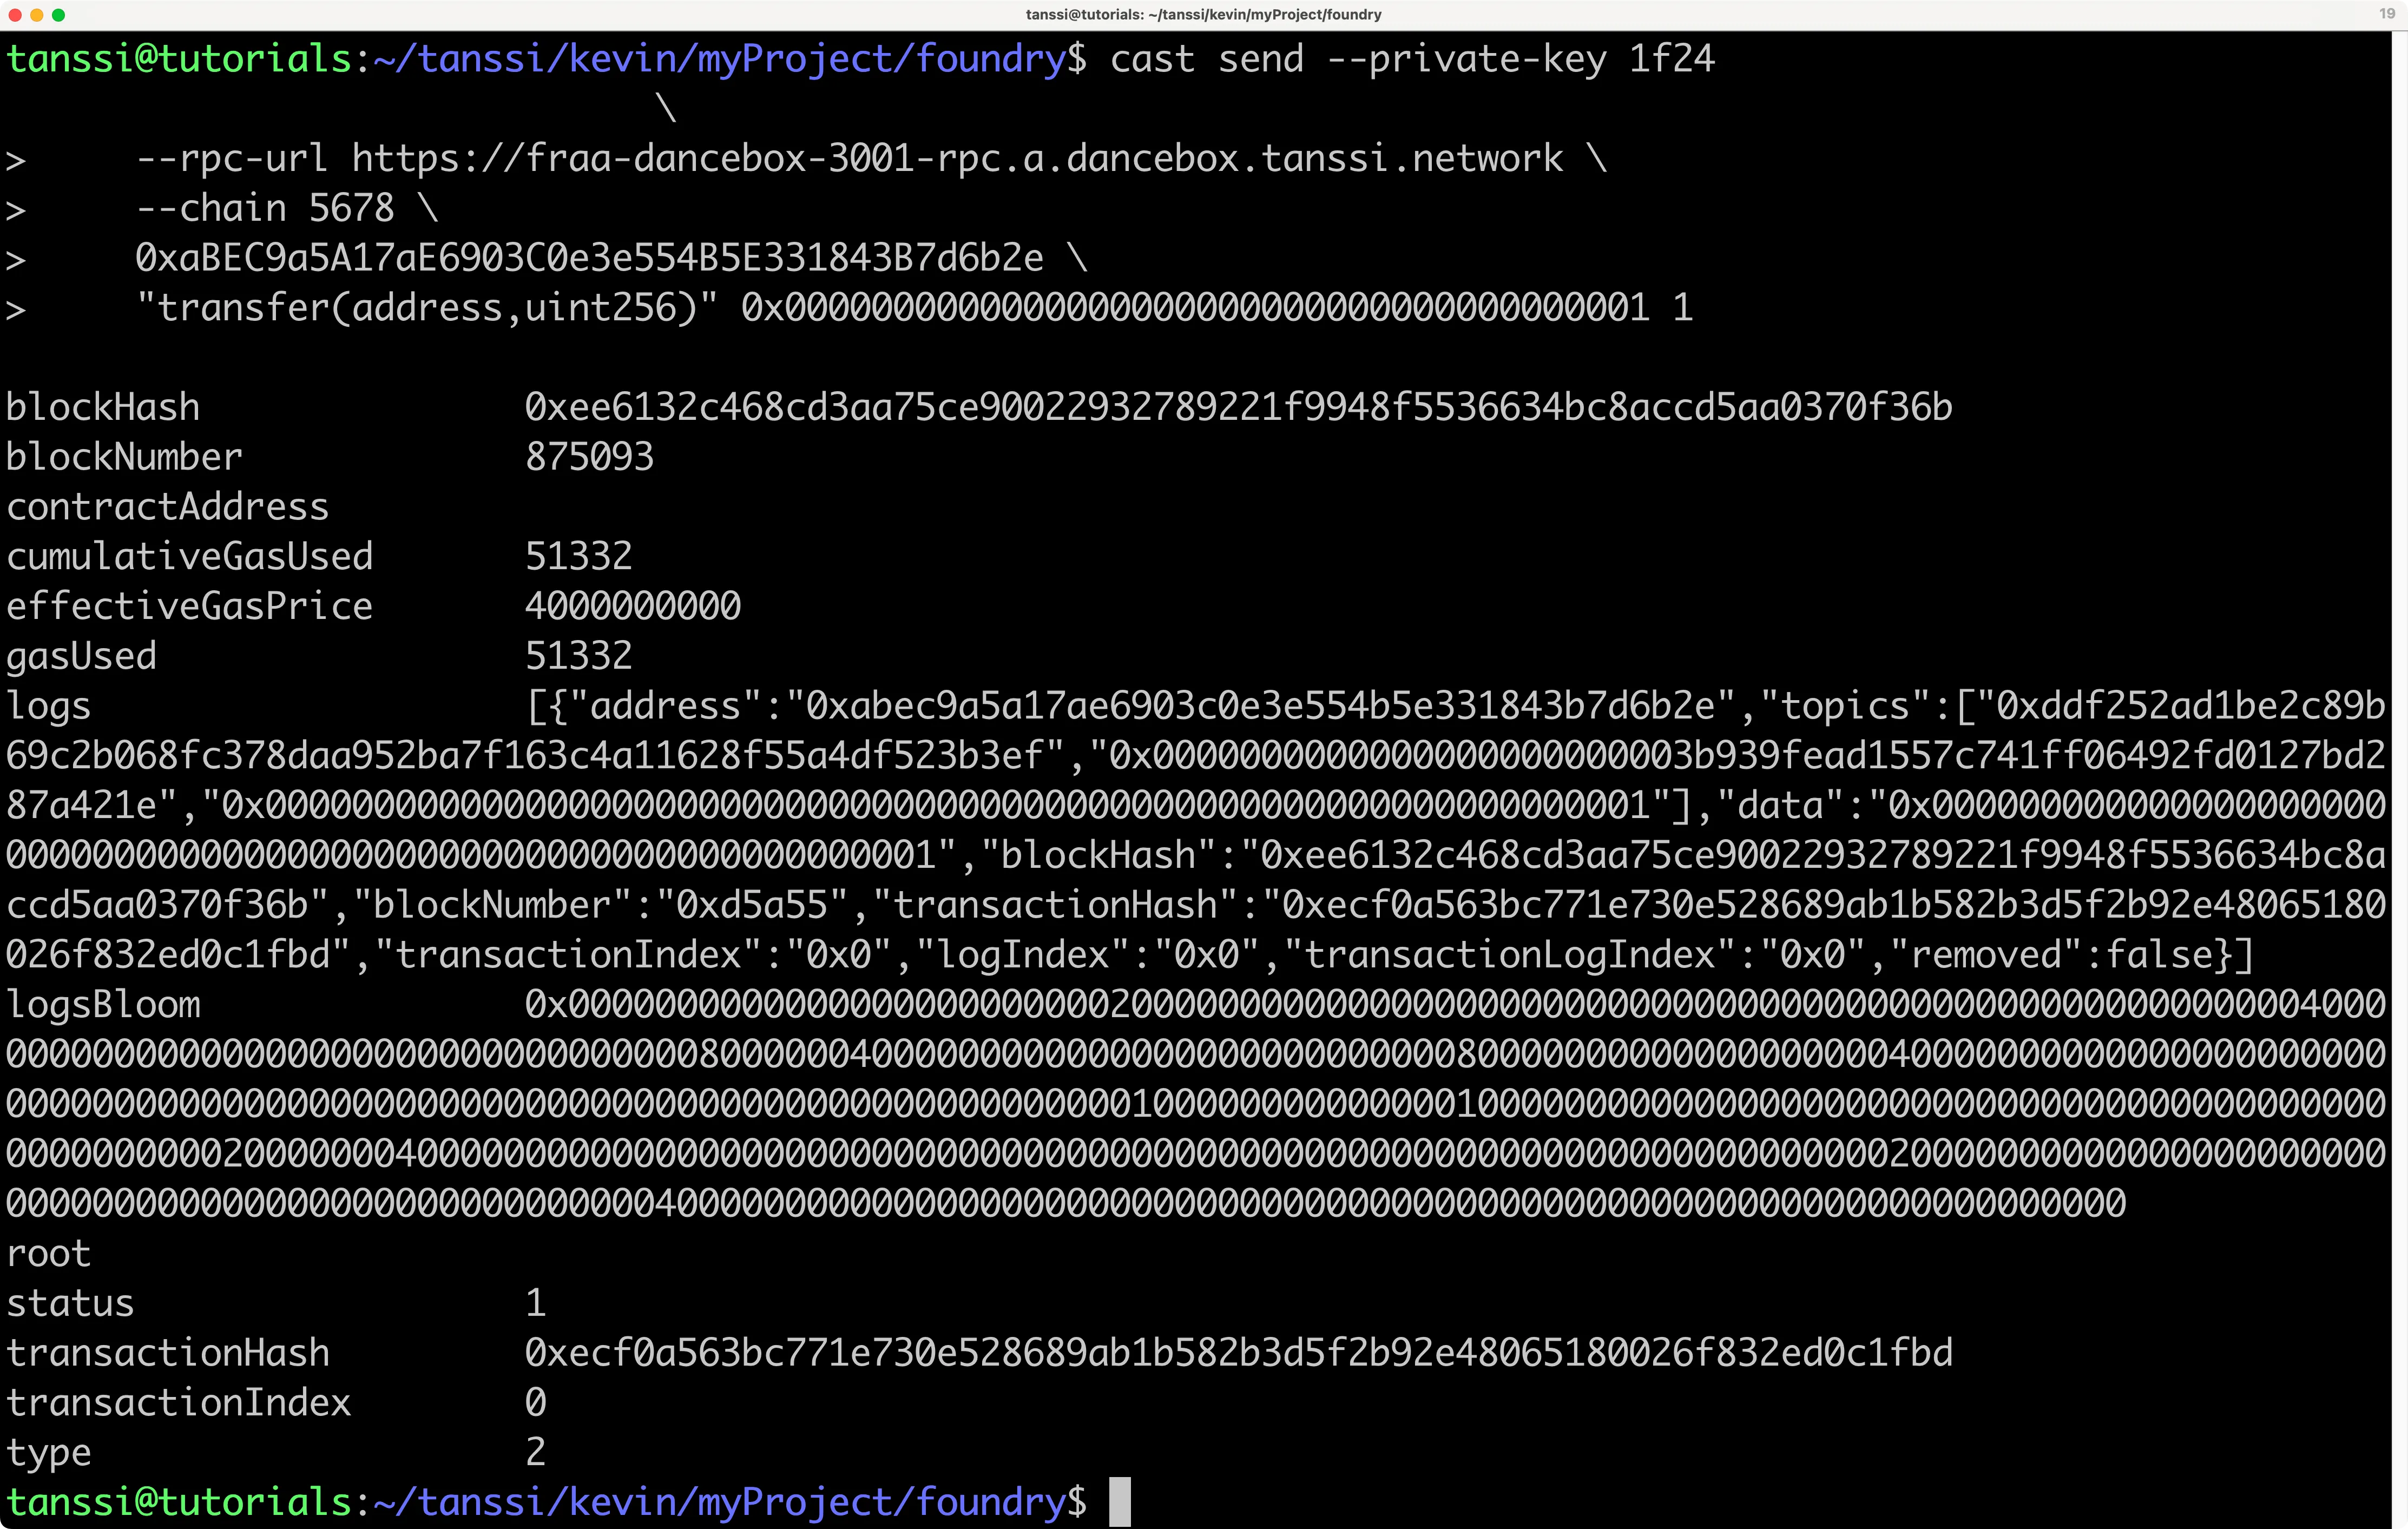
Congratulations, you have successfully deployed and interacted with a contract using Foundry!
Forking with Anvil
As previously mentioned, Anvil is a local TestNet node for development purposes that can fork preexisting networks. Forking the demo EVM network allows you to interact with live contracts deployed on the network.
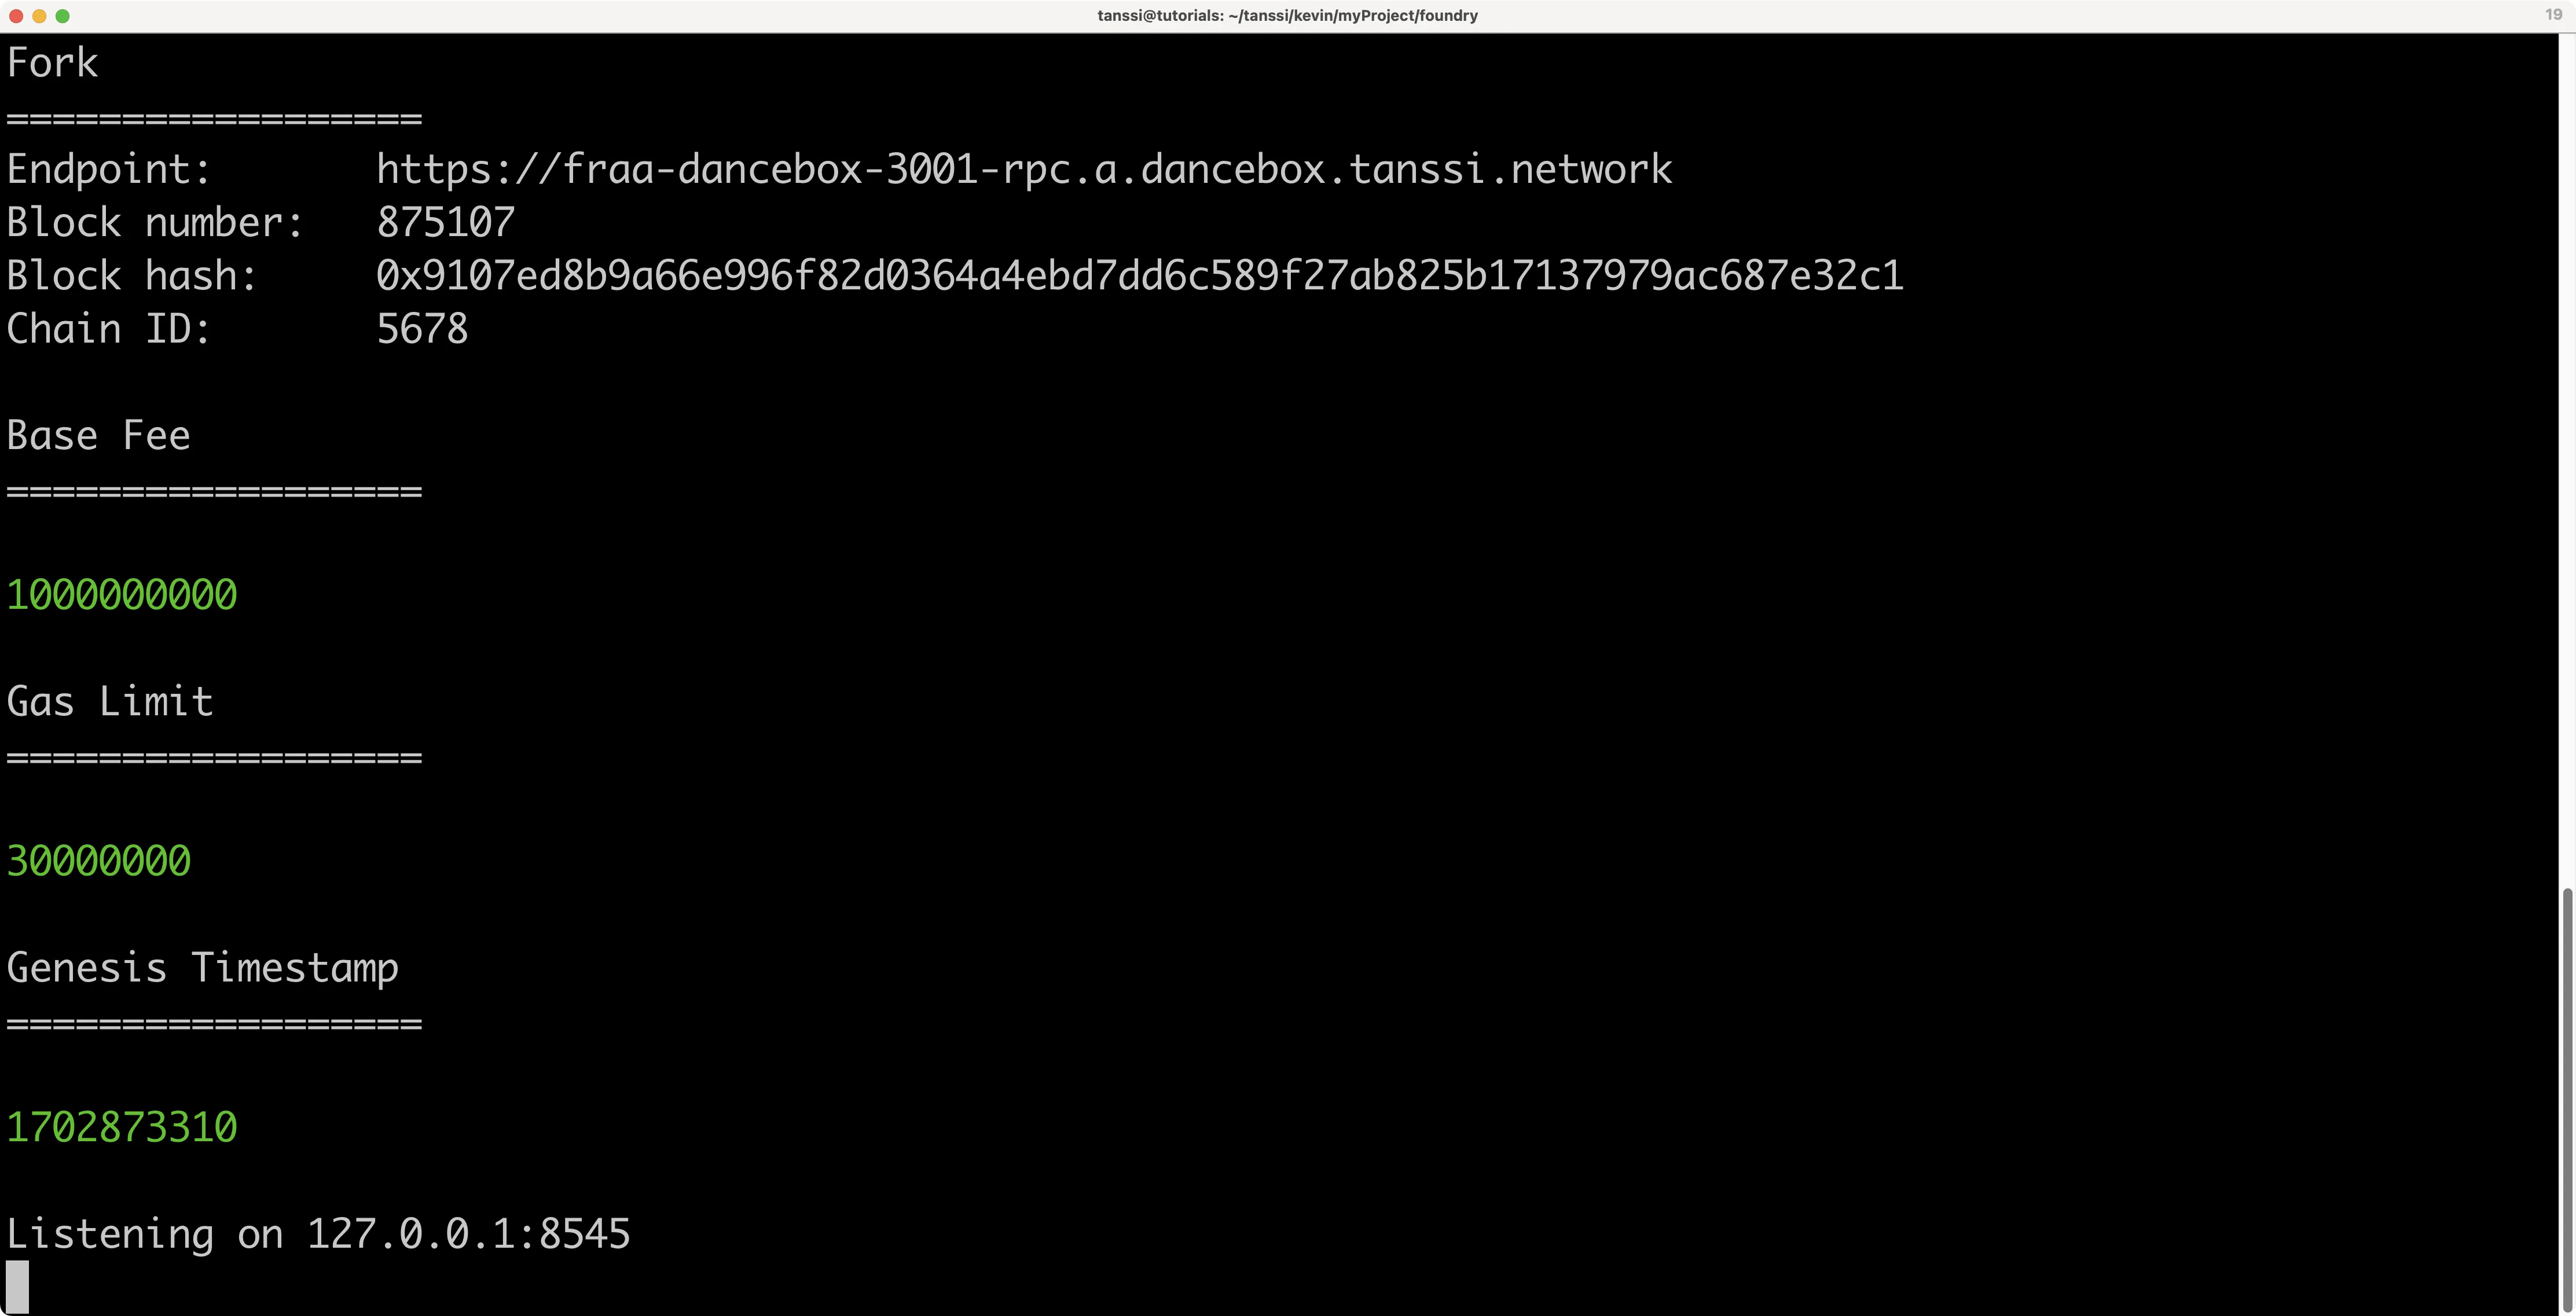
To fork the demo EVM network from the command line, you can run the following command from within your Foundry project directory. You can also replace the RPC URL with the RPC URL of your Tanssi EVM network.
anvil --fork-url https://services.tanssi-testnet.network/dancelight-2001/
Your forked instance will have 10 development accounts that are pre-funded with 10,000 test tokens. The forked instance is available at http://127.0.0.1:8545/. The output in your terminal should resemble the following:
To verify you have forked the network, you can query the latest block number and compare it to the current block number of the demo EVM network.
curl --data '{"method":"eth_blockNumber","params":[],"id":1,"jsonrpc":"2.0"}' -H "Content-Type: application/json" -X POST localhost:8545
If you convert the result from hex to decimal, you should get the latest block number from the time you forked the network.
From here, you can deploy new contracts to your forked instance of the demo EVM network (or any other Tanssi-powered EVM network) or interact with contracts already deployed. Building off of the previous example in this guide, you can make a call using Cast to check the balance of the minted MYTOK tokens in the account you deployed the contract with:
cast call INSERT_CONTRACT_ADDRESS  "balanceOf(address)(uint256)" \
 INSERT_YOUR_ADDRESS --rpc-url http://localhost:8545
Using Chisel
Chisel is a Solidity REPL or shell. It allows a developer to write Solidity directly in the console for testing small snippets of code, letting developers skip the project setup and contract deployment steps for what should be a quick process.
Since Chisel is mainly useful for quick testing, it can be used outside of a Foundry project. But, if executed within a Foundry project, it will keep the configurations within foundry.toml when running.
For this example, you will be testing out some of the features of abi within Solidity because it is complex enough to demonstrate how Chisel could be useful. To get started using Chisel, run the following in the command line to start the shell:
chisel
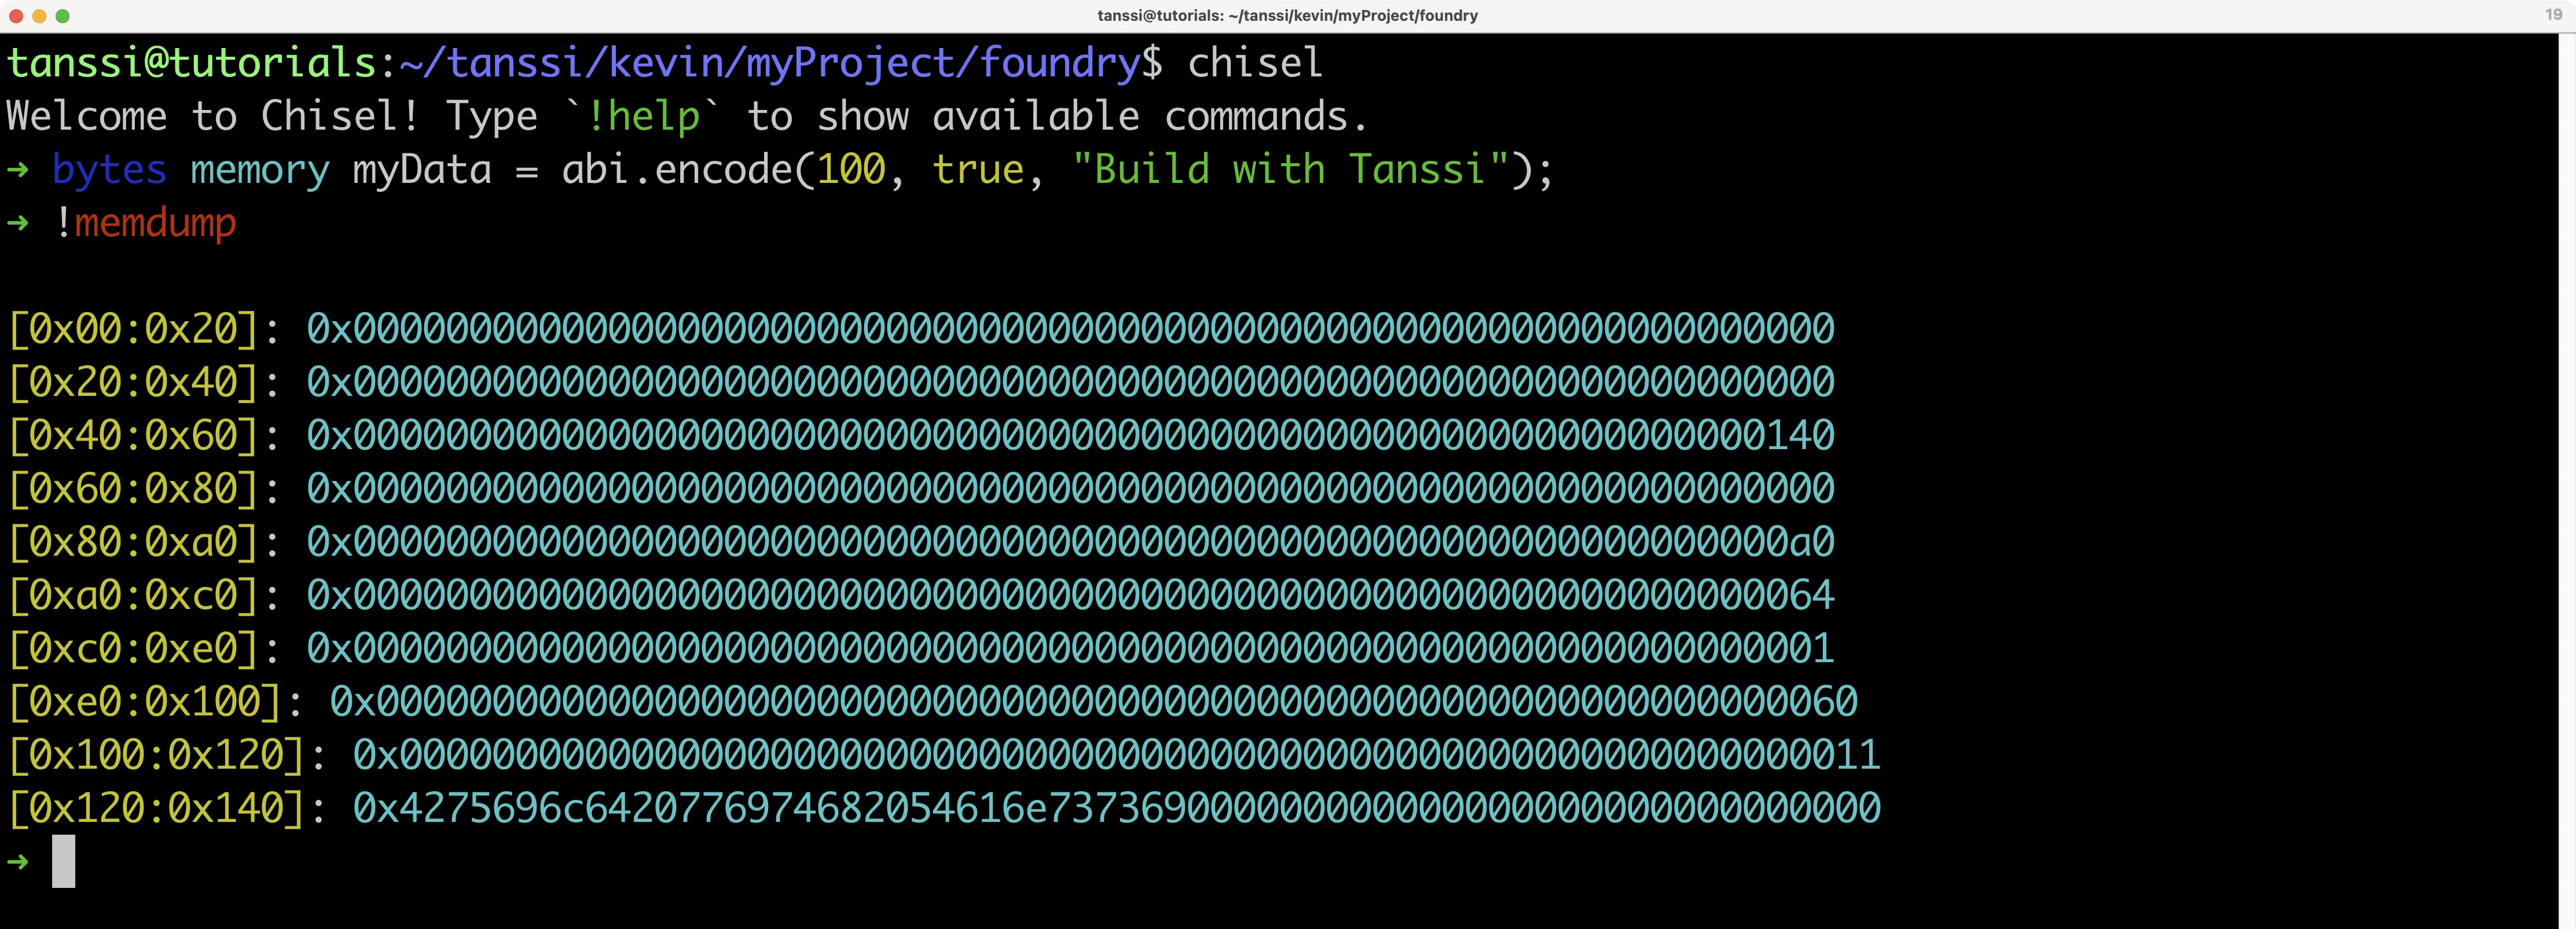
In the shell, you can write Solidity code as if it were running within a function:
bytes memory myData = abi.encode(100, true, "Build with Tanssi");
Let's say you were interested in how abi encoded data because you're looking into how to most efficiently store data on the blockchain and thus save gas. To view how the myData is stored in memory, you can use the following command while in the Chisel shell:
!memdump
memdump will dump all of the data in your current session. You'll likely see something like this below. If you aren't good at reading hexadecimal or if you don't know how ABI encoding works, then you might not be able to find where the myData variable has been stored.
Fortunately, Chisel lets you easily figure out where this information is stored. Using the !rawstack command, you can find the location in the stack where the value of a variable is:
!rawstack myData
In this situation, since myData is over 32 bytes in length, the memory pointer is displayed instead. But that's exactly what's needed since you already know the entirety of the stack from the !memdump command.
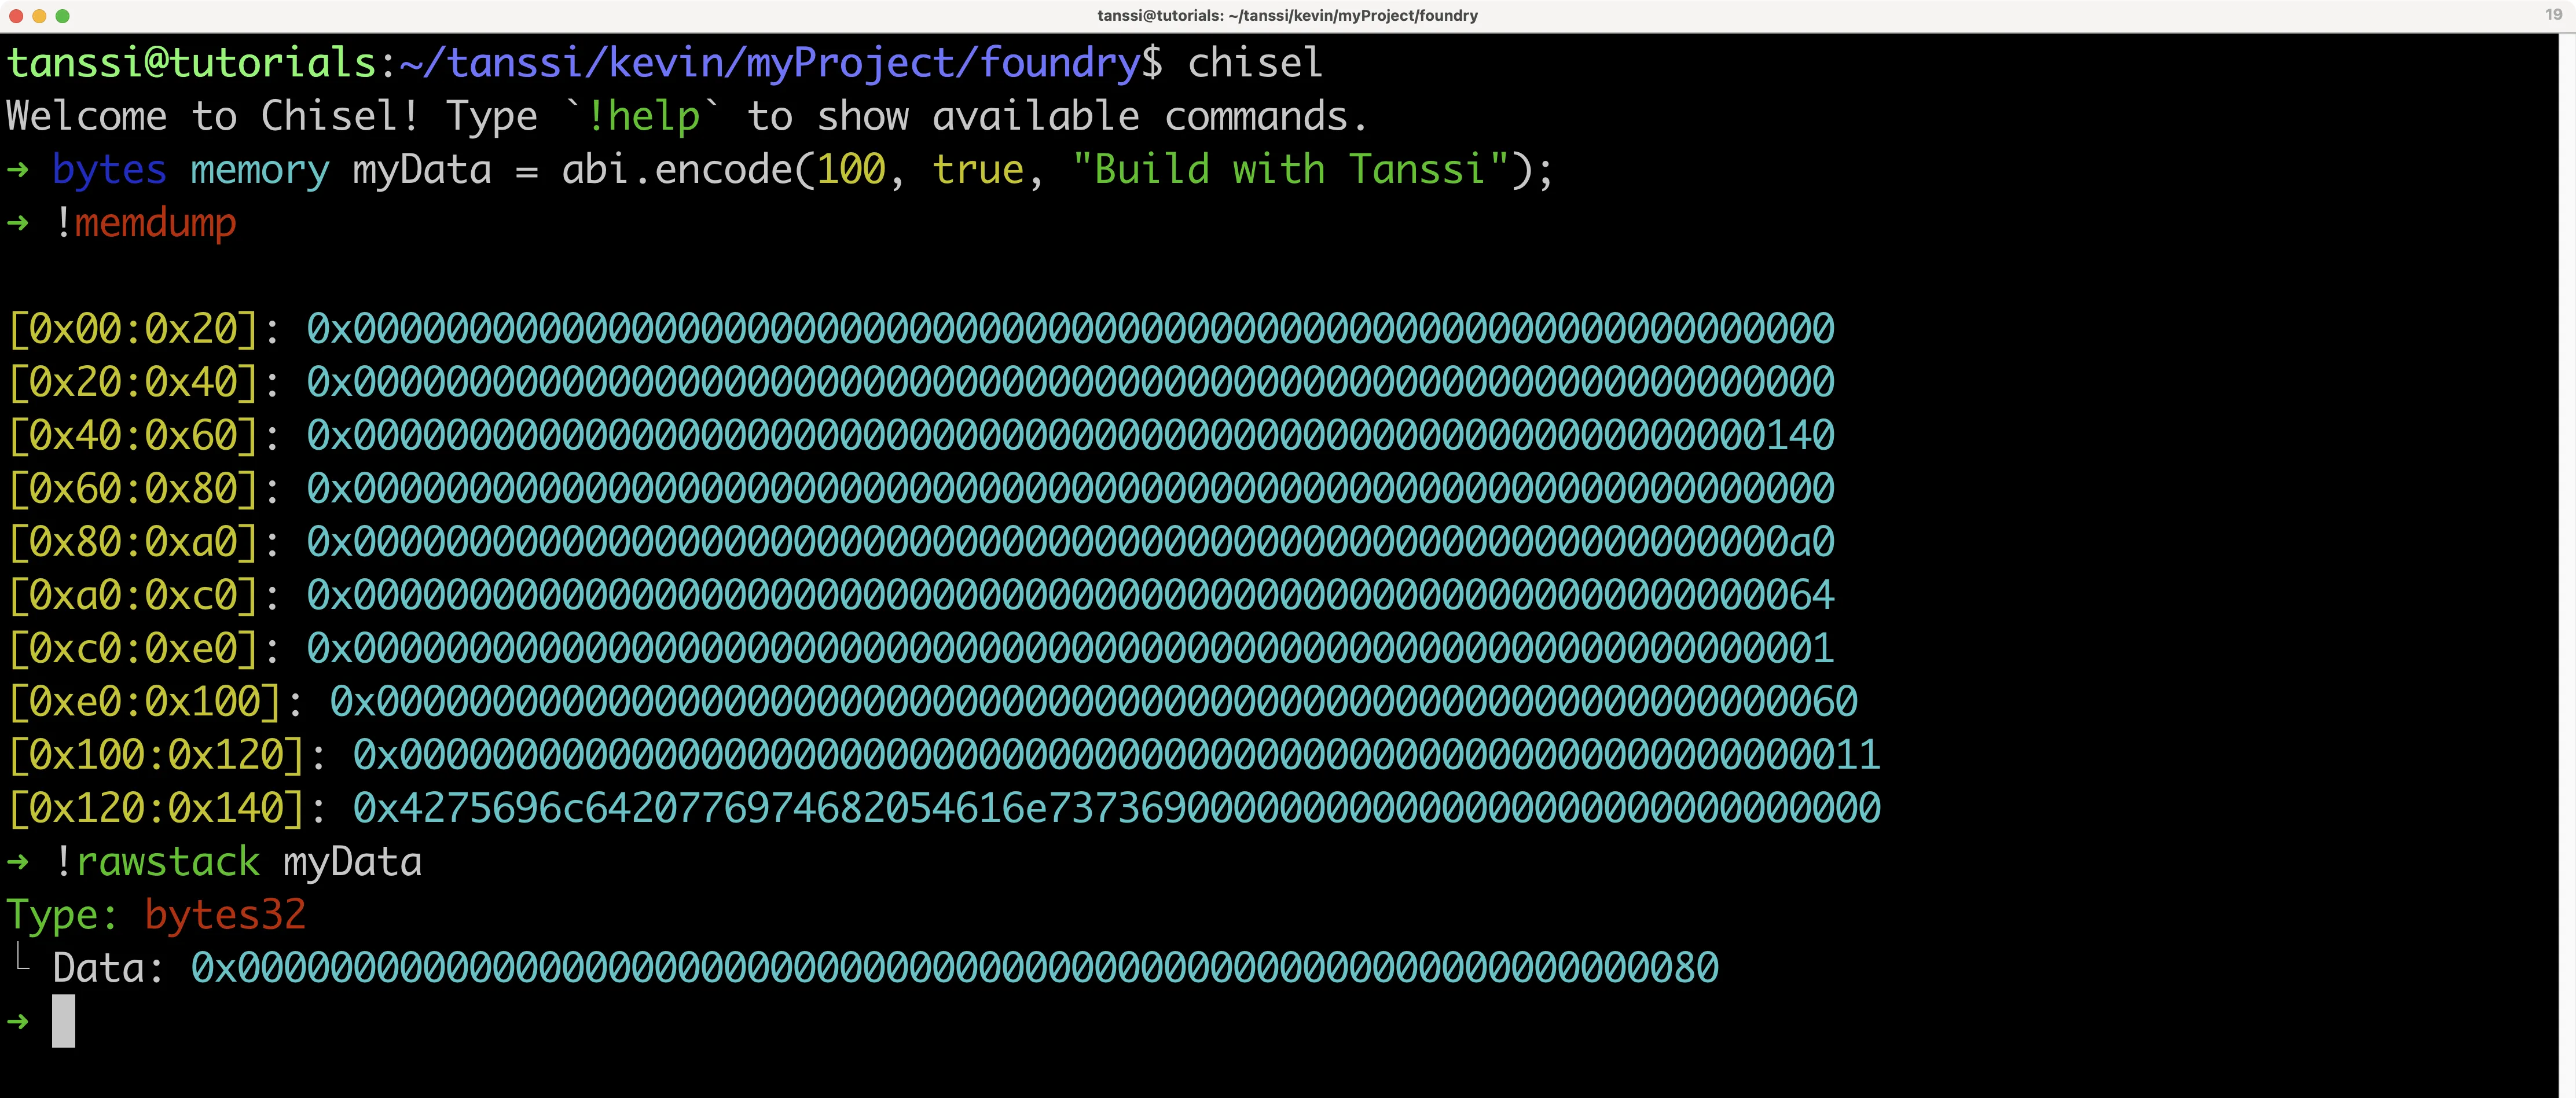
The !rawstack command shows that the myData variable is stored at 0x80, so when comparing this with the memory dump retrieved from the !memdump command, it looks like myData is stored like this:
[0x80:0xa0]: 0x00000000000000000000000000000000000000000000000000000000000000a0
[0xa0:0xc0]: 0x0000000000000000000000000000000000000000000000000000000000000064
[0xc0:0xe0]: 0x0000000000000000000000000000000000000000000000000000000000000001
[0xe0:0x100]: 0x0000000000000000000000000000000000000000000000000000000000000060
[0x100:0x120]: 0x0000000000000000000000000000000000000000000000000000000000000011
[0x120:0x140]: 0x4275696c6420776974682054616e737369000000000000000000000000000000
At first glance, this makes sense since 0xa0 has a value of 0x64, which is equal to 100, and 0xc0 has a value of 0x01, which is equal to true. If you want to learn more about how ABI-encoding works, the Solidity documentation for ABI is helpful. In this case, there are a lot of zeros in this method of data packing, so as a smart contract developer, you might instead try to use structs or pack the data together more efficiently with bitwise code.
Since you're done with this code, you can clear the state of Chisel so that it doesn't mess with any future logic that you want to try out (while running the same instance of Chisel):
!clear
There's an even easier way to test with Chisel. When writing code that ends with a semicolon, ;, Chisel will run it as a statement, storing its value in Chisel's runtime state. But if you only needed to see how the ABI-encoded data was represented, then you could get away with running the code as an expression. To try this out with the same abi example, write the following in the Chisel shell:
abi.encode(100, true, "Build with Tanssi")
You should see something like the following:
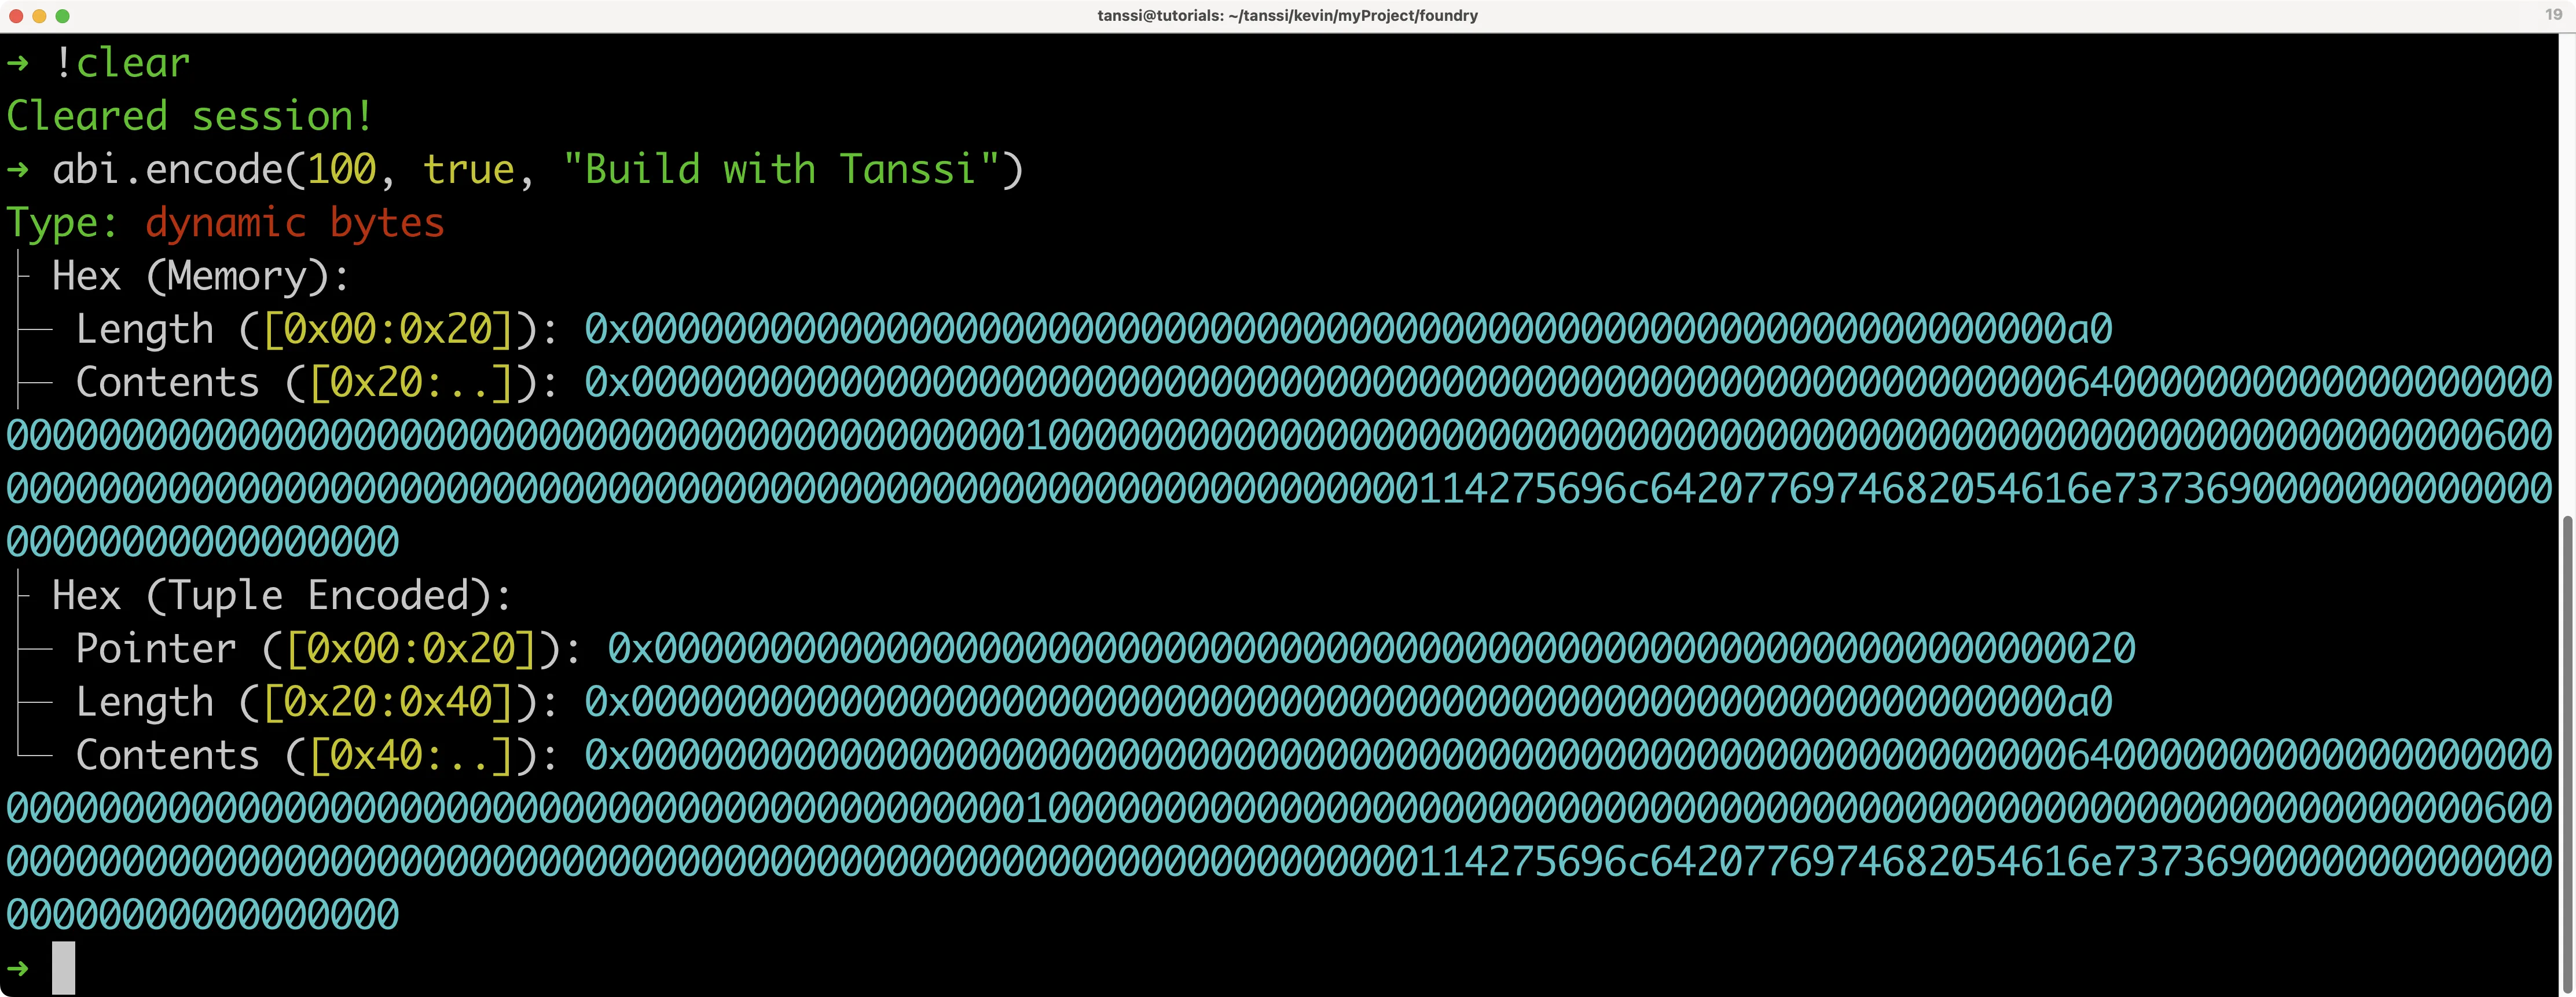
While it doesn't display the data in the same way, you still get the contents of the data, and it also further breaks down how the information is coded, such as letting you know that the 0xa0 value defines the length of the data.
By default, when you leave the Chisel shell, none of the data persists. But you can instruct Chisel to do so. For example, you can take the following steps to store a variable:
-
Store a
uint256in Chiseluint256 myNumber = 101; -
Store the session with
!save. For this example, you can use the number1as a save ID!save 1 -
Quit the session
!quit
Then to view and interact with your stored Chisel states, you can take the following steps:
-
View a list of saved Chisel states
chisel list -
Load your stored state by providing the
chisel loadcommand followed by the ID of the statechisel load 1 -
View the
uint256saved in Chisel from the previous set of steps!rawstack myNumber

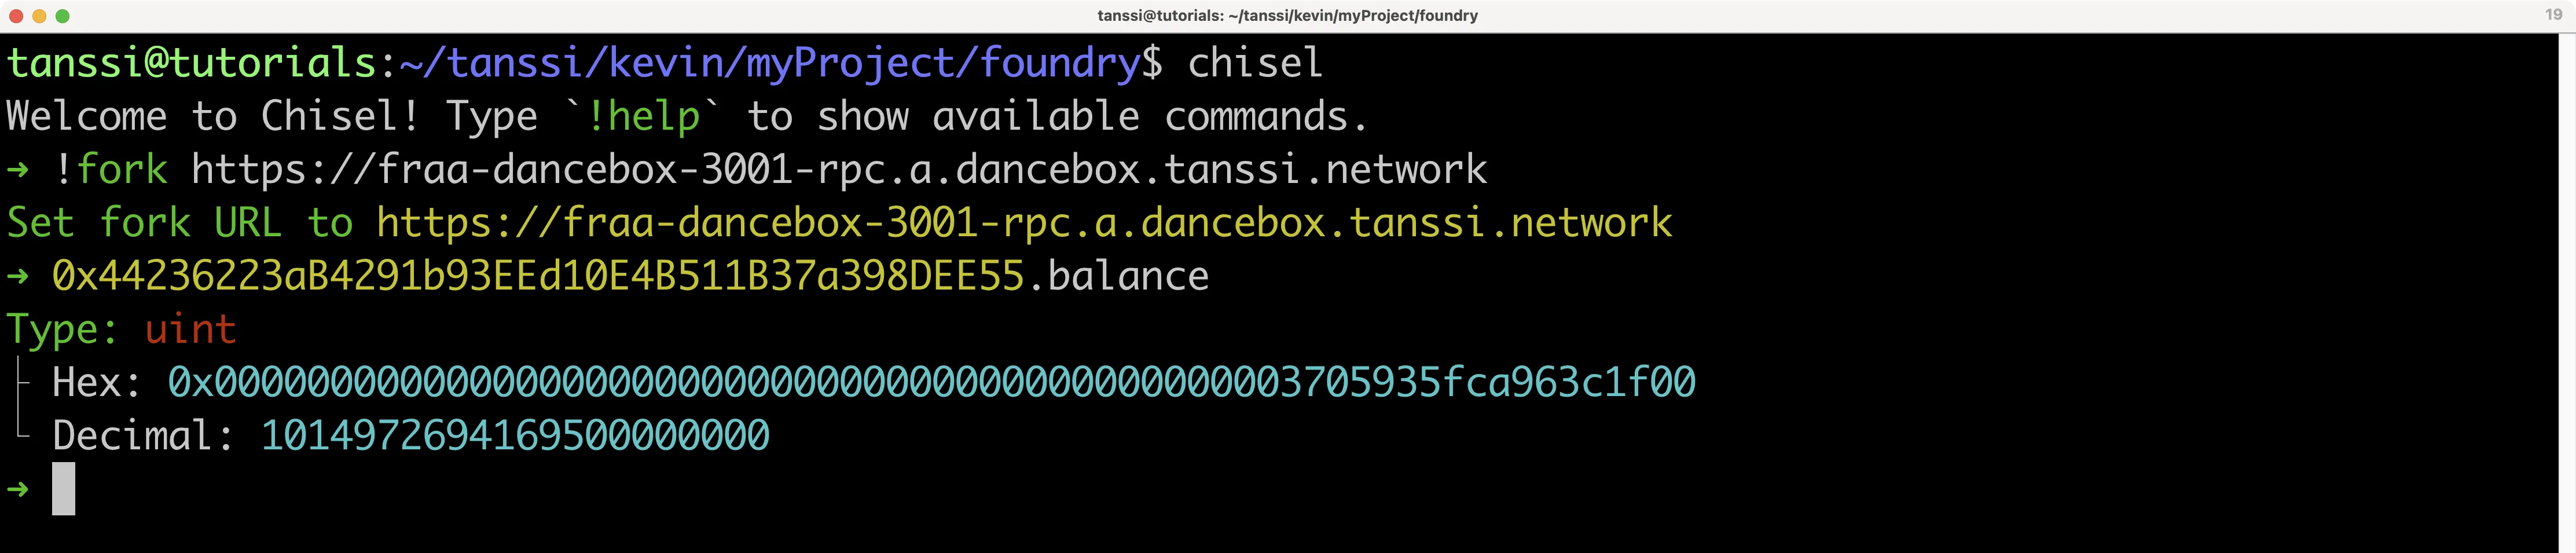
You can even fork networks while using Chisel:
!fork https://services.tanssi-testnet.network/dancelight-2001/
Then, for example, you can query the balance of the Alice account on the demo EVM network:
0x44236223aB4291b93EEd10E4B511B37a398DEE55.balance
If you want to learn more about Chisel, download Foundry and refer to its official reference page.
Foundry with Hardhat
Often, there will be the case where a project that you wish to integrate with has all of its setup within Hardhat, making it an arduous task to convert the entirety of the project into Foundry. This additional work is avoidable by creating a hybrid project that uses both Hardhat and Foundry features together. This is possible with Hardhat's hardhat-foundry plugin.
To convert your preexisting Foundry project to a hybrid project, you will essentially have to install a Hardhat project into the same folder:
npm init
npm install --save-dev hardhat @nomicfoundation/hardhat-foundry
npx hardhat init
For more information, please refer to our documentation on Creating a Hardhat Project.
After initializing the new Hardhat project, a few new folders and files should appear: contracts, hardhat.config.js, scripts, and test/Lock.js. You'll need to make a few modifications to create a hybrid project:
-
Edit the
hardhat.config.jsfile within your repository. Open it up, and at the top, add the following:require('@nomicfoundation/hardhat-foundry');After adding the
hardhat-foundryplugin, the typicalcontractsfolders for Hardhat will not work because now Hardhat expects all smart contracts to be stored within Foundry'ssrcfolder -
Move all smart contracts within the
contractsfolder into thesrcfolder, and then delete thecontractsfolder -
Edit the
foundry.tomlfile to ensure that dependencies installed via Git submodules and npm can be compiled by the Forge tool. Edit theprofile.defaultto ensure that thelibsentry has bothlibandnode_modules:[profile.default] src = 'src' out = 'out' libs = ['lib', 'node_modules'] solc = '0.8.20' evm_version = 'london'
Now both forge build and npx hardhat compile should work regardless of the dependencies.
Both forge test and npx hardhat test should now be able to access all smart contracts and dependencies. forge test will only test the Solidity tests, whereas npx hardhat test will only test the JavaScript tests. If you would like to use them in conjunction, then you can create a new script within your package.json file:
"scripts": {
    "test": "npx hardhat test && forge test"
}
You can run this command with:
npm run test
Finally, while not necessary, it could be worthwhile to move all JavaScript scripts from the scripts folder into Foundry's script folder and delete the scripts folder so that you don't have two folders that serve the same purpose.
Congratulations, you have successfully deployed and interacted with smart contracts on your Tanssi EVM network using Foundry! For more information, be sure to check out the Foundry Book.
| Created: December 18, 2023