Using Remix to Deploy to Your Tanssi EVM Network
Introduction
Developers building dApps on top of Tanssi-powered EVM networks can use Remix, one of the most popular Ethereum development environments, to build, compile, and deploy their smart contracts. Remix can be used with any EVM network, thanks to the seamless compatibility of Tanssi-powered EVM networks.
This guide walks through the process of creating and deploying a Solidity-based smart contract to the Tanssi demo EVM network using the Remix IDE. This guide can be adapted for your own Tanssi EVM network by simply adding the RPC URL of your network to your EVM Wallet and switching networks to it.
Checking Prerequisites
For this guide, you'll need to have MetaMask installed and configured to work with your Tanssi EVM network. You can follow this guide to configure MetaMask for Tanssi with the demo EVM network.
Getting Started with Remix
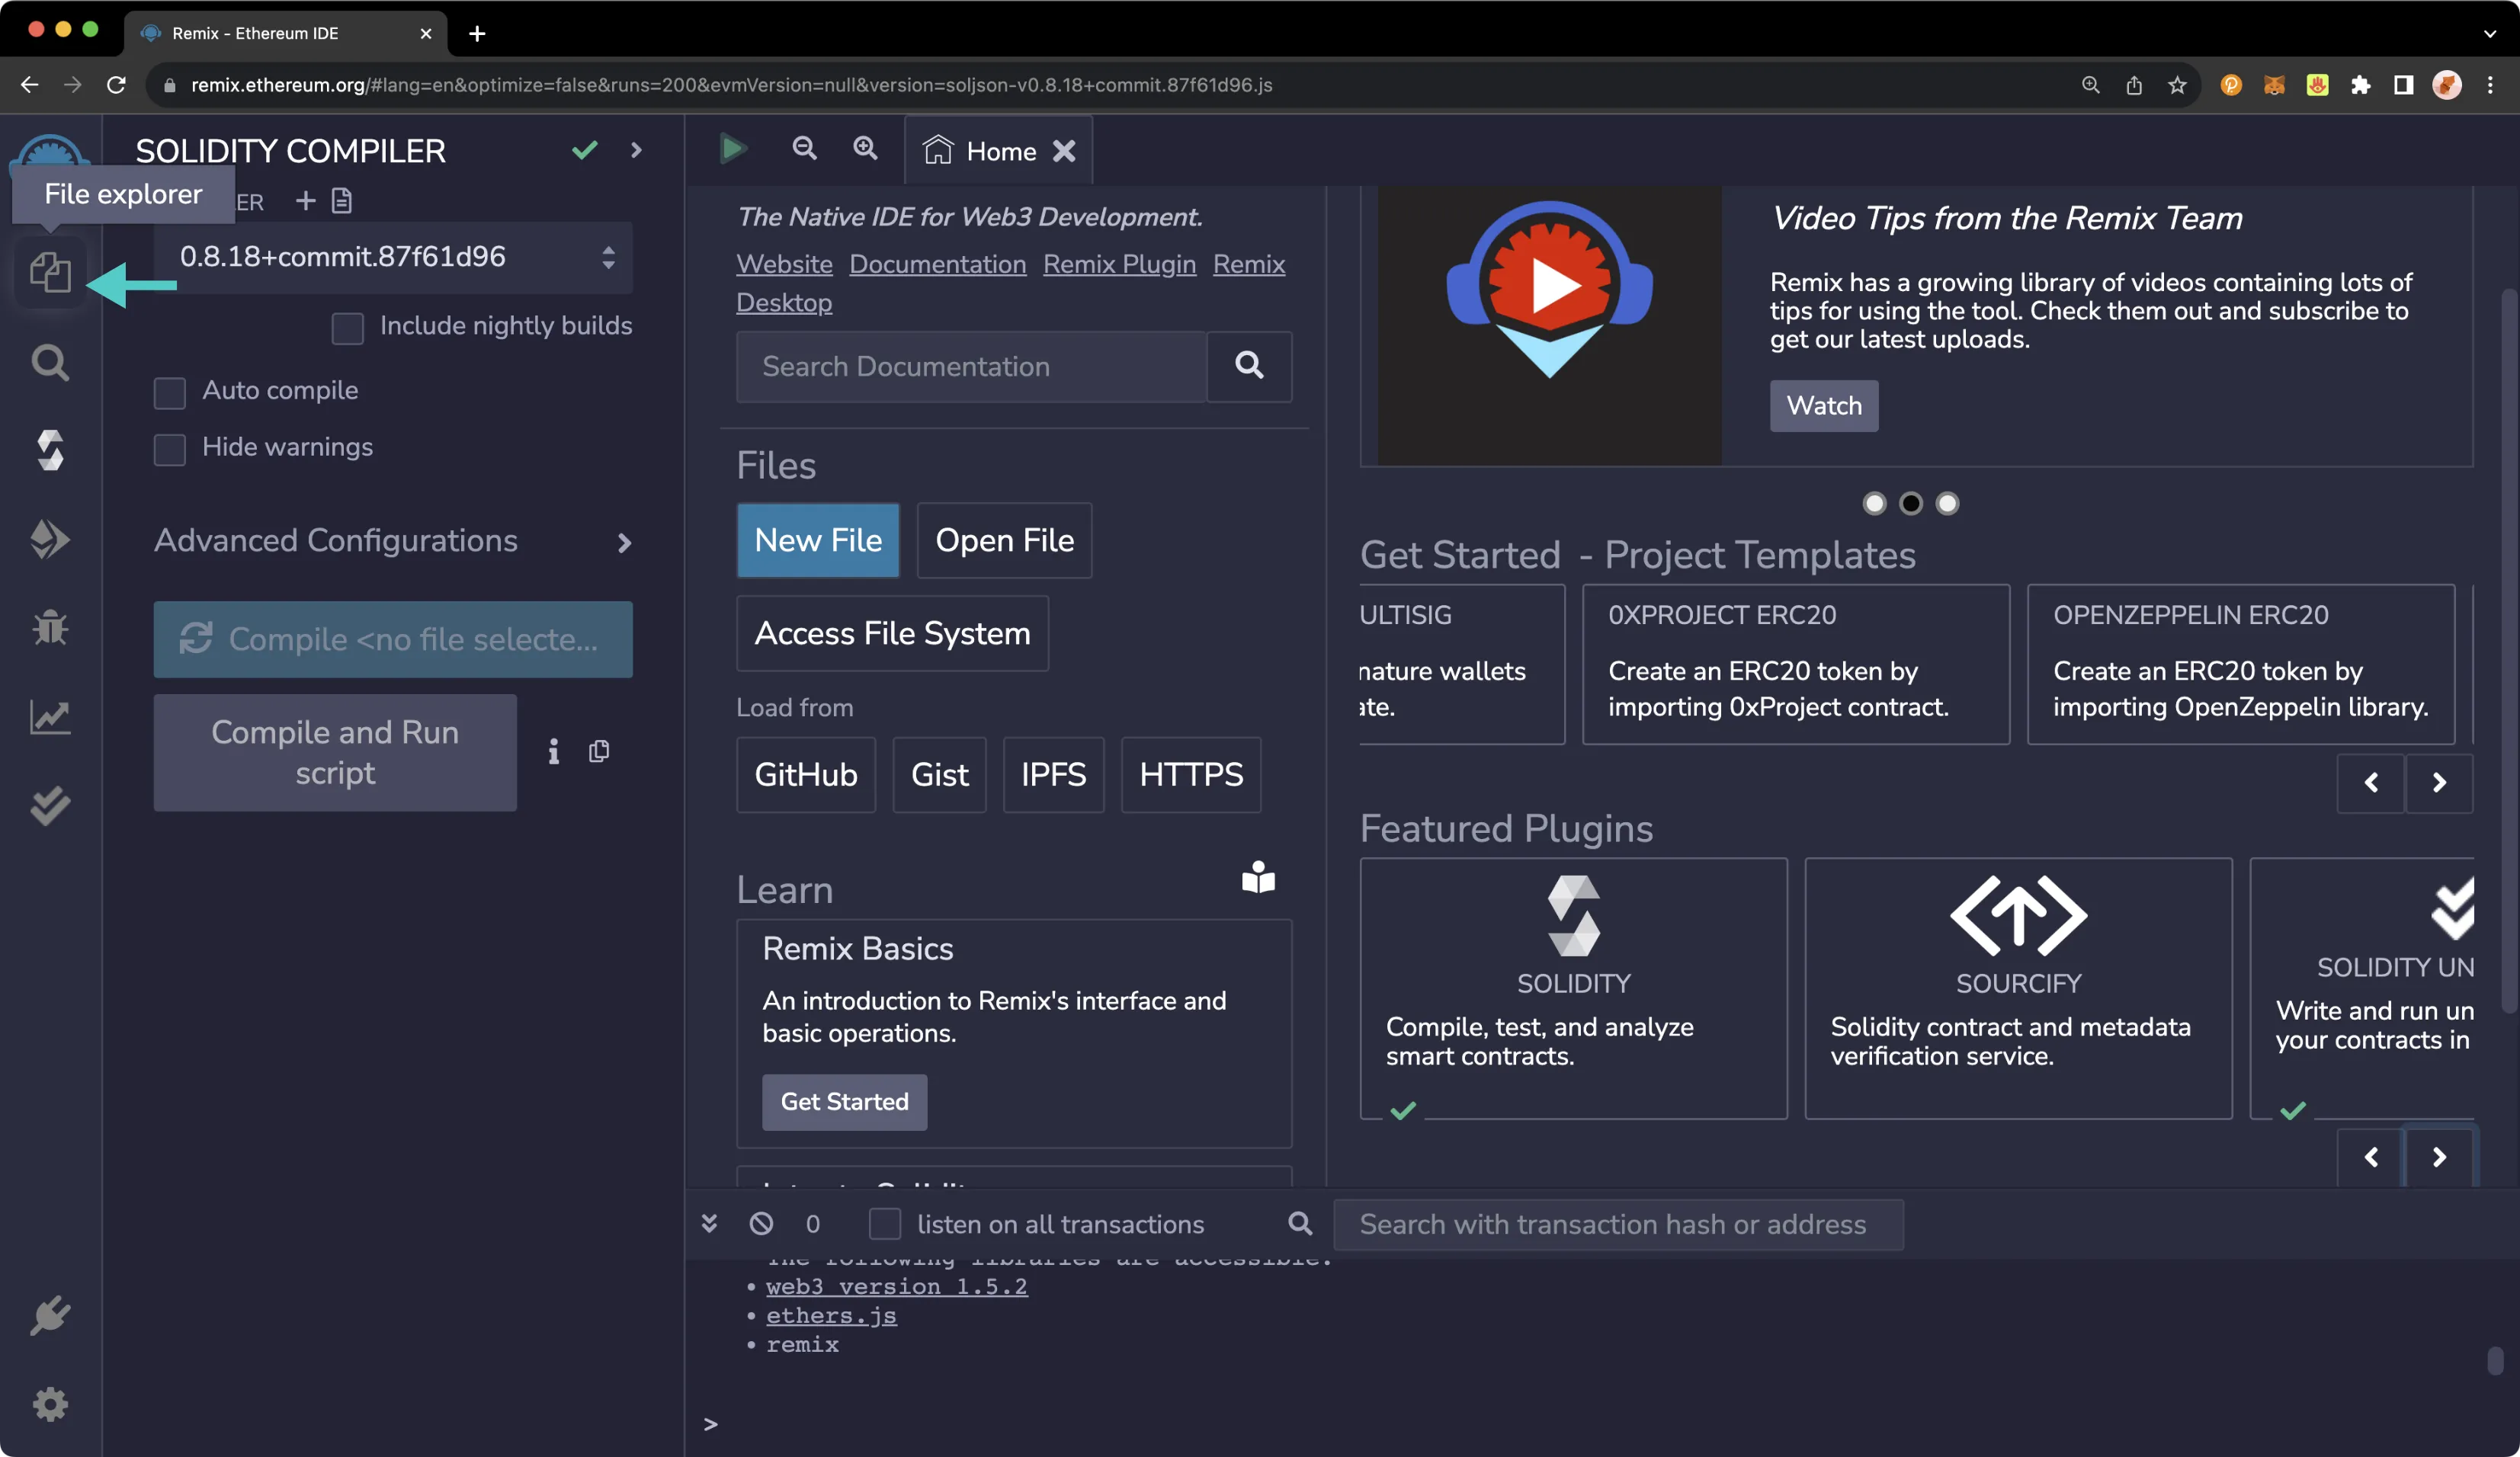
Now, you can head to Remix to get started. On the main screen, navigate to the File Explorer tab.
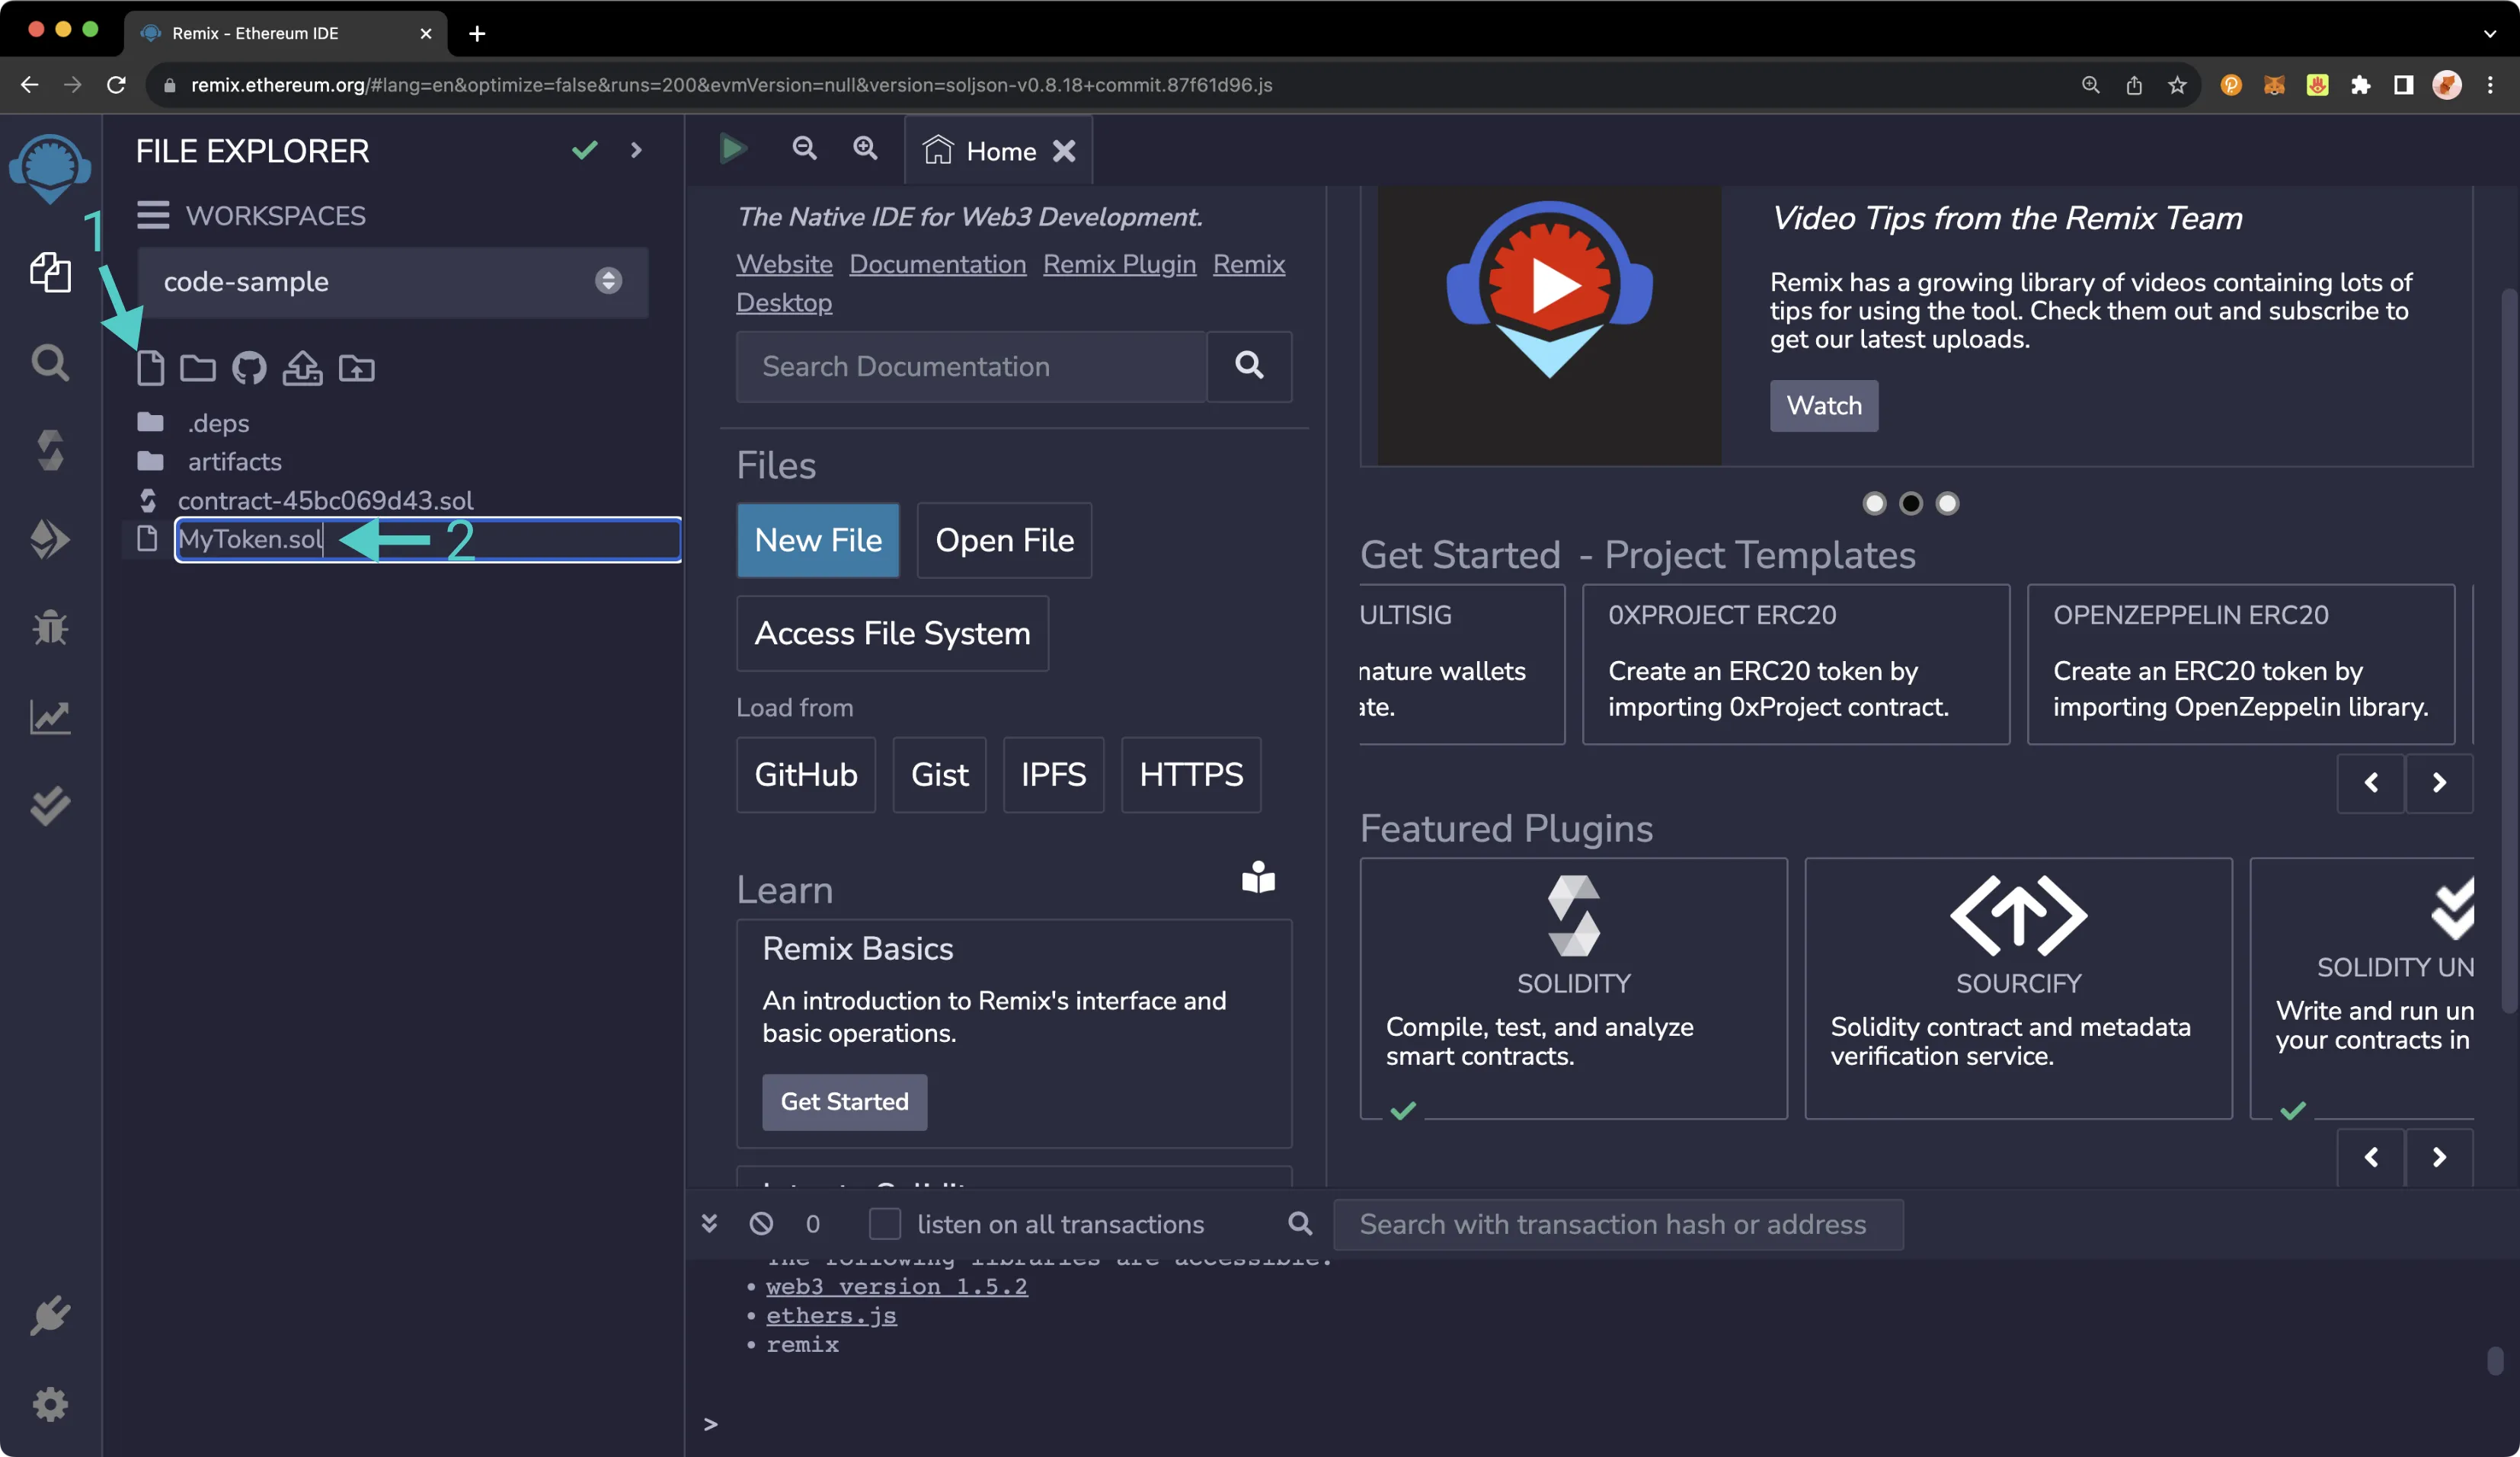
Next, you can create a new file to save the Solidity smart contract. To do so, take the following steps:
- Press the Create New File button on the left-hand side of File Explorer
- Enter your desired filename, such as
MyToken.sol
Next, paste the following smart contract into the editor tab:
// SPDX-License-Identifier: MIT
pragma solidity ^0.8.0;

import 'https://github.com/OpenZeppelin/openzeppelin-contracts/blob/audit/2023-03/contracts/token/ERC20/ERC20.sol';

// This ERC-20 contract mints the specified amount of tokens to the contract creator.
contract MyToken is ERC20 {
  constructor(uint256 initialSupply) ERC20("MyToken", "MYTOK") {
    _mint(msg.sender, initialSupply);
  }
}
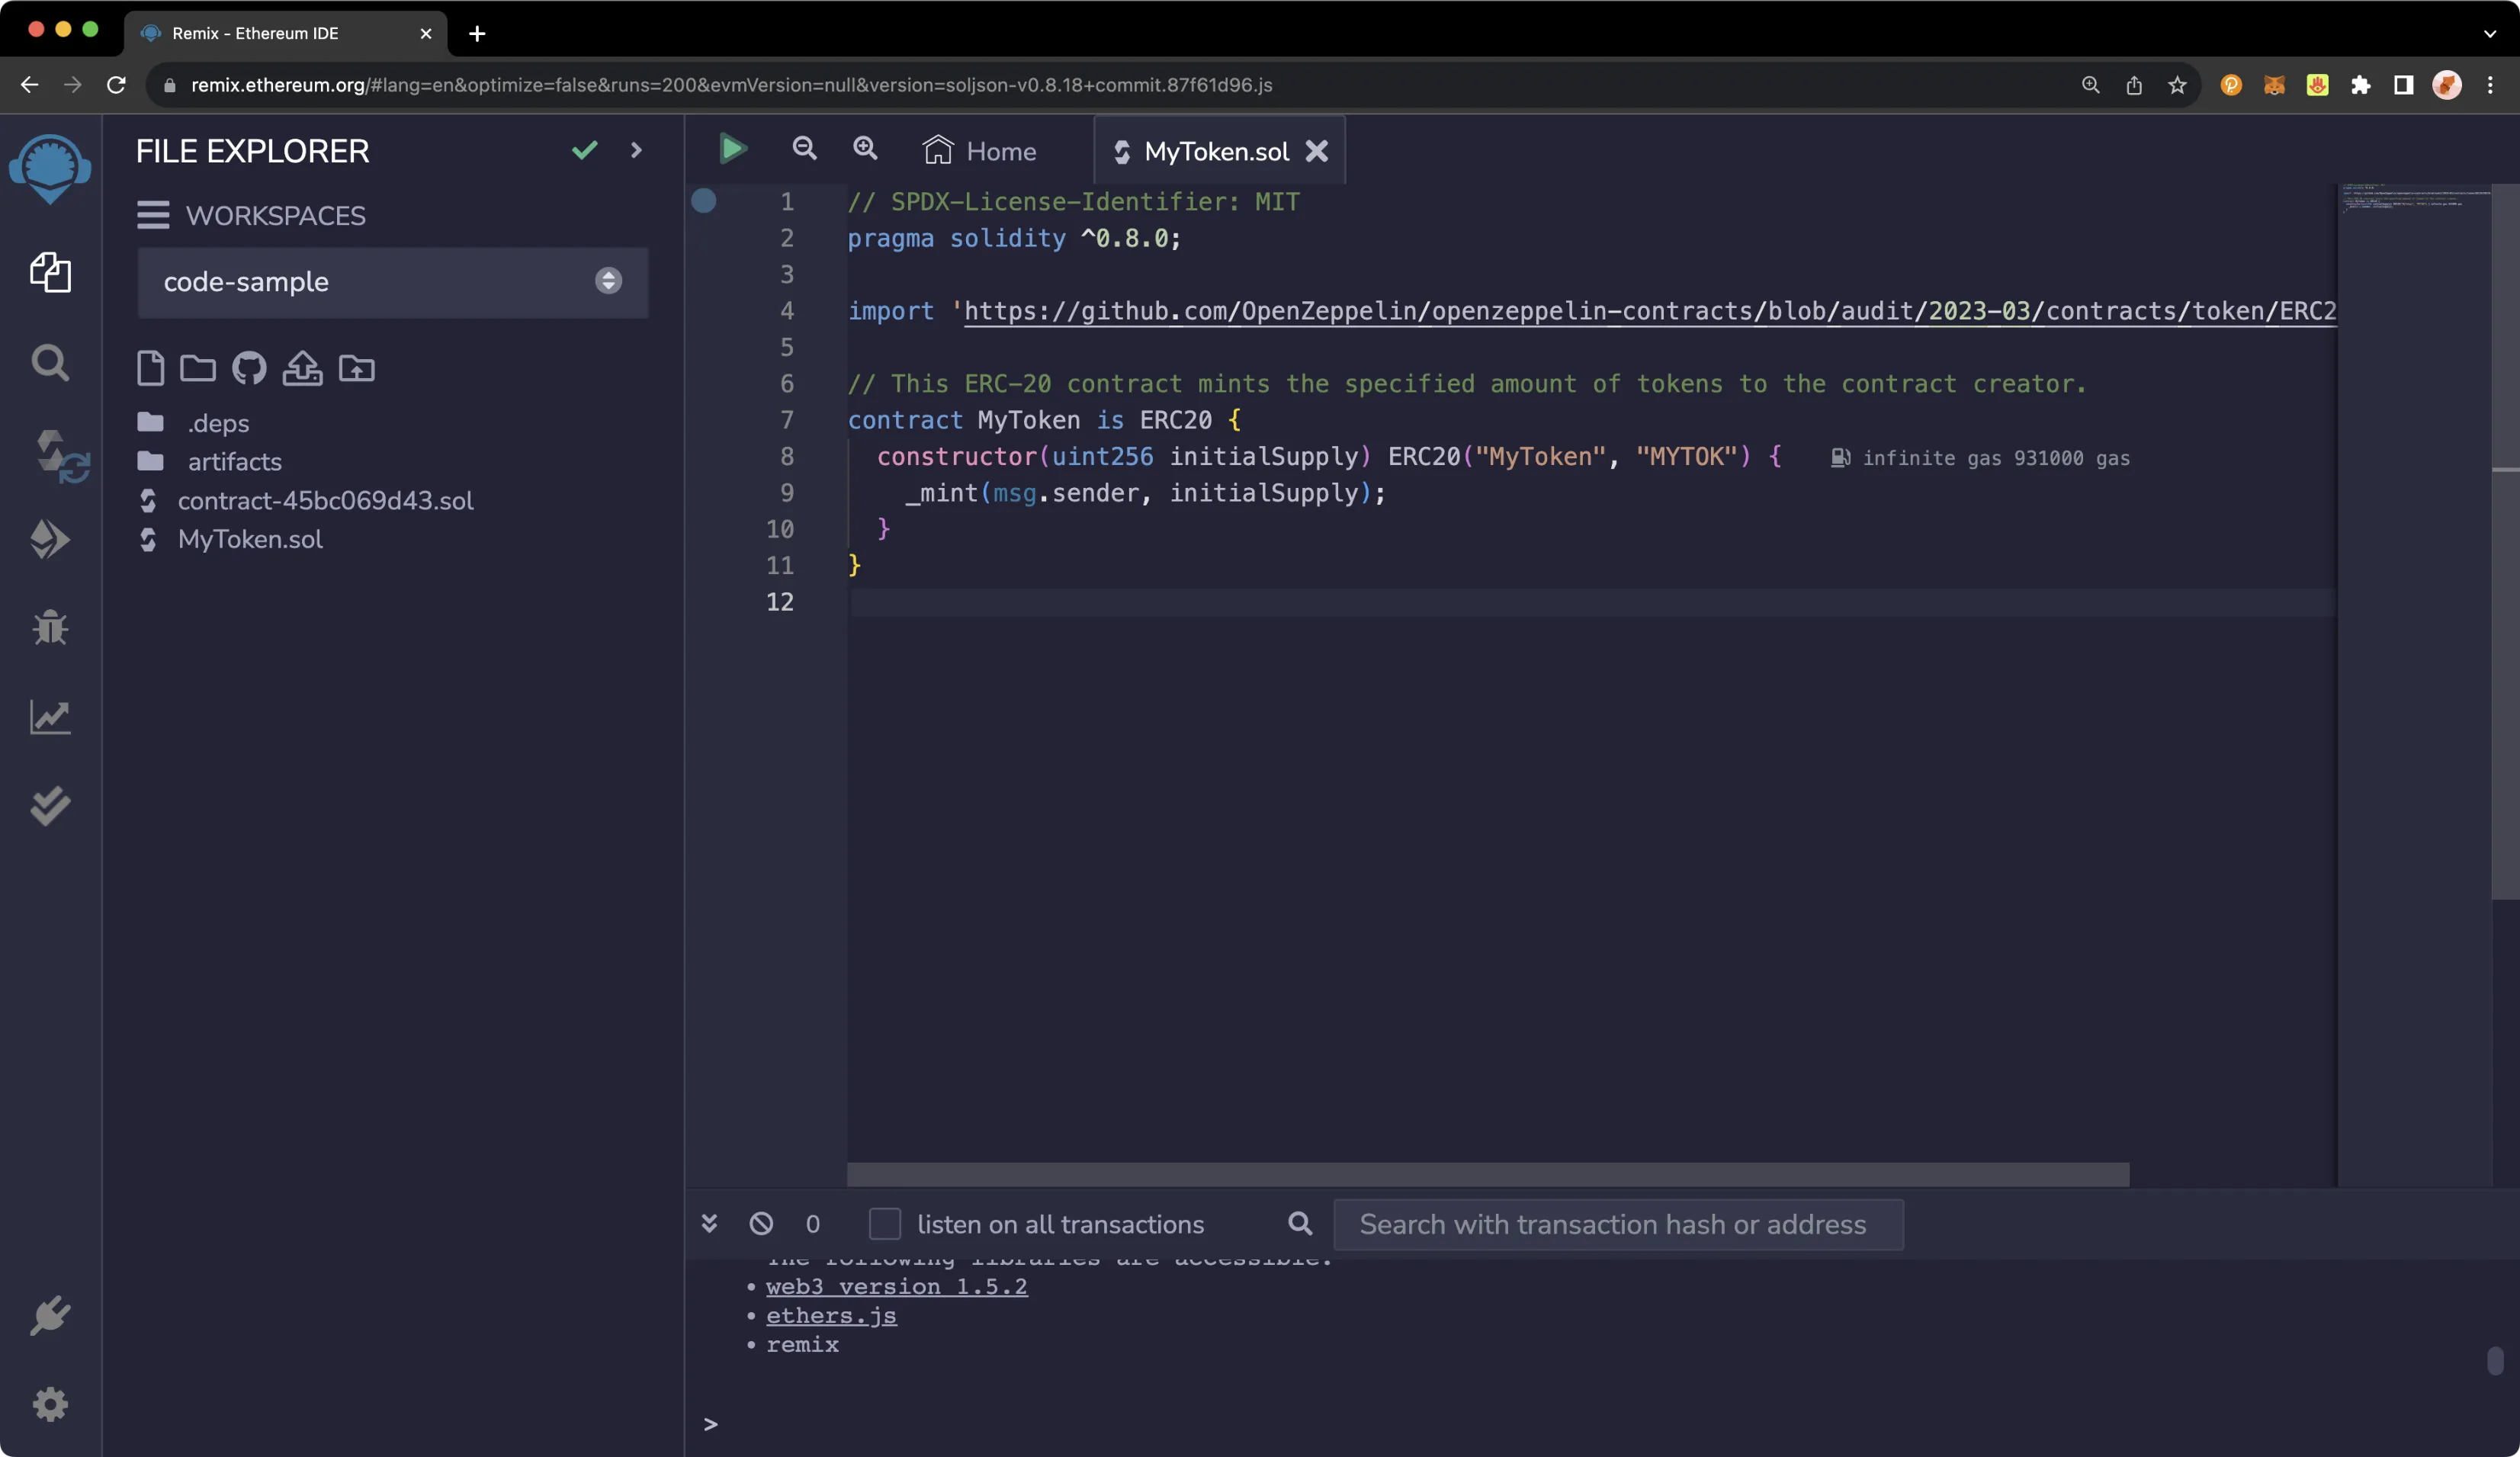
This is a simple ERC-20 contract based on the current OpenZeppelin ERC-20 template. It creates MyToken with symbol MYTOK and mints the entirety of the initial supply to the creator of the contract.
To compile your smart contract, take the following steps:
- Navigate to the Solidity compiler tab
- Press the Compile MyToken.sol button
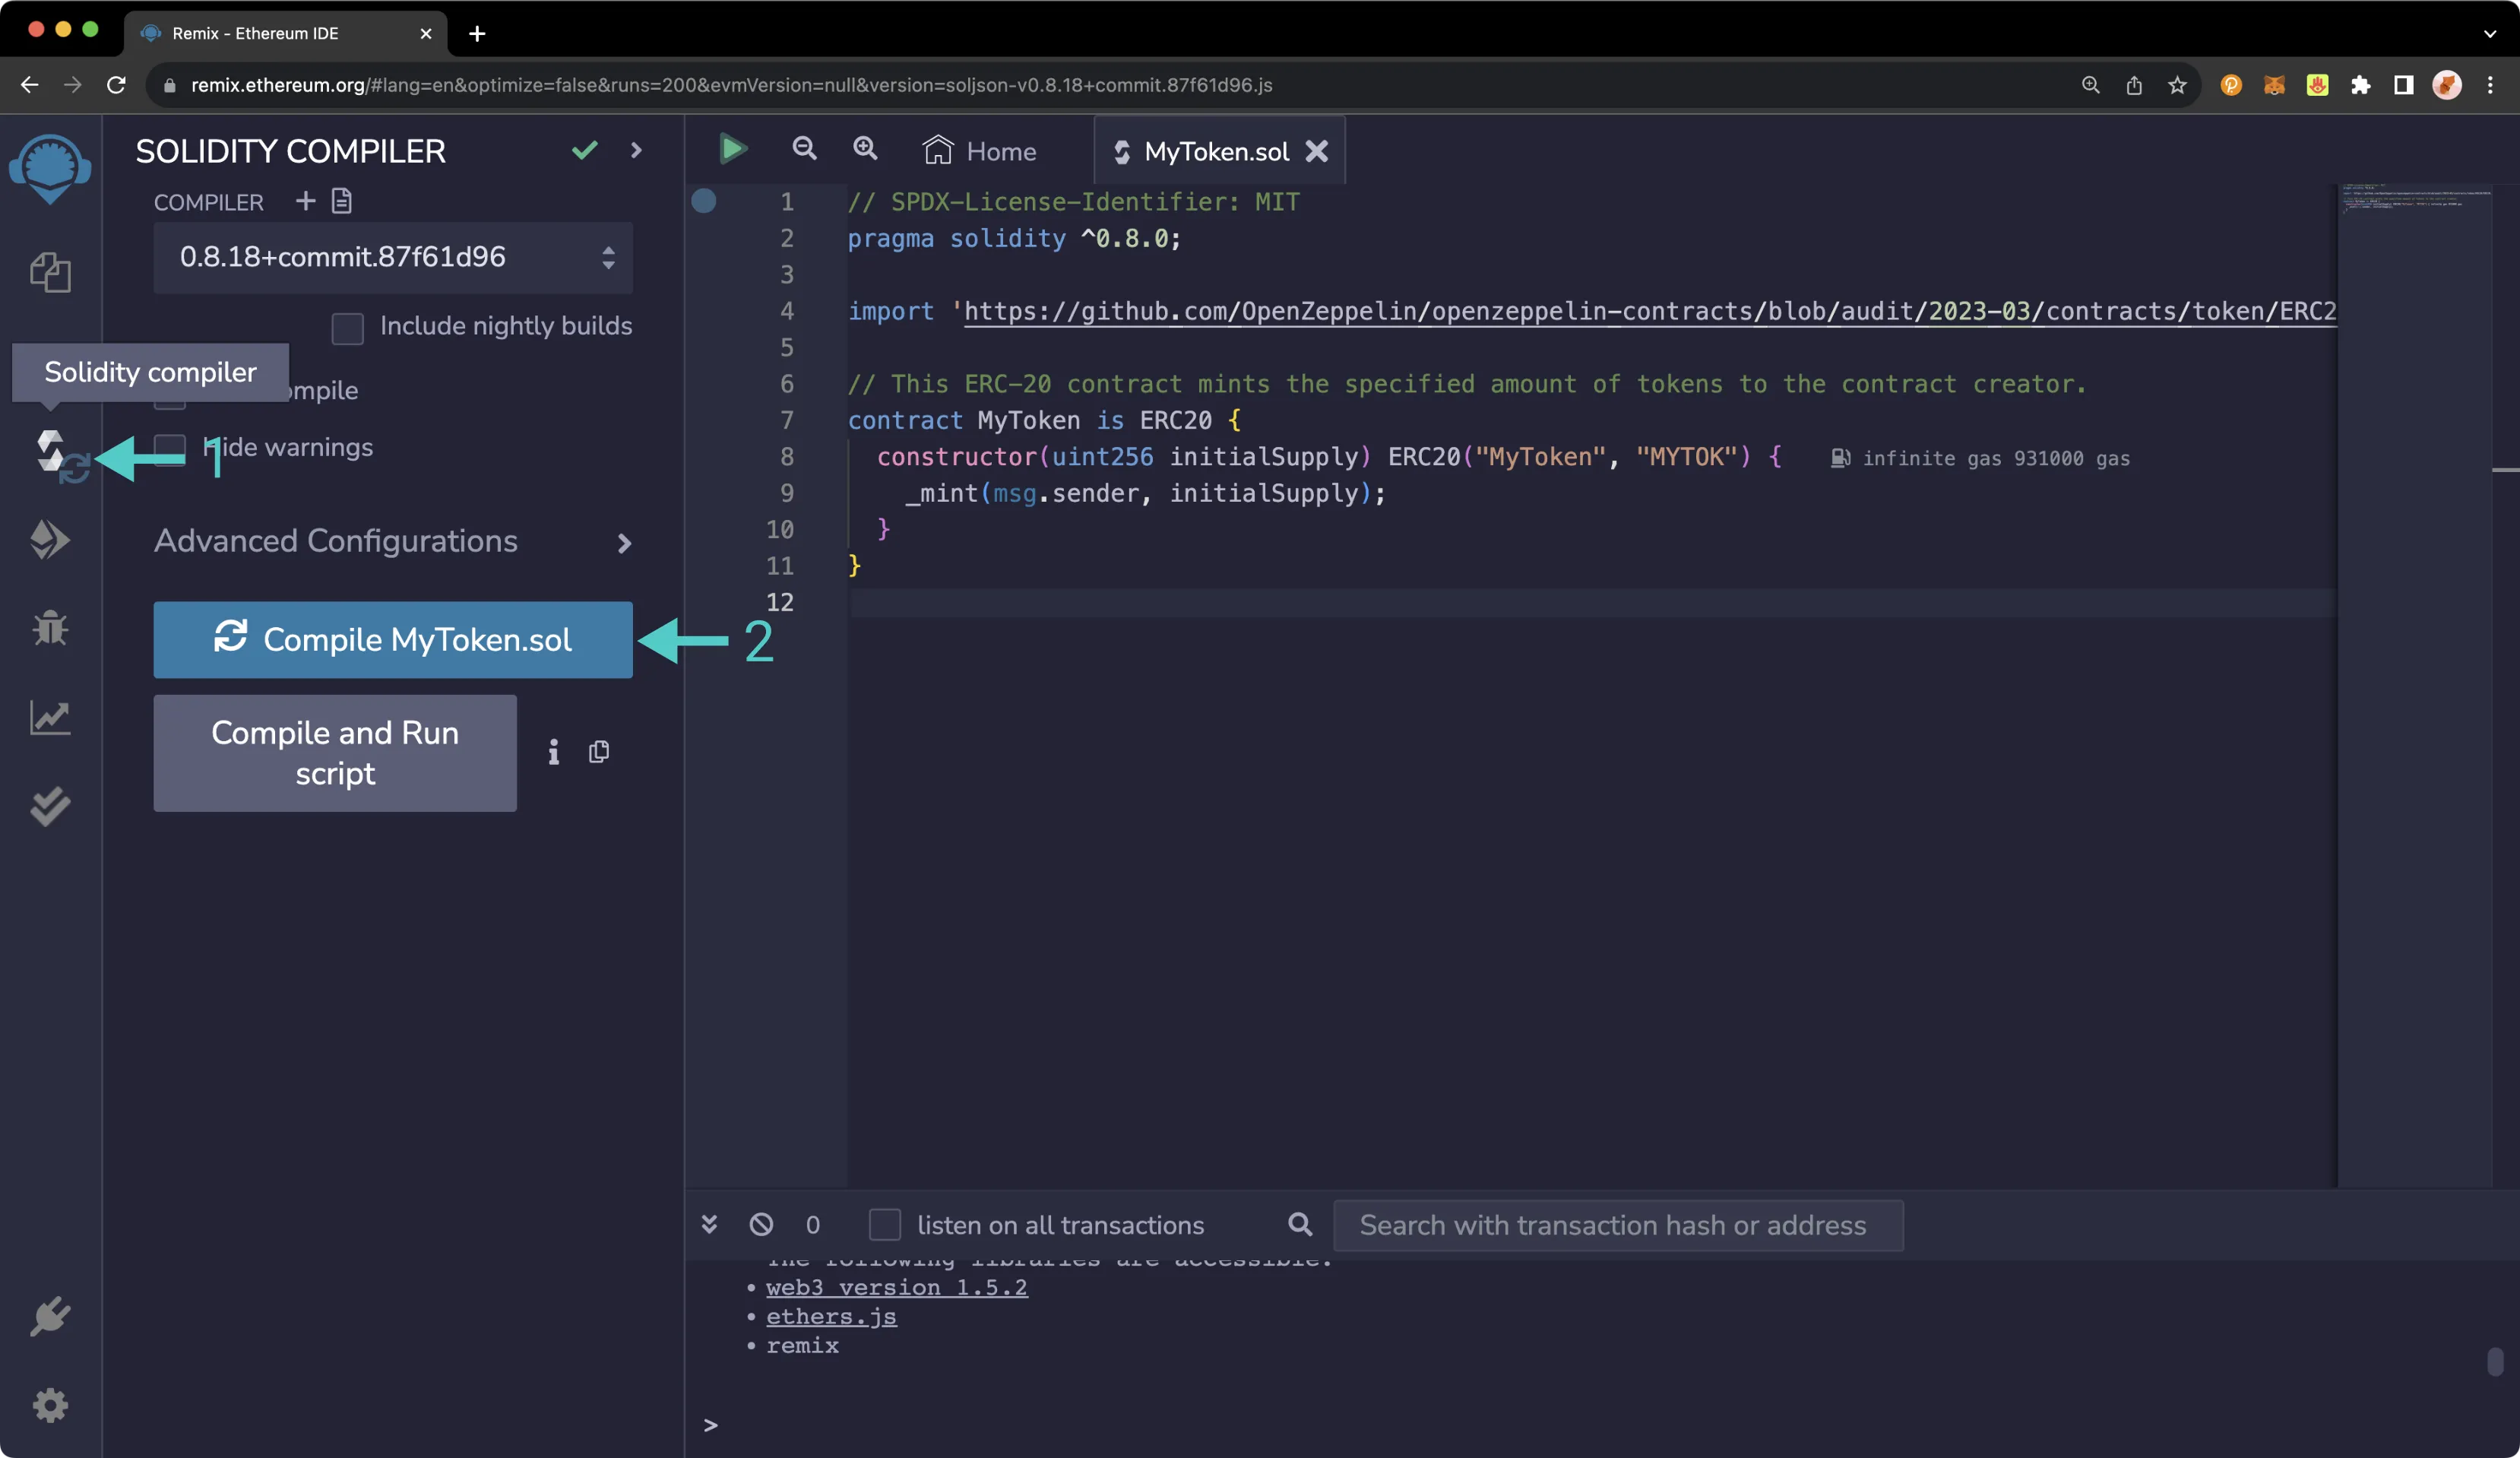
Your contract is now compiled and ready to be deployed to your Tanssi network.
Deploying a Contract to Your Network Using Remix
Now you can deploy the contract by navigating to the Deployment sidebar option. You need to change the topmost ENVIRONMENT dropdown from JavaScript VM to Injected Web3. This tells Remix to use the MetaMask injected provider, which will point it to your Tanssi-powered EVM network, so long as the selected network in your MetaMask is your Tanssi EVM network. If you need to change your network in MetaMask, you can easily do so, and Remix will update your account balances to reflect the network change.

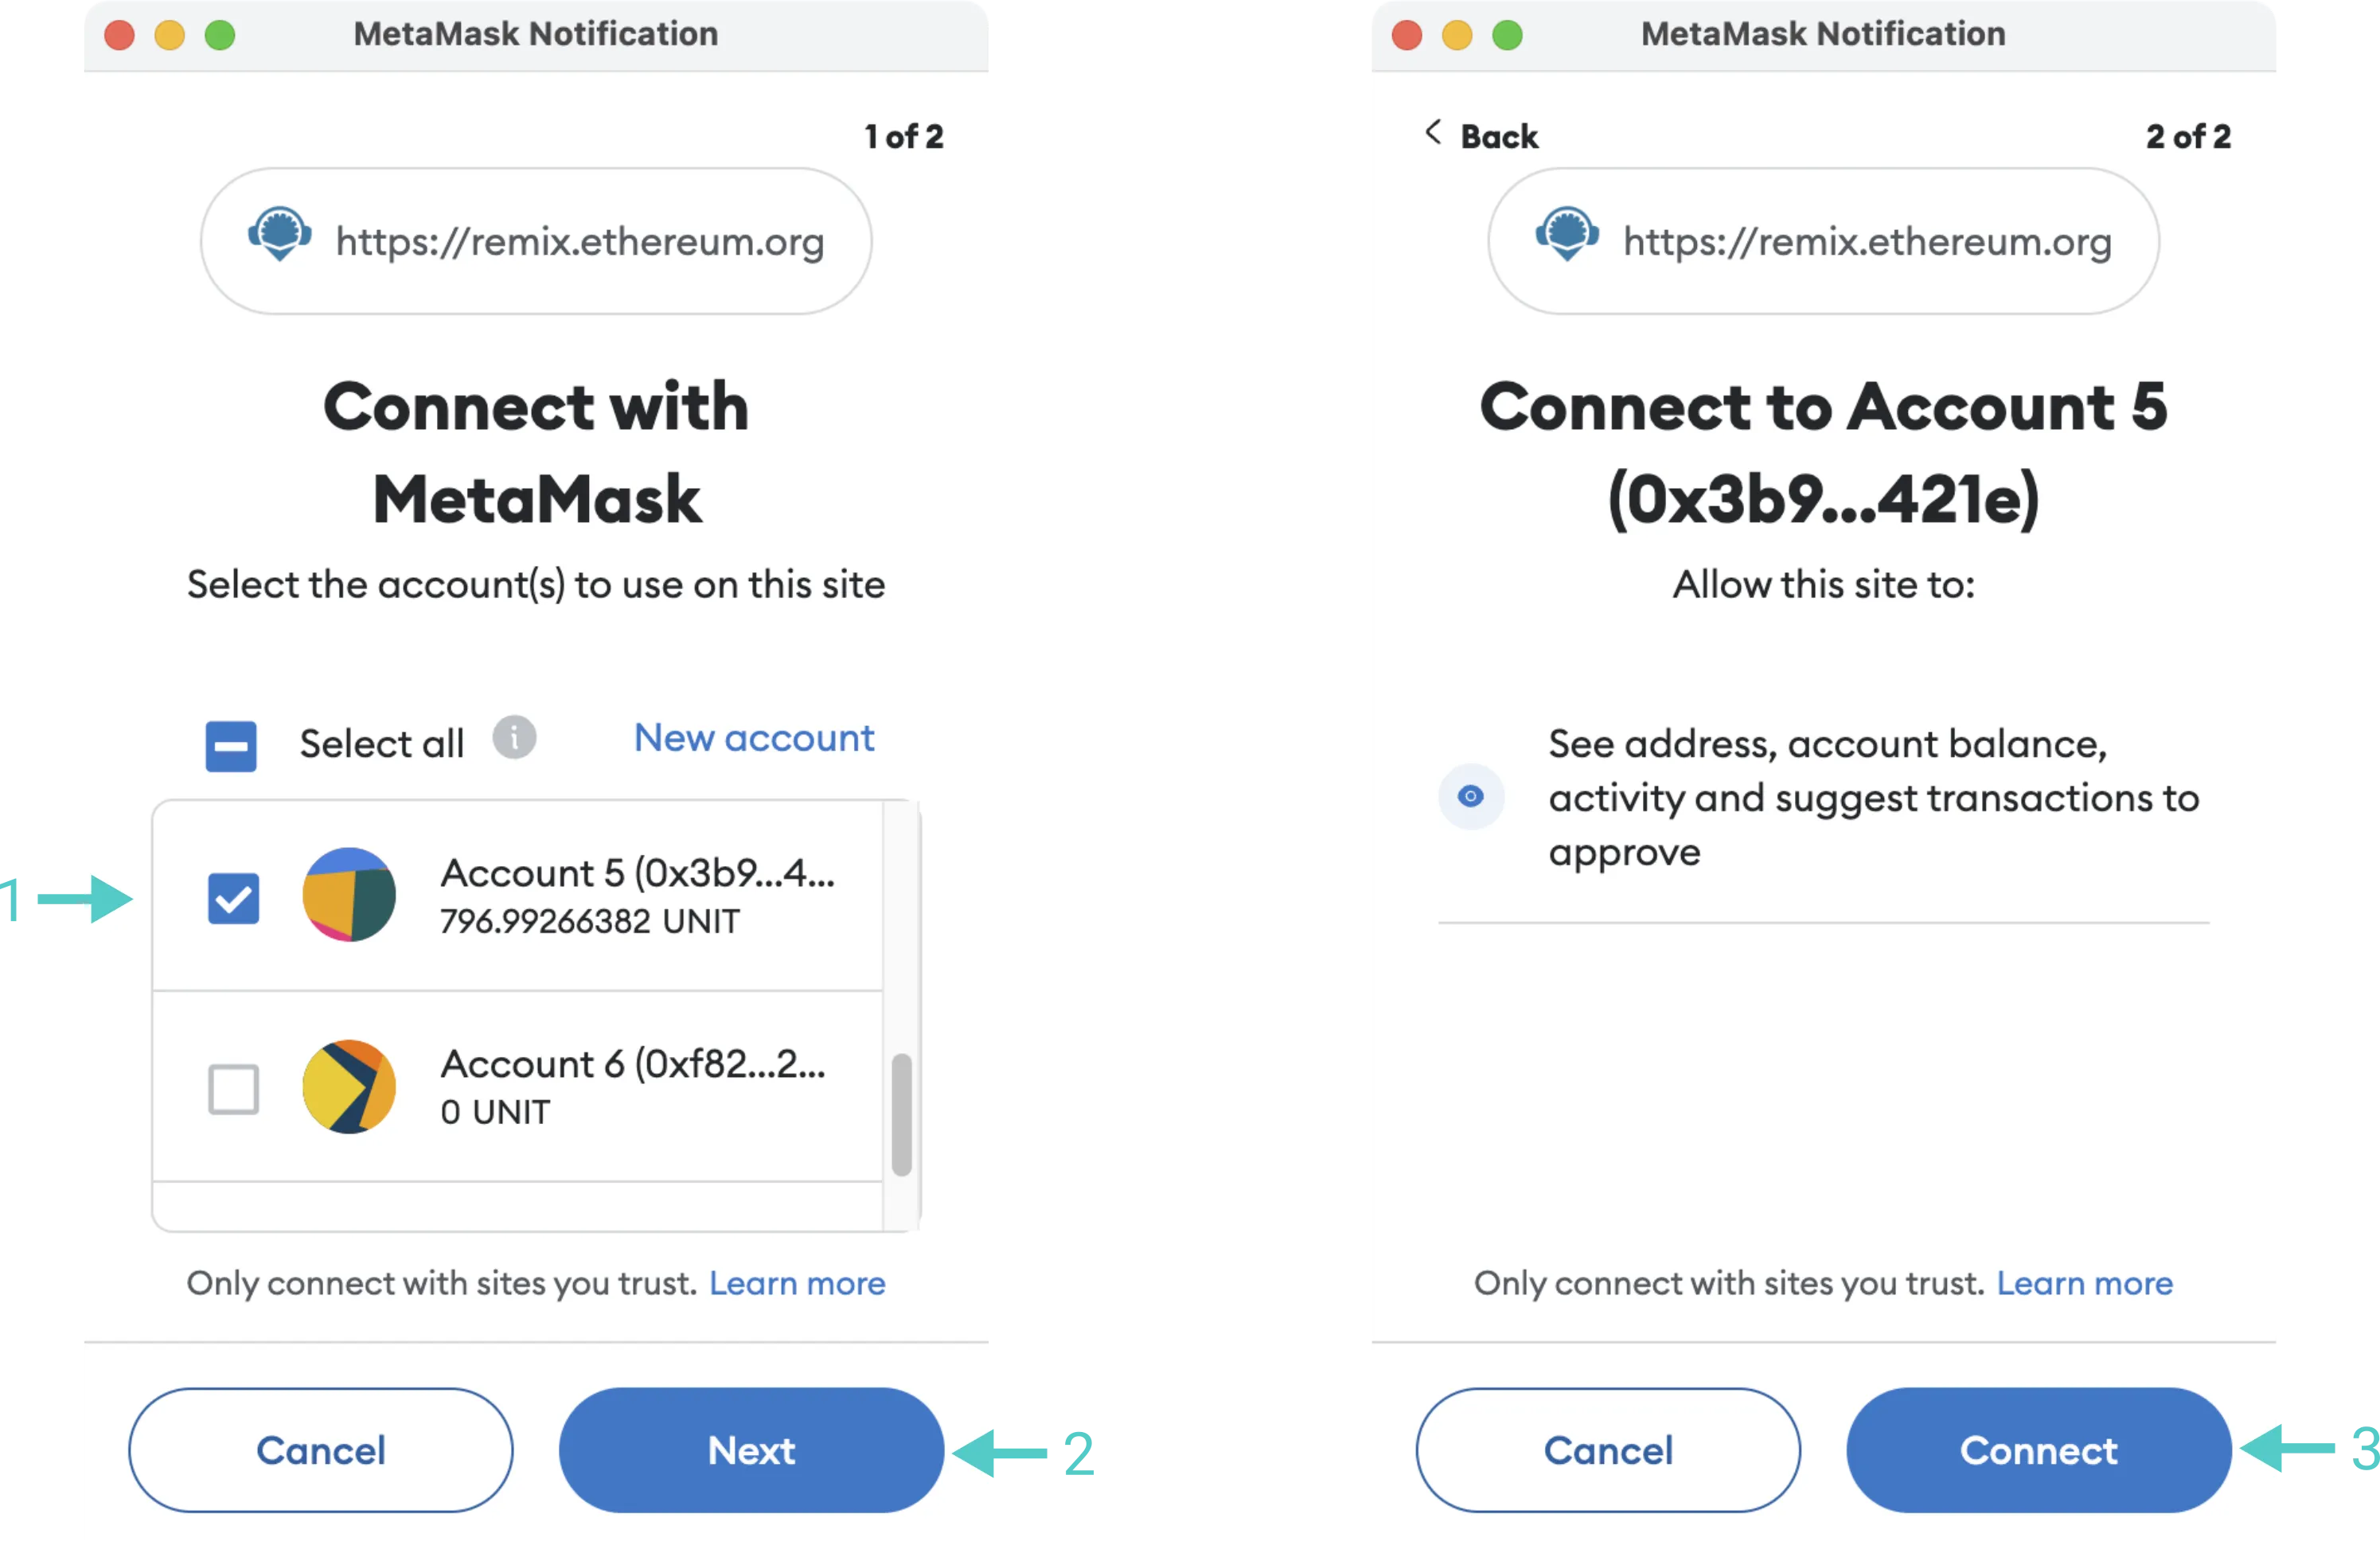
As soon as you select Injected Web3, you will be prompted to allow Remix to connect to your MetaMask account. Then, take the following steps:
- Select the account(s) that you would like to use with Remix
- Press Next
- Press Connect
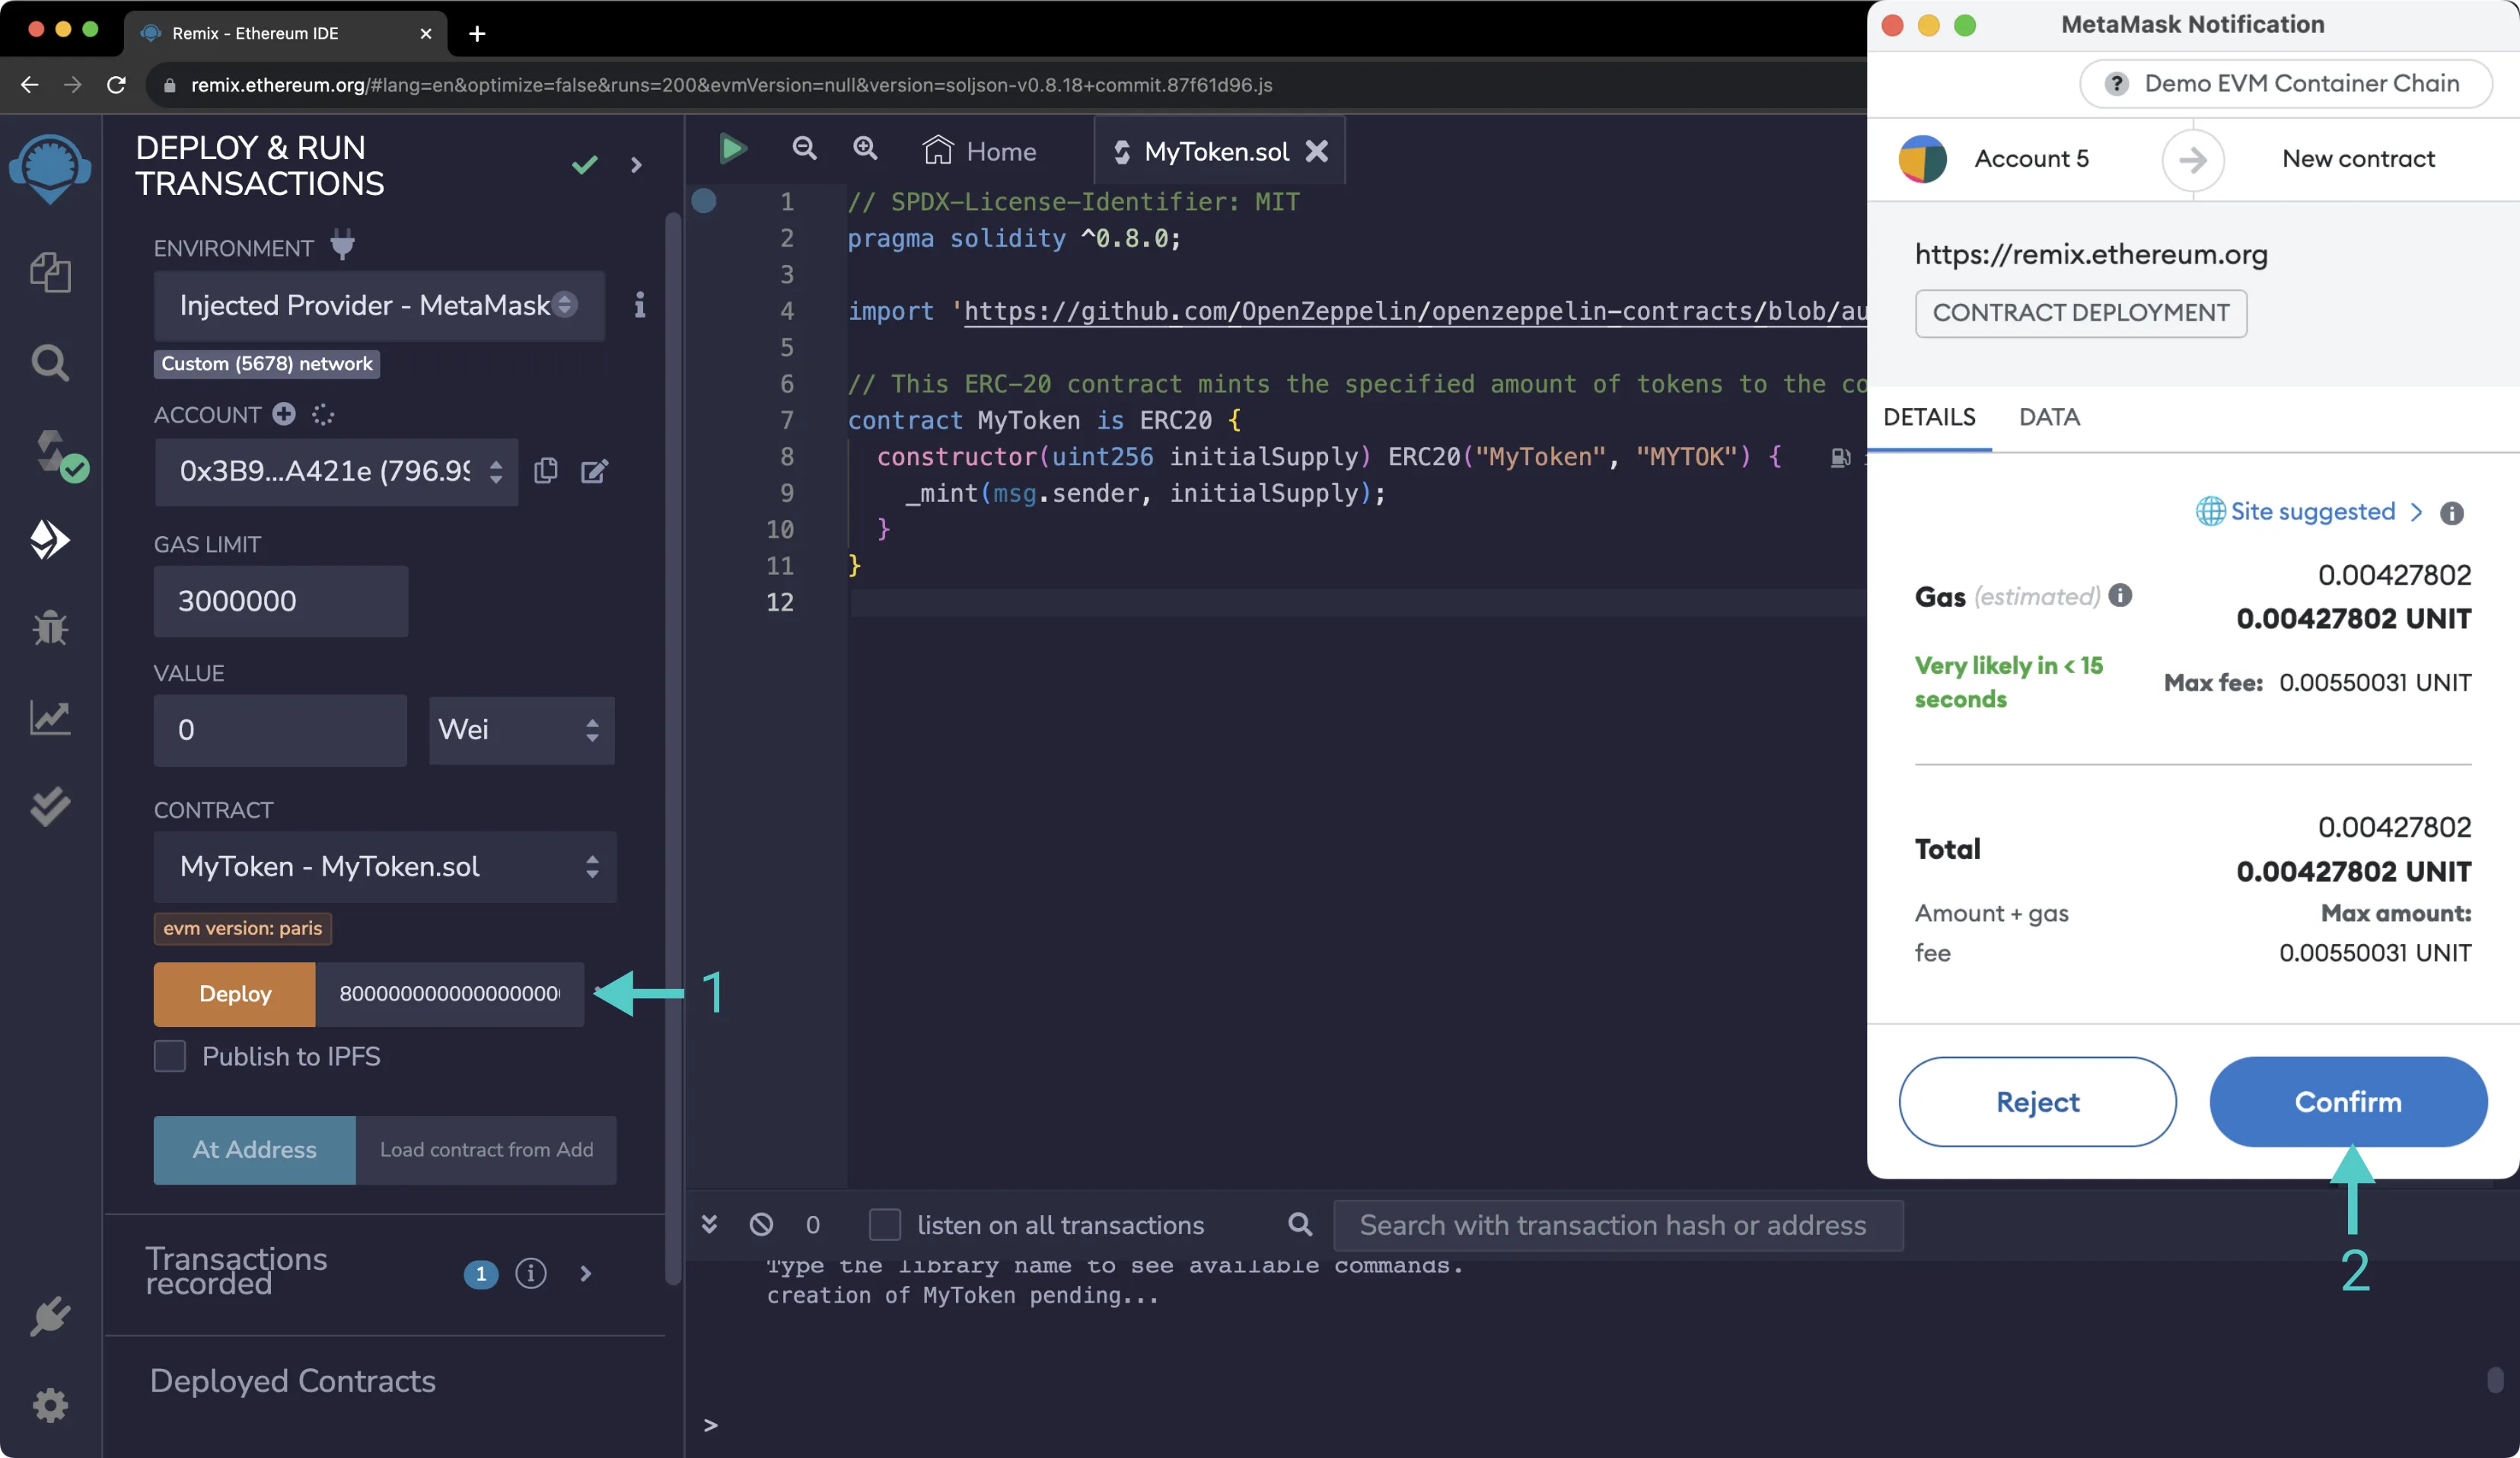
Back on Remix, you should see the account you wish to use for deployment is now managed by MetaMask. To deploy your token contract, take the following steps:
- Next to the Deploy button, specify an initial supply of 8 million tokens. Since this contract uses the default of 18 decimals, the value to put in the box is
8000000000000000000000000. Once you have entered this value, press Deploy - Confirm the contract deployment transaction in MetaMask.
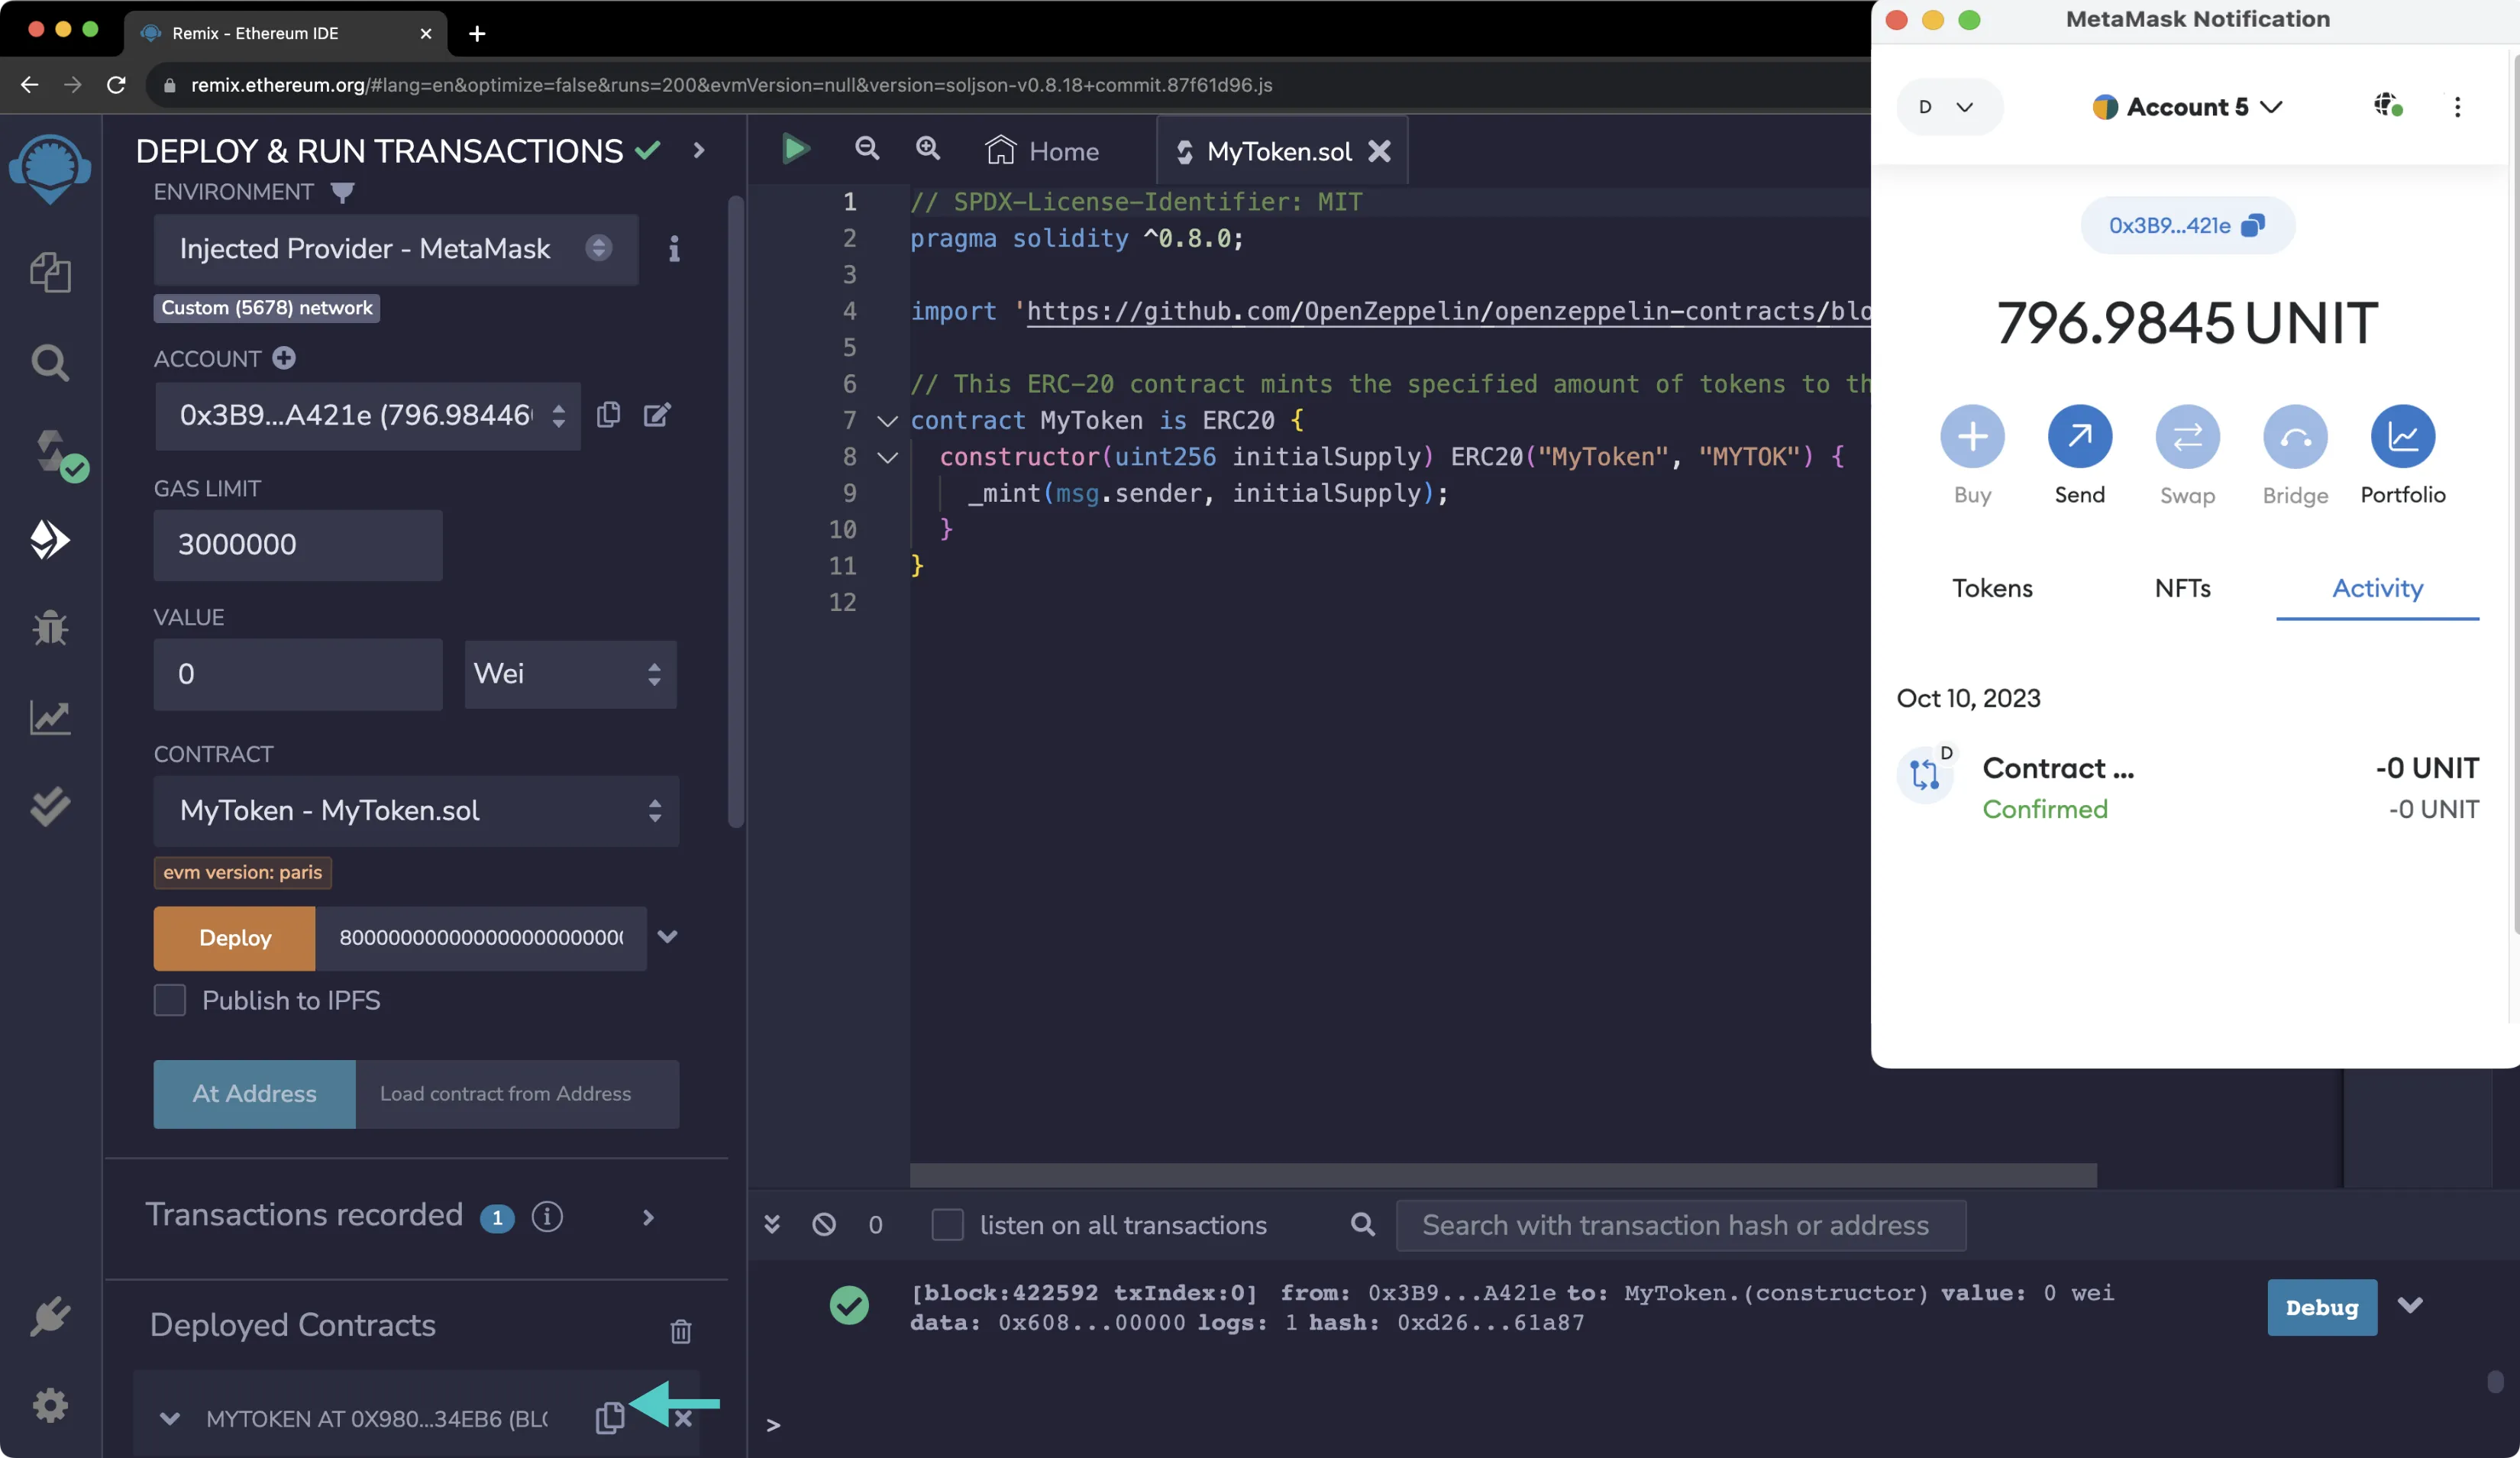
After you press Confirm and the deployment is complete, you will see the transaction listed in MetaMask. The contract will appear under Deployed Contracts in Remix. You can access the address of the deployed contract by pressing the copy button.
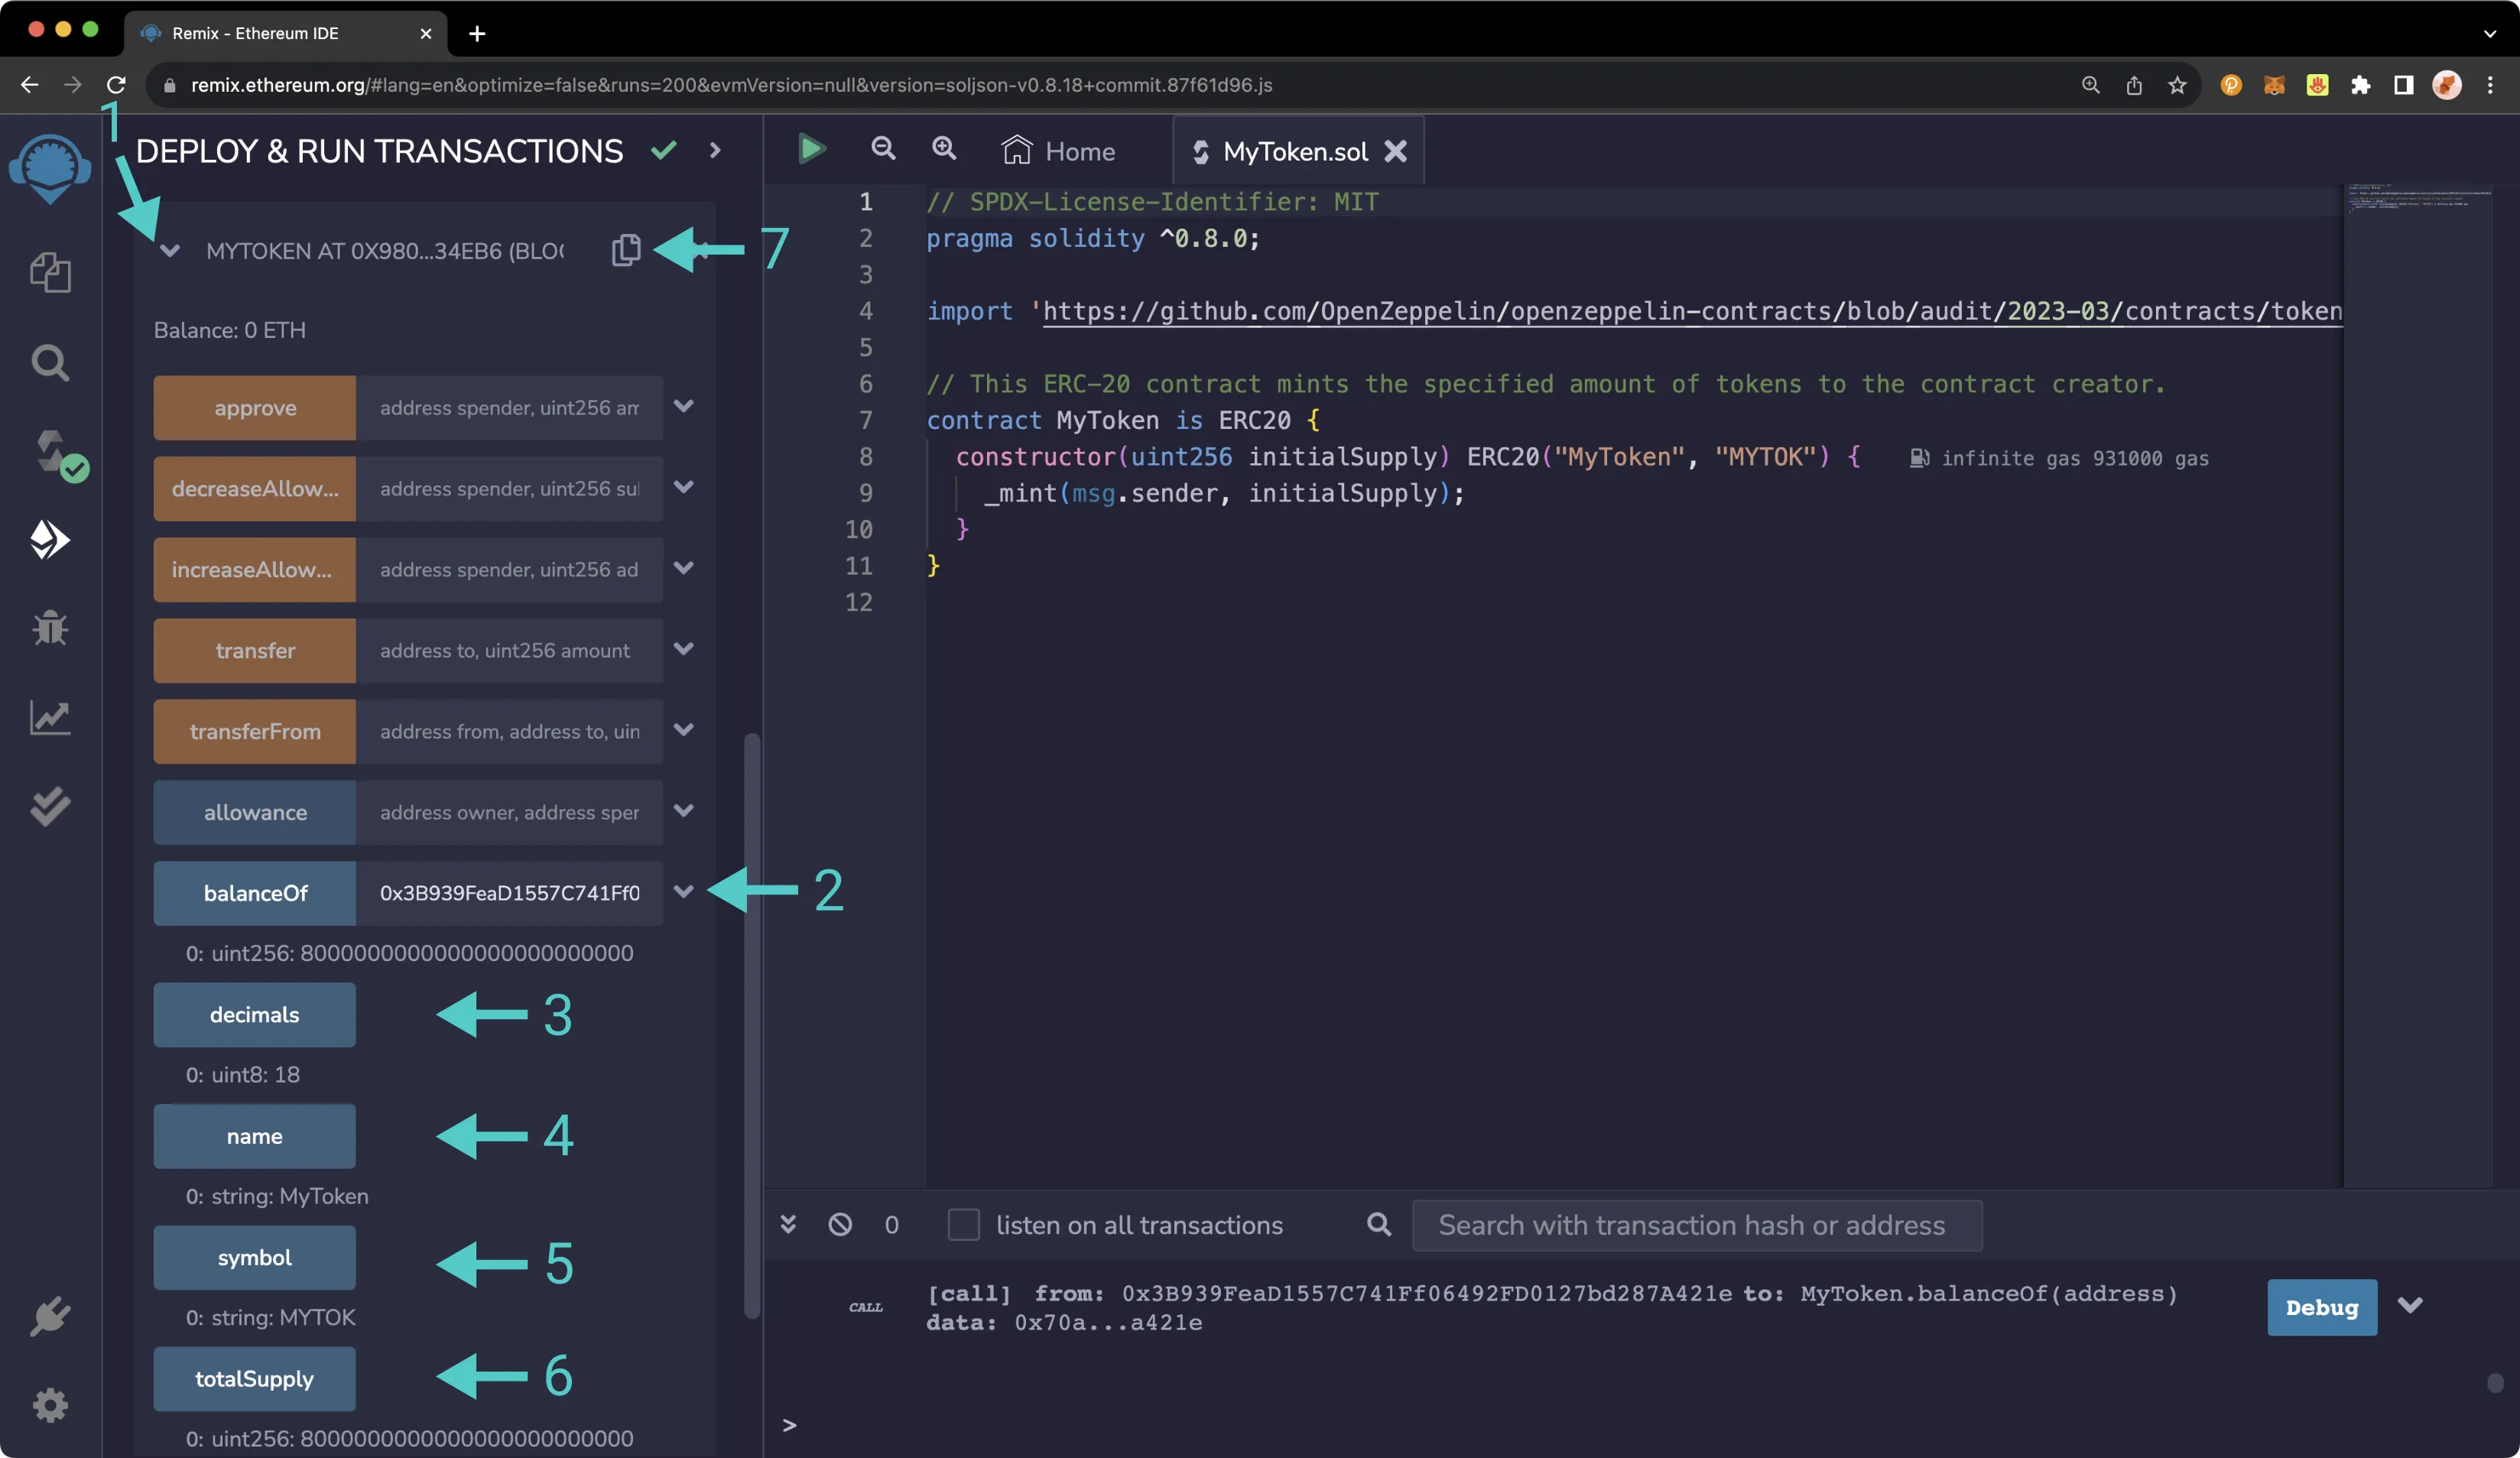
Once the contract is deployed, you can interact with it from within Remix. To familiarize yourself with interacting with a smart contract from Remix, take the following steps:
- Expand the contract under the Deployed Contracts section
- Paste in your address (the address that deployed the token contract) next to the balanceOf method and press balanceOf. You should see the entirety of the balance of the ERC-20 belonging to that address
- Press Decimals to see the number of decimal points the token has
- Press Name to see the name you assigned the token
- Press Symbol to see the token symbol
- Press Initial Supply and you should see
8000000000000000000000000 - Copy the contract address by clicking the button next to the contract name and address. You'll need it in the next section
Interacting with an ERC-20 on Your Network from MetaMask
Now, open MetaMask to add the newly deployed ERC-20 tokens. Make sure you are connected to the account that deployed the token contract. Additionally, make sure you have copied the contract's address from Remix.
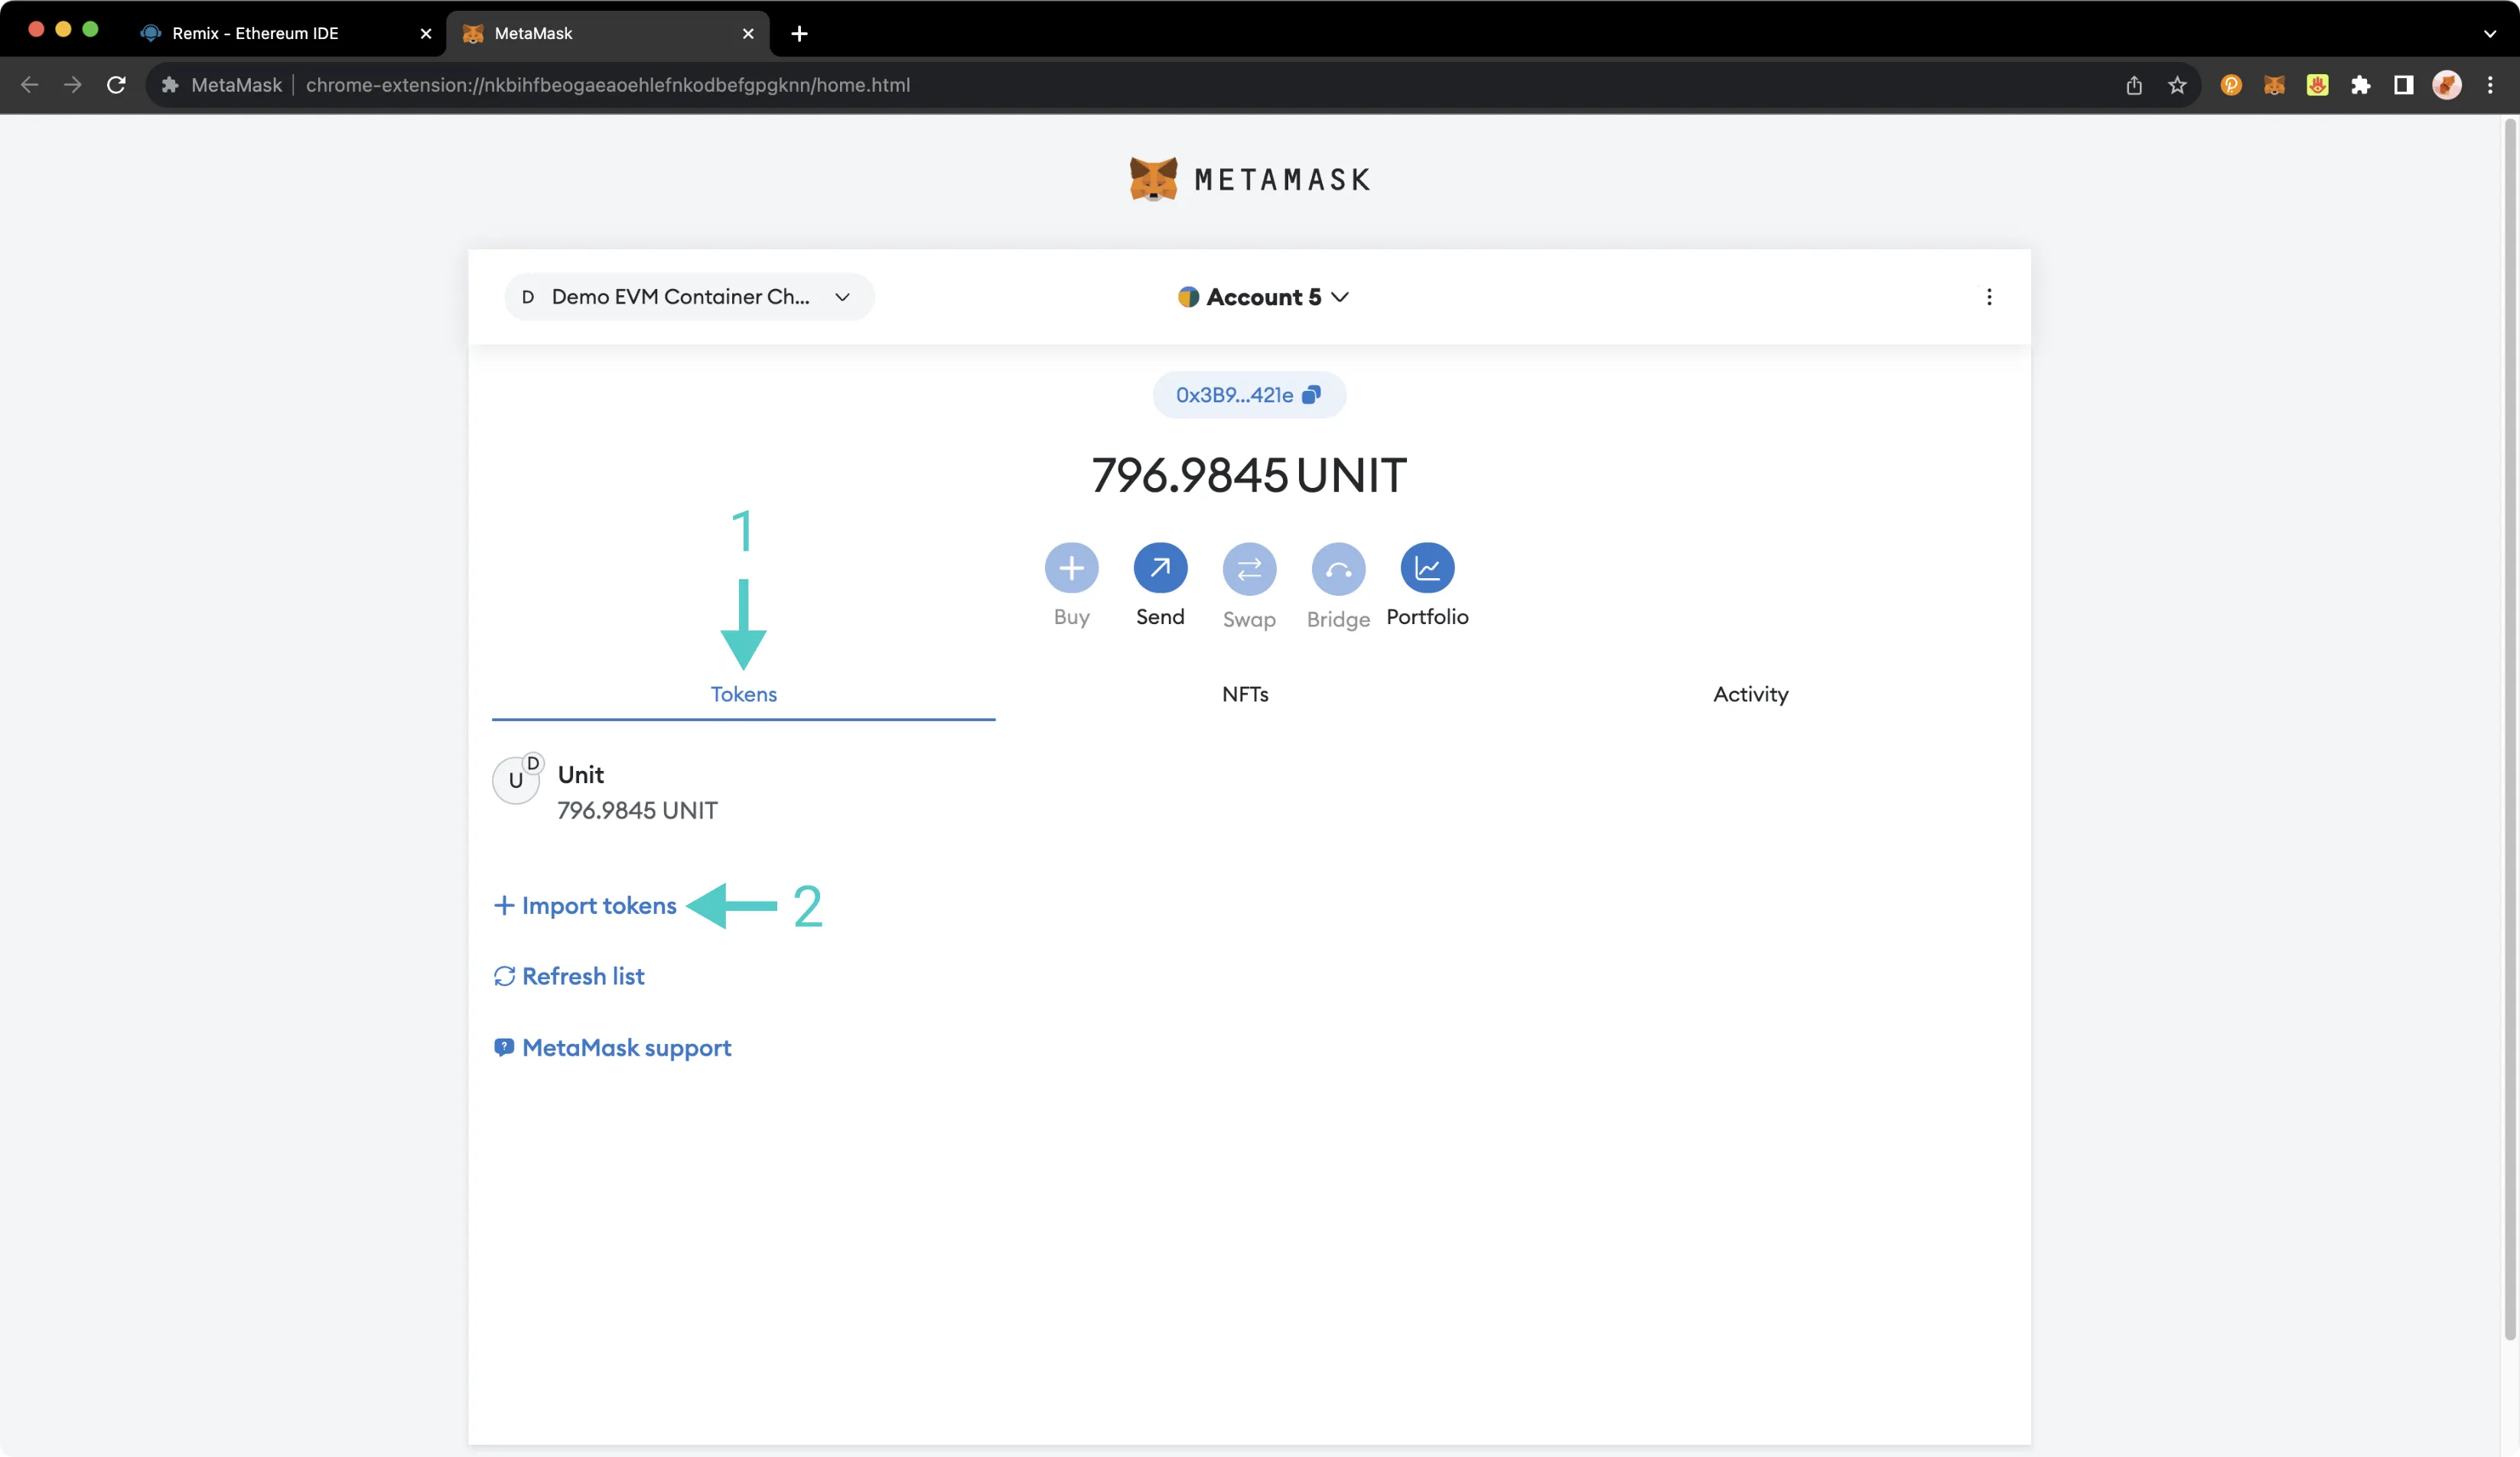
To add the token to MetaMask, take the following steps:
- Click on the Tokens tab as shown below
- Press Import tokens
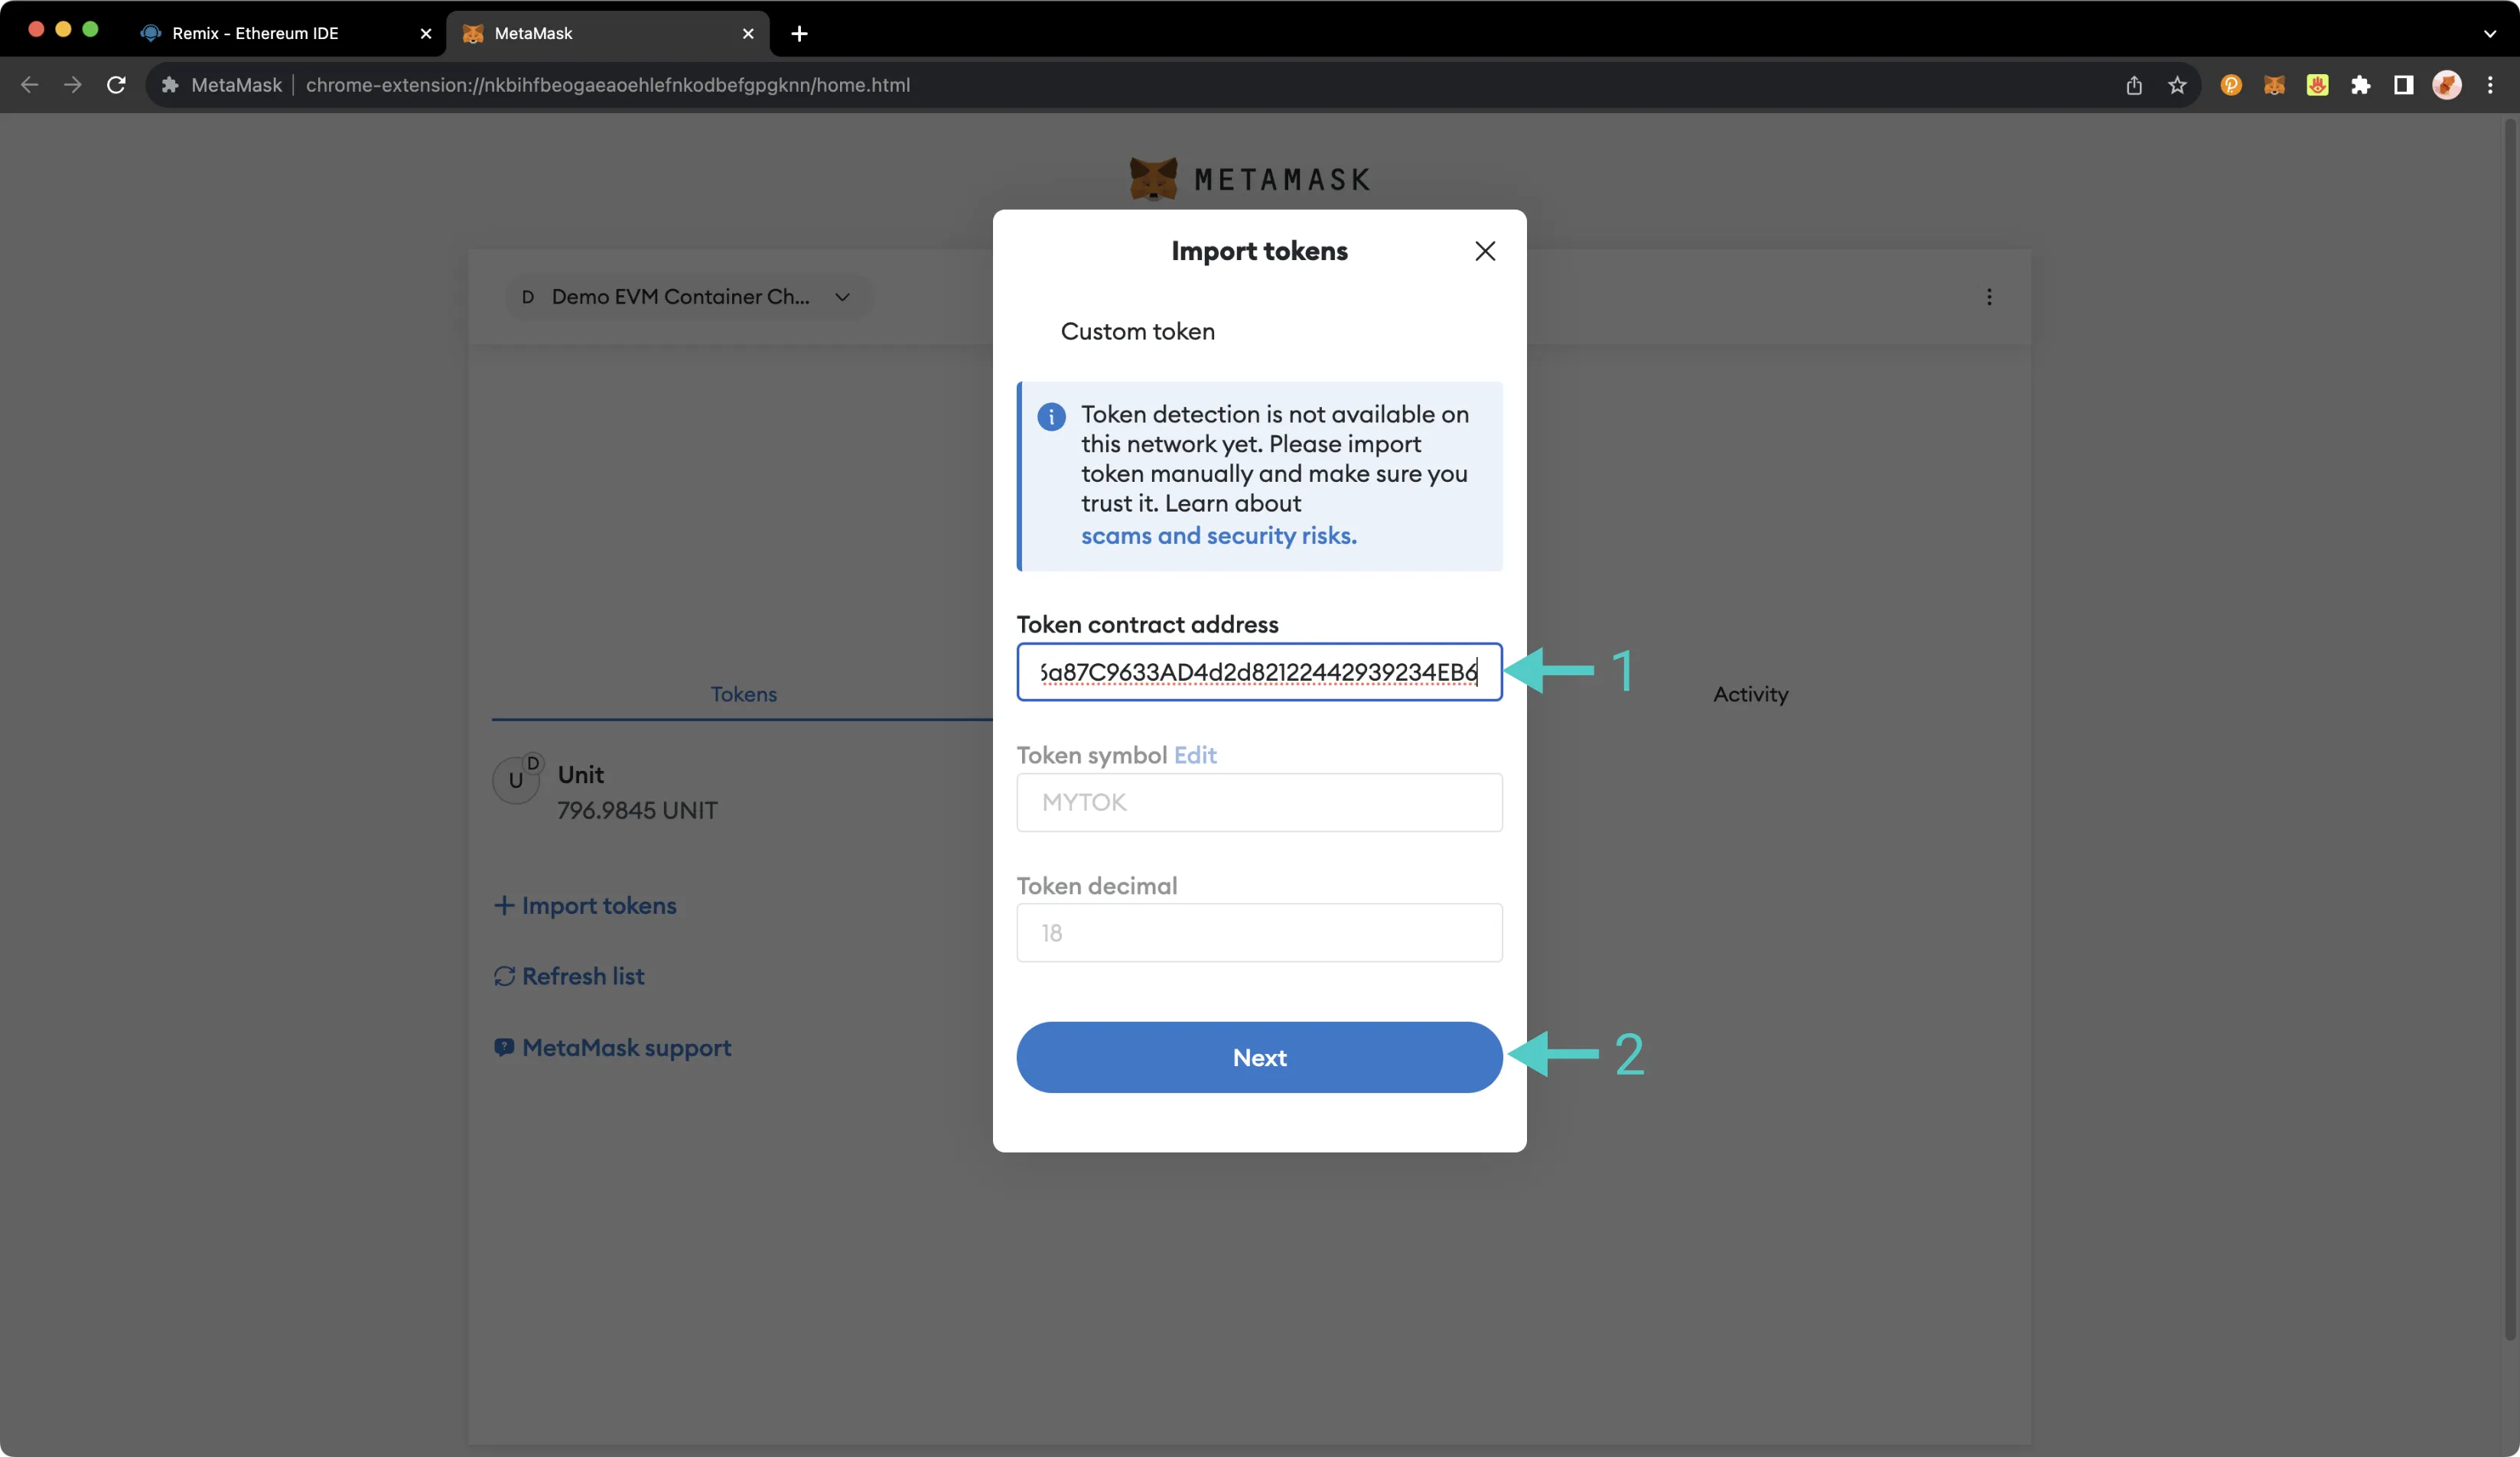
Then, take the following steps:
- Paste the copied contract address into the Token contract address field. The Token symbol and Token decimal fields should be automatically populated
- Press Next
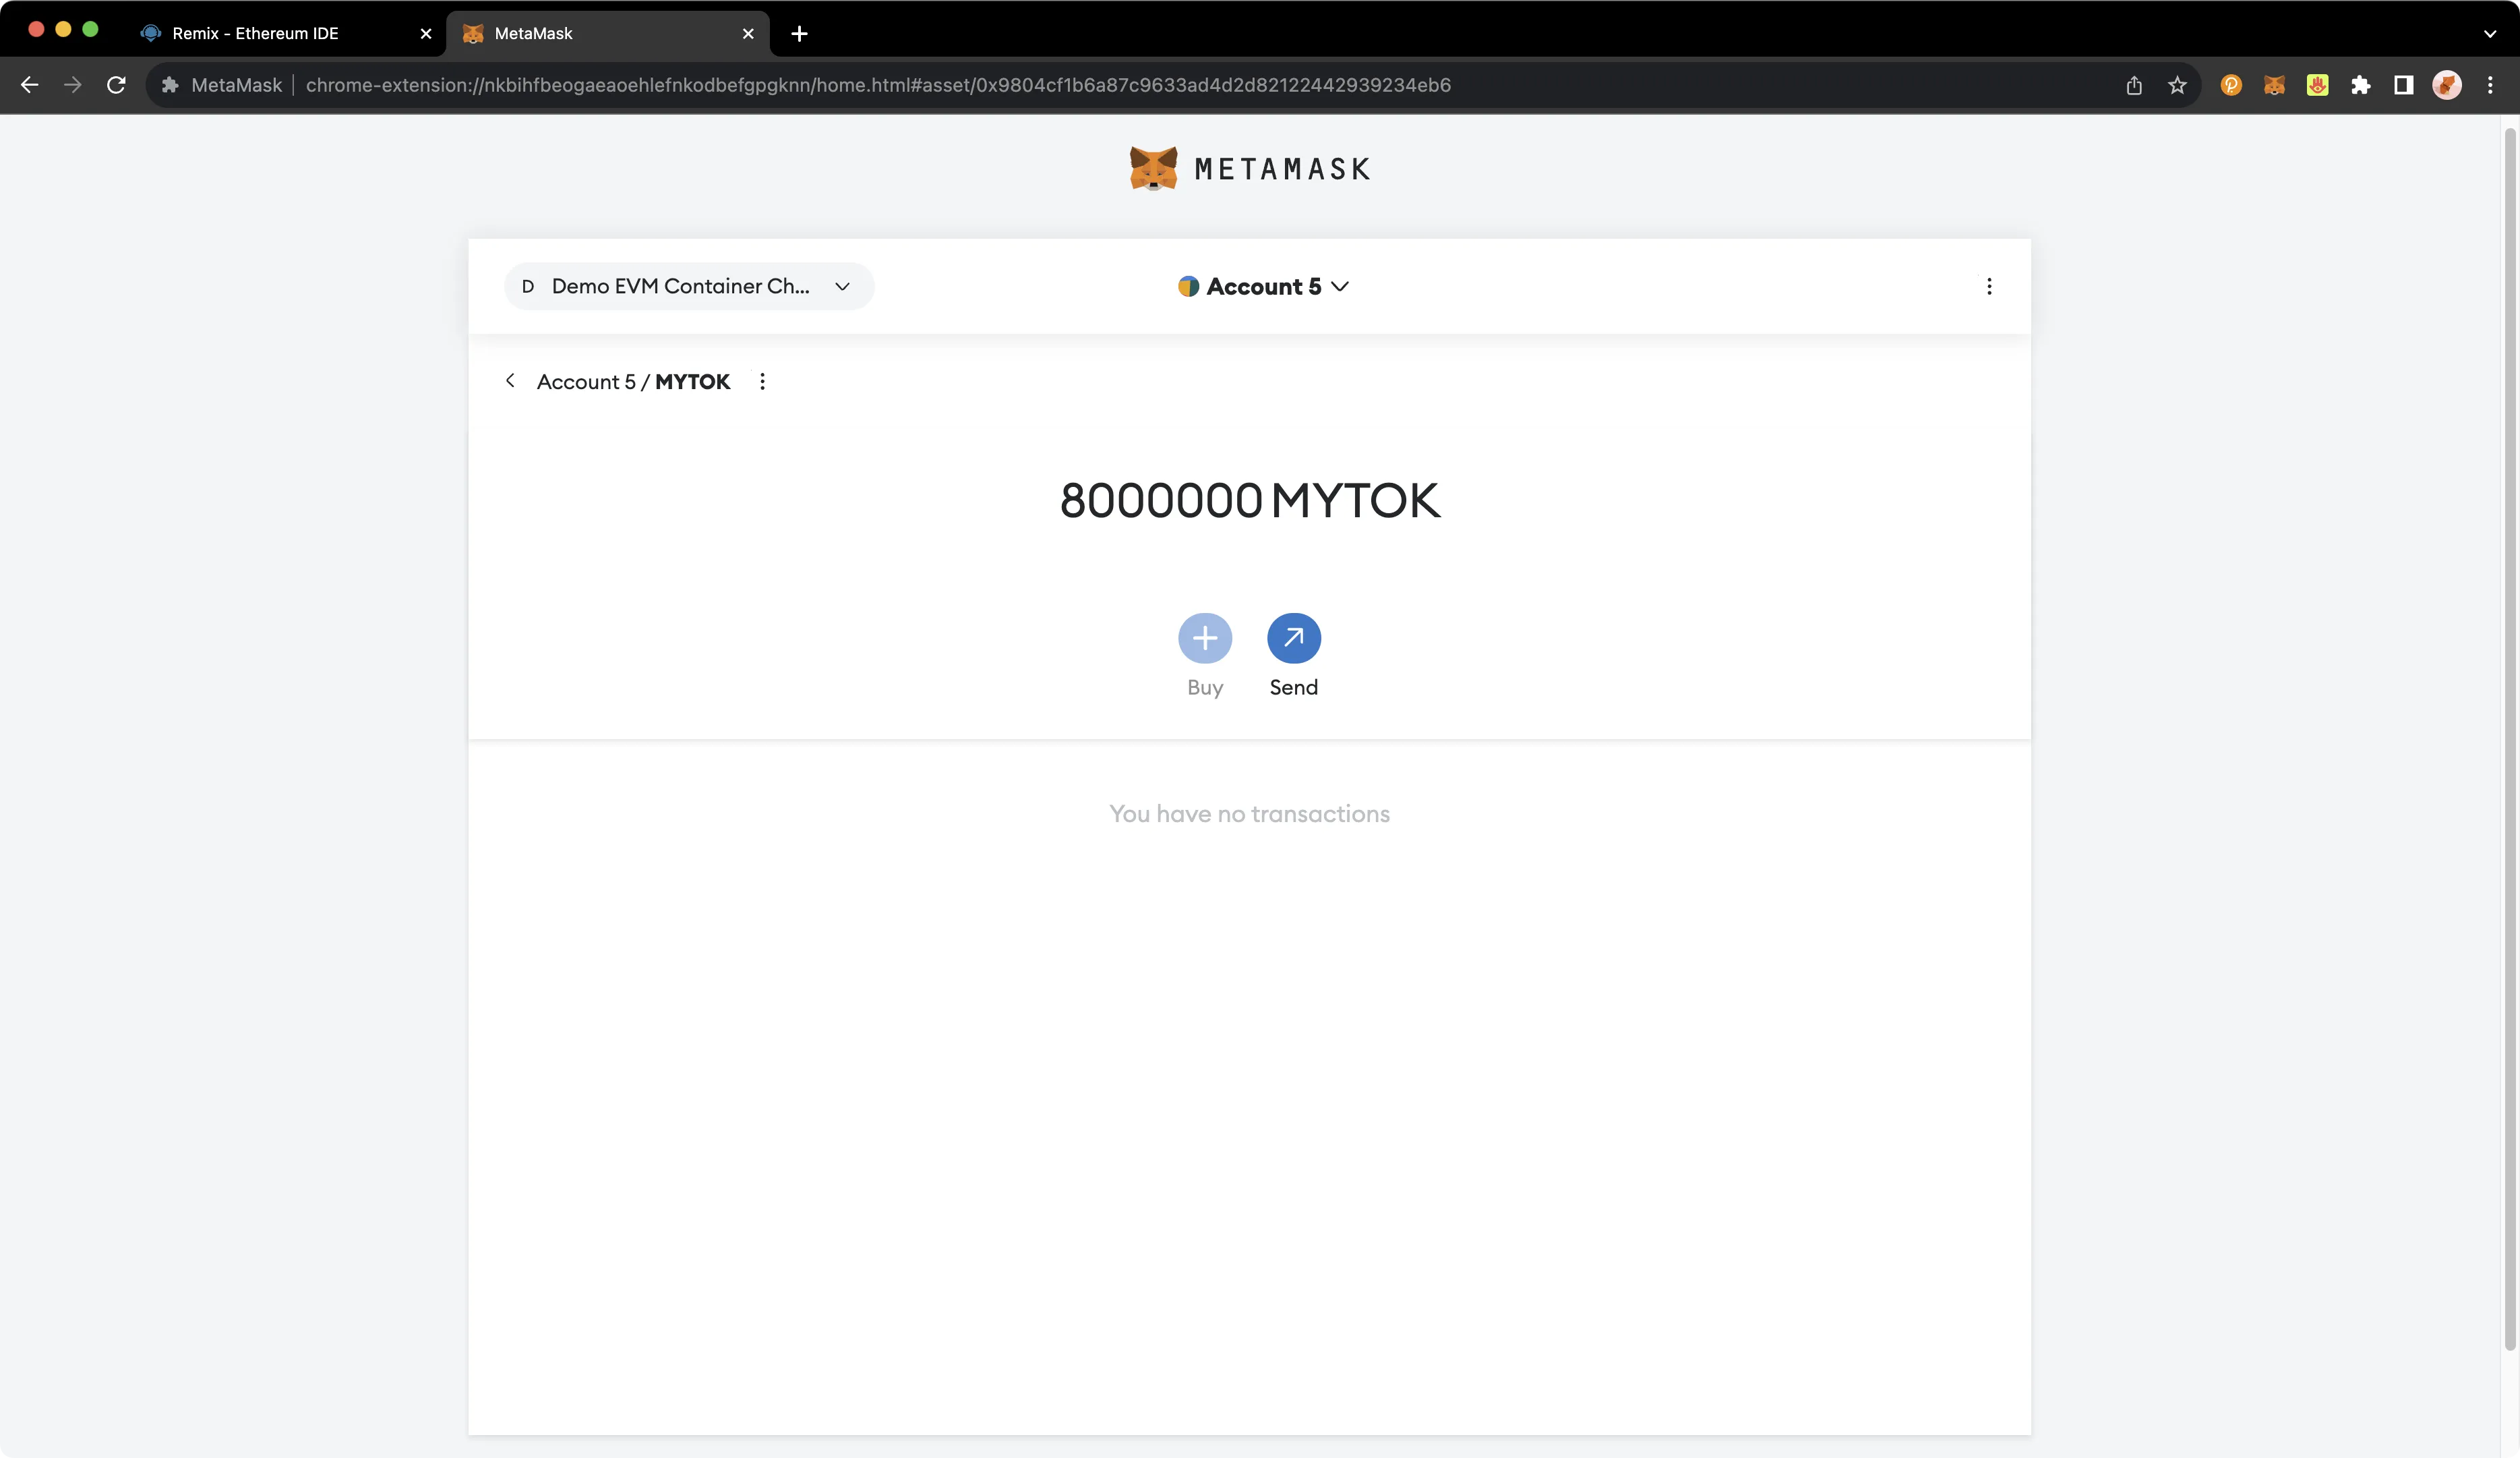
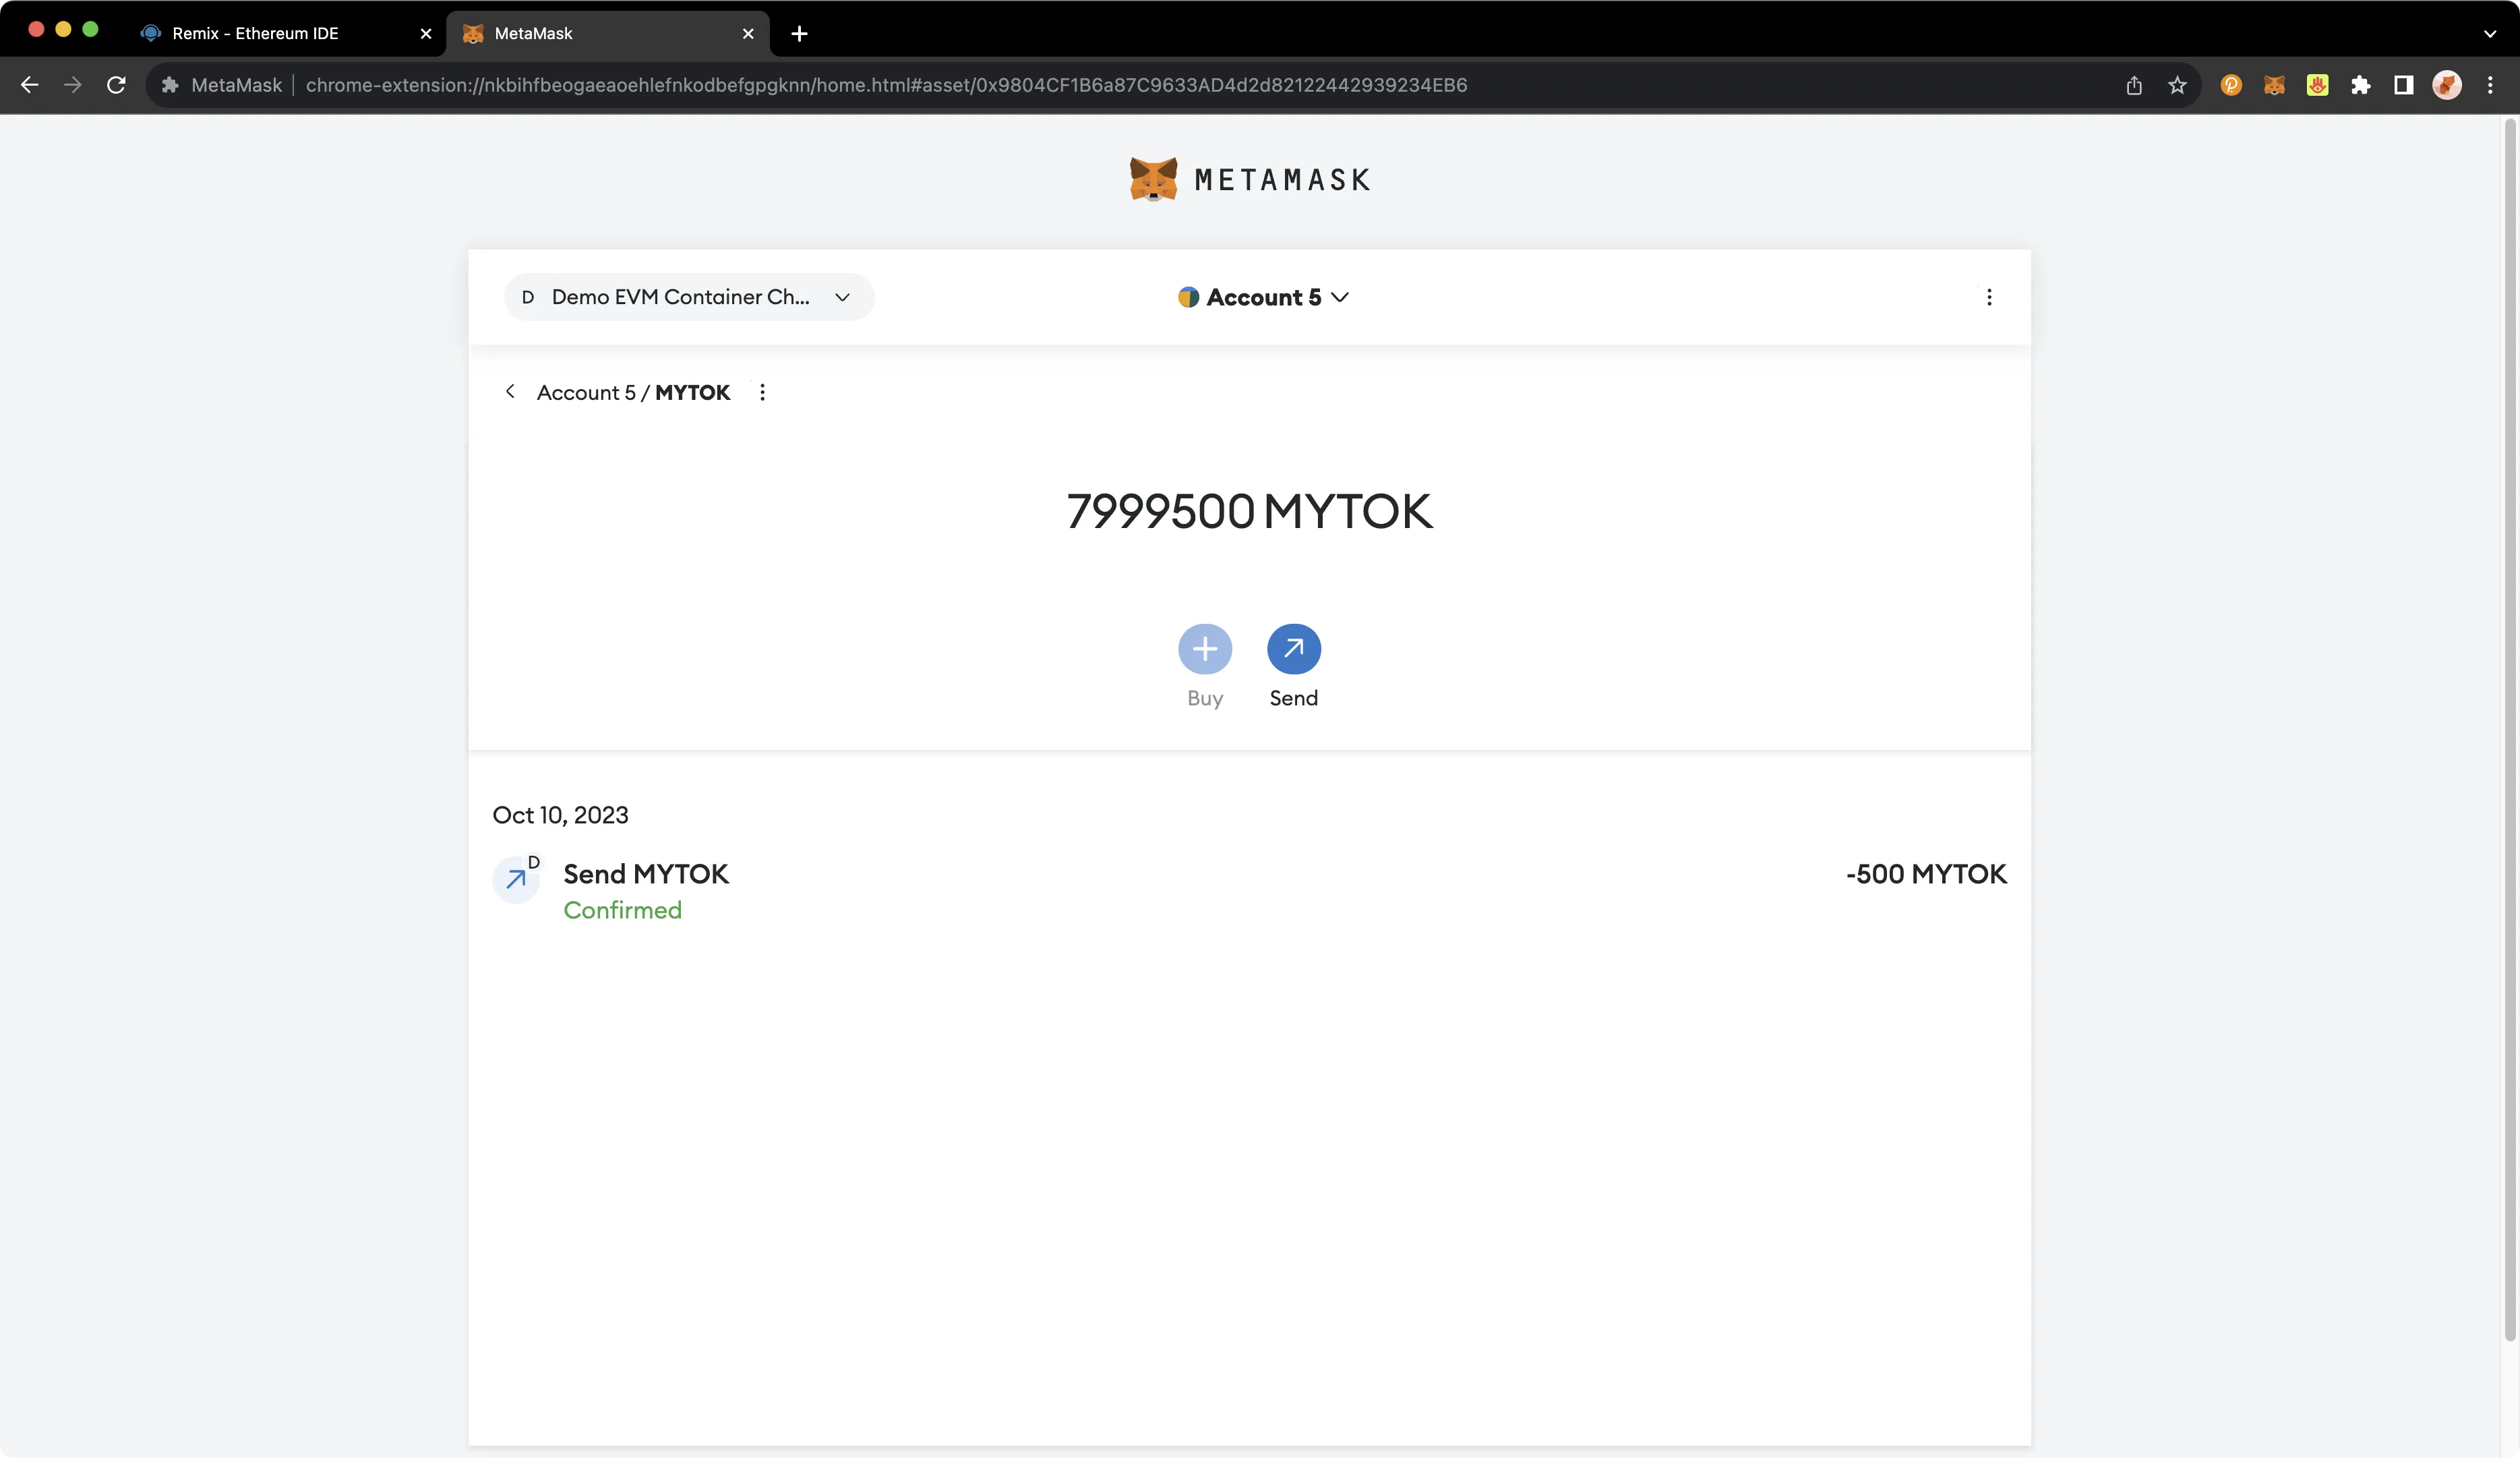
After clicking Next, you will need to confirm that you want to add these tokens to your MetaMask account. Click Import and you should see a balance of 8 million MyTokens in MetaMask:
Now you can send some of these ERC-20 tokens to the other account that you have set up in MetaMask. Click Send to initiate the transfer of 500 MyTokens and select the destination account.
After clicking Next, you will be asked to confirm (similar to what is pictured below).
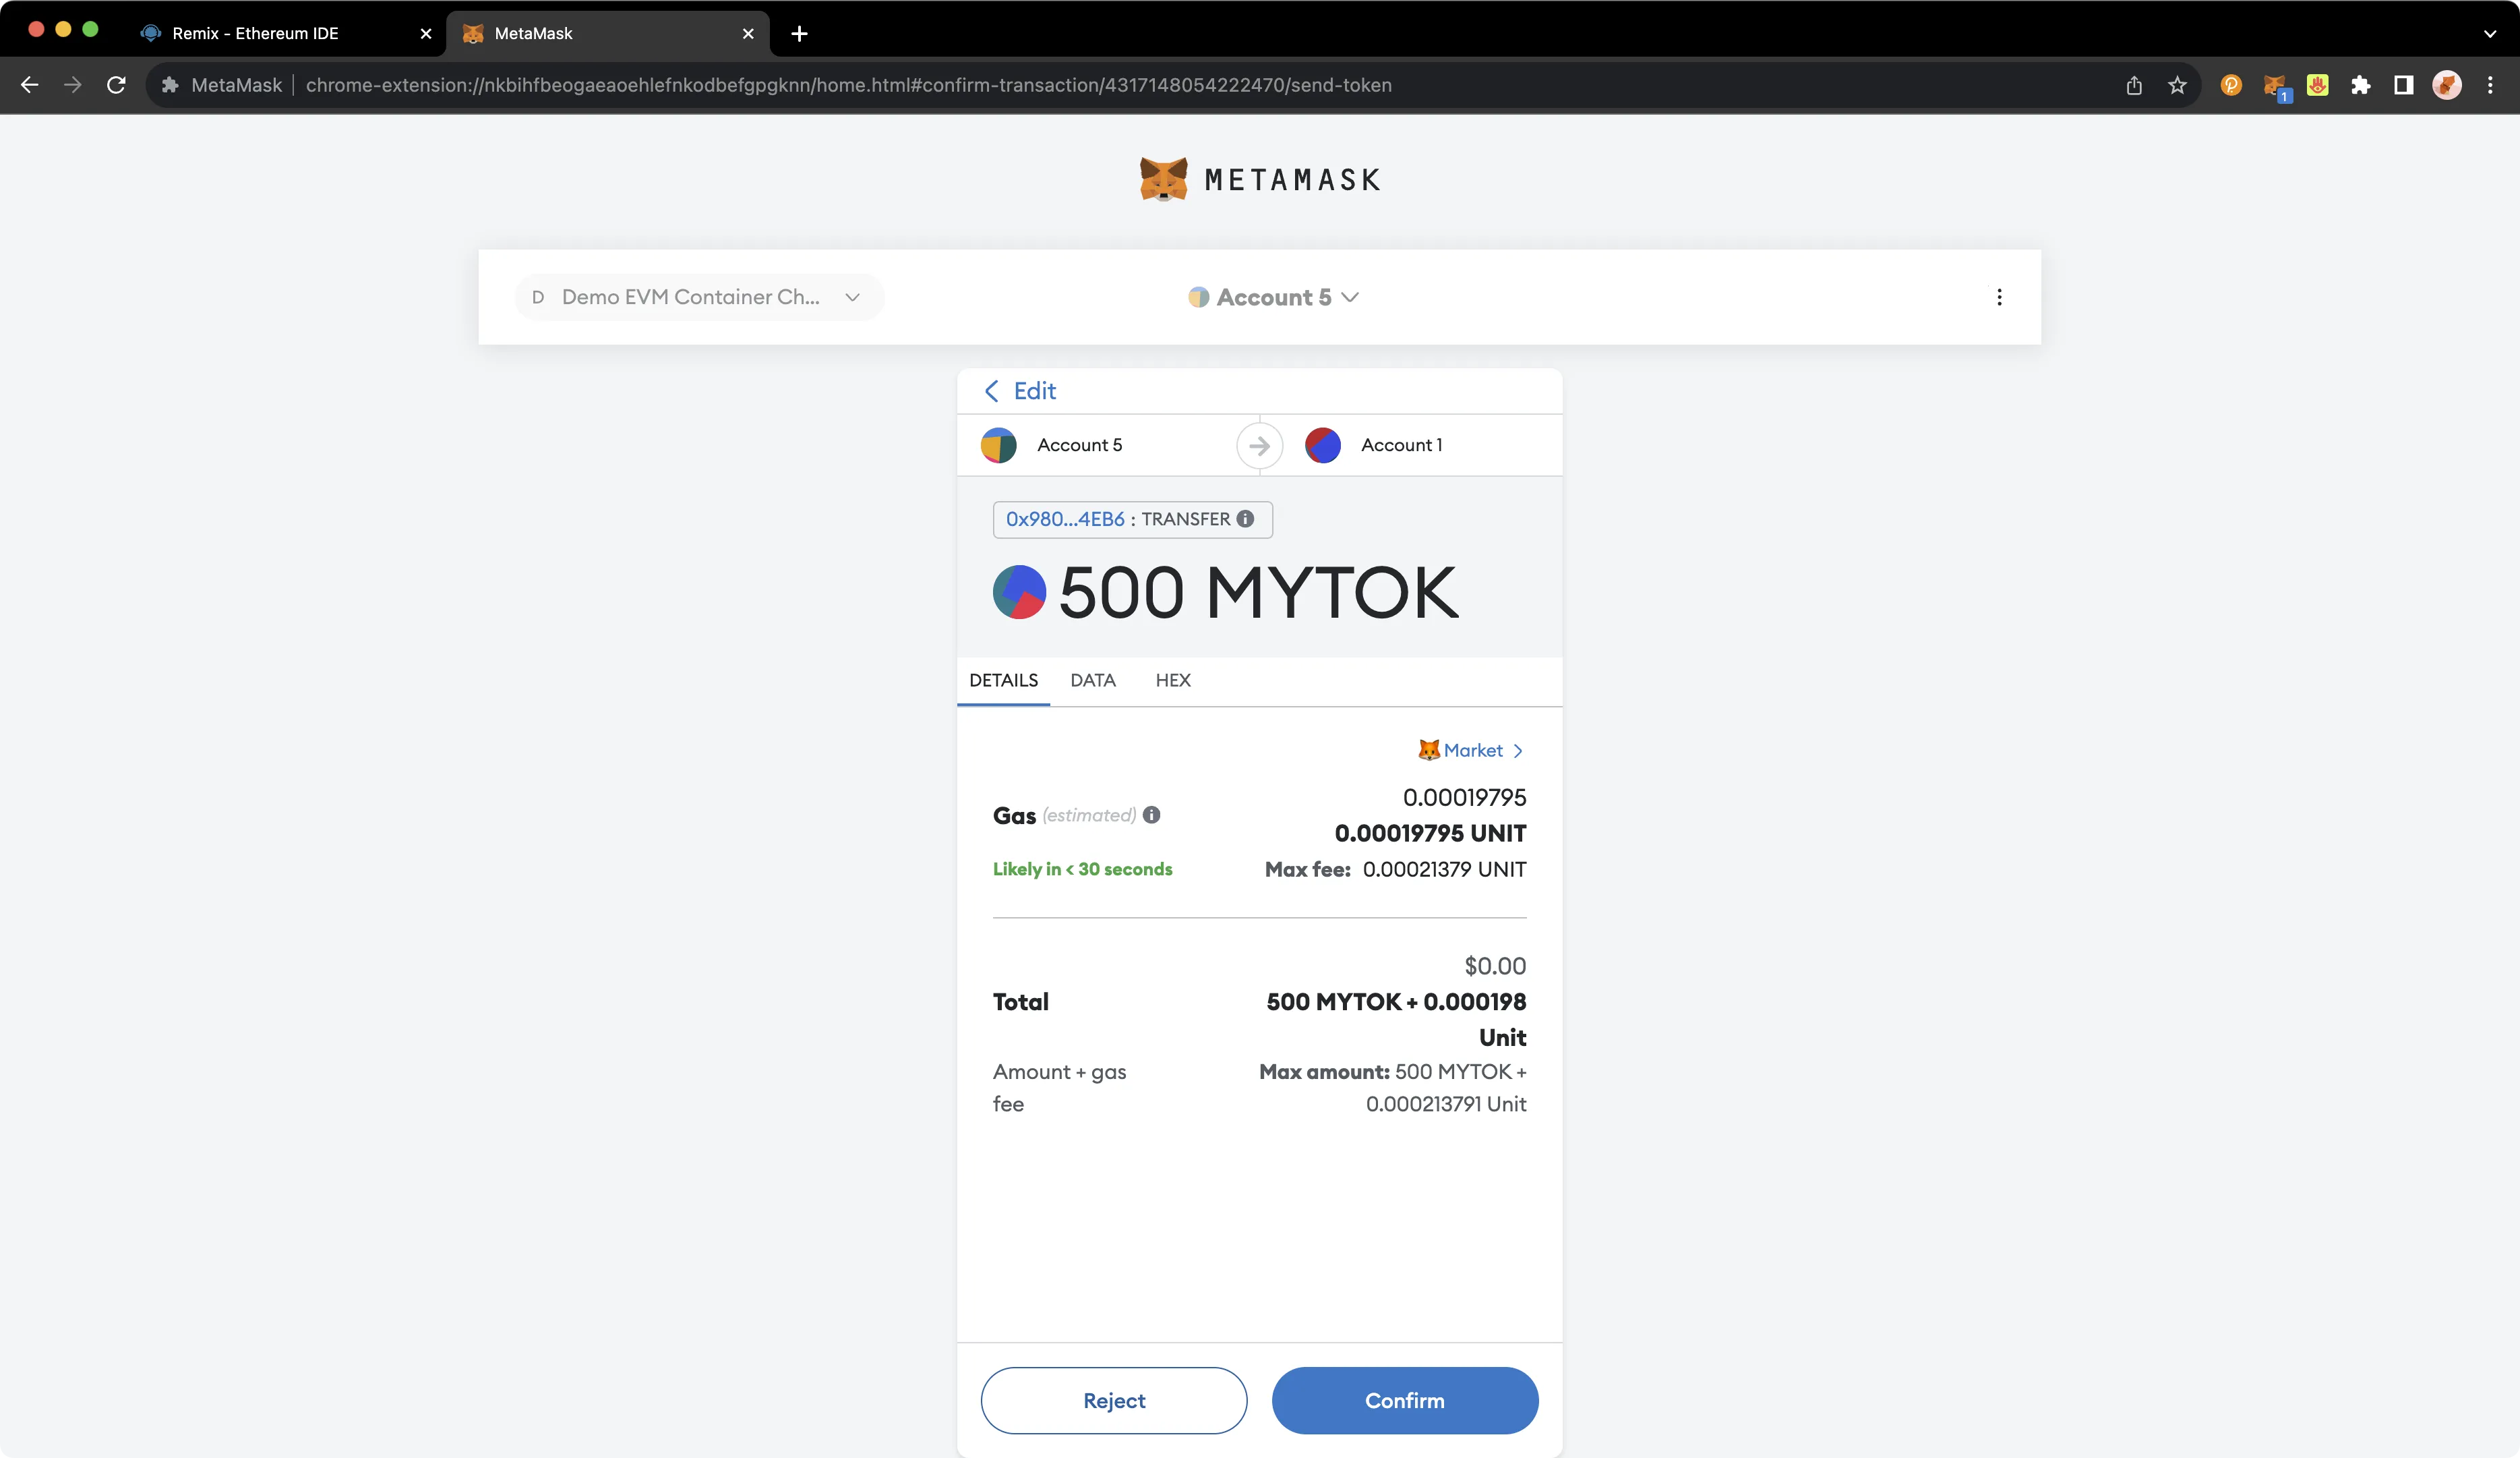
Click Confirm and, after the transaction is complete, you will see a confirmation and a reduction of the MyToken account balance from the sender account in MetaMask.
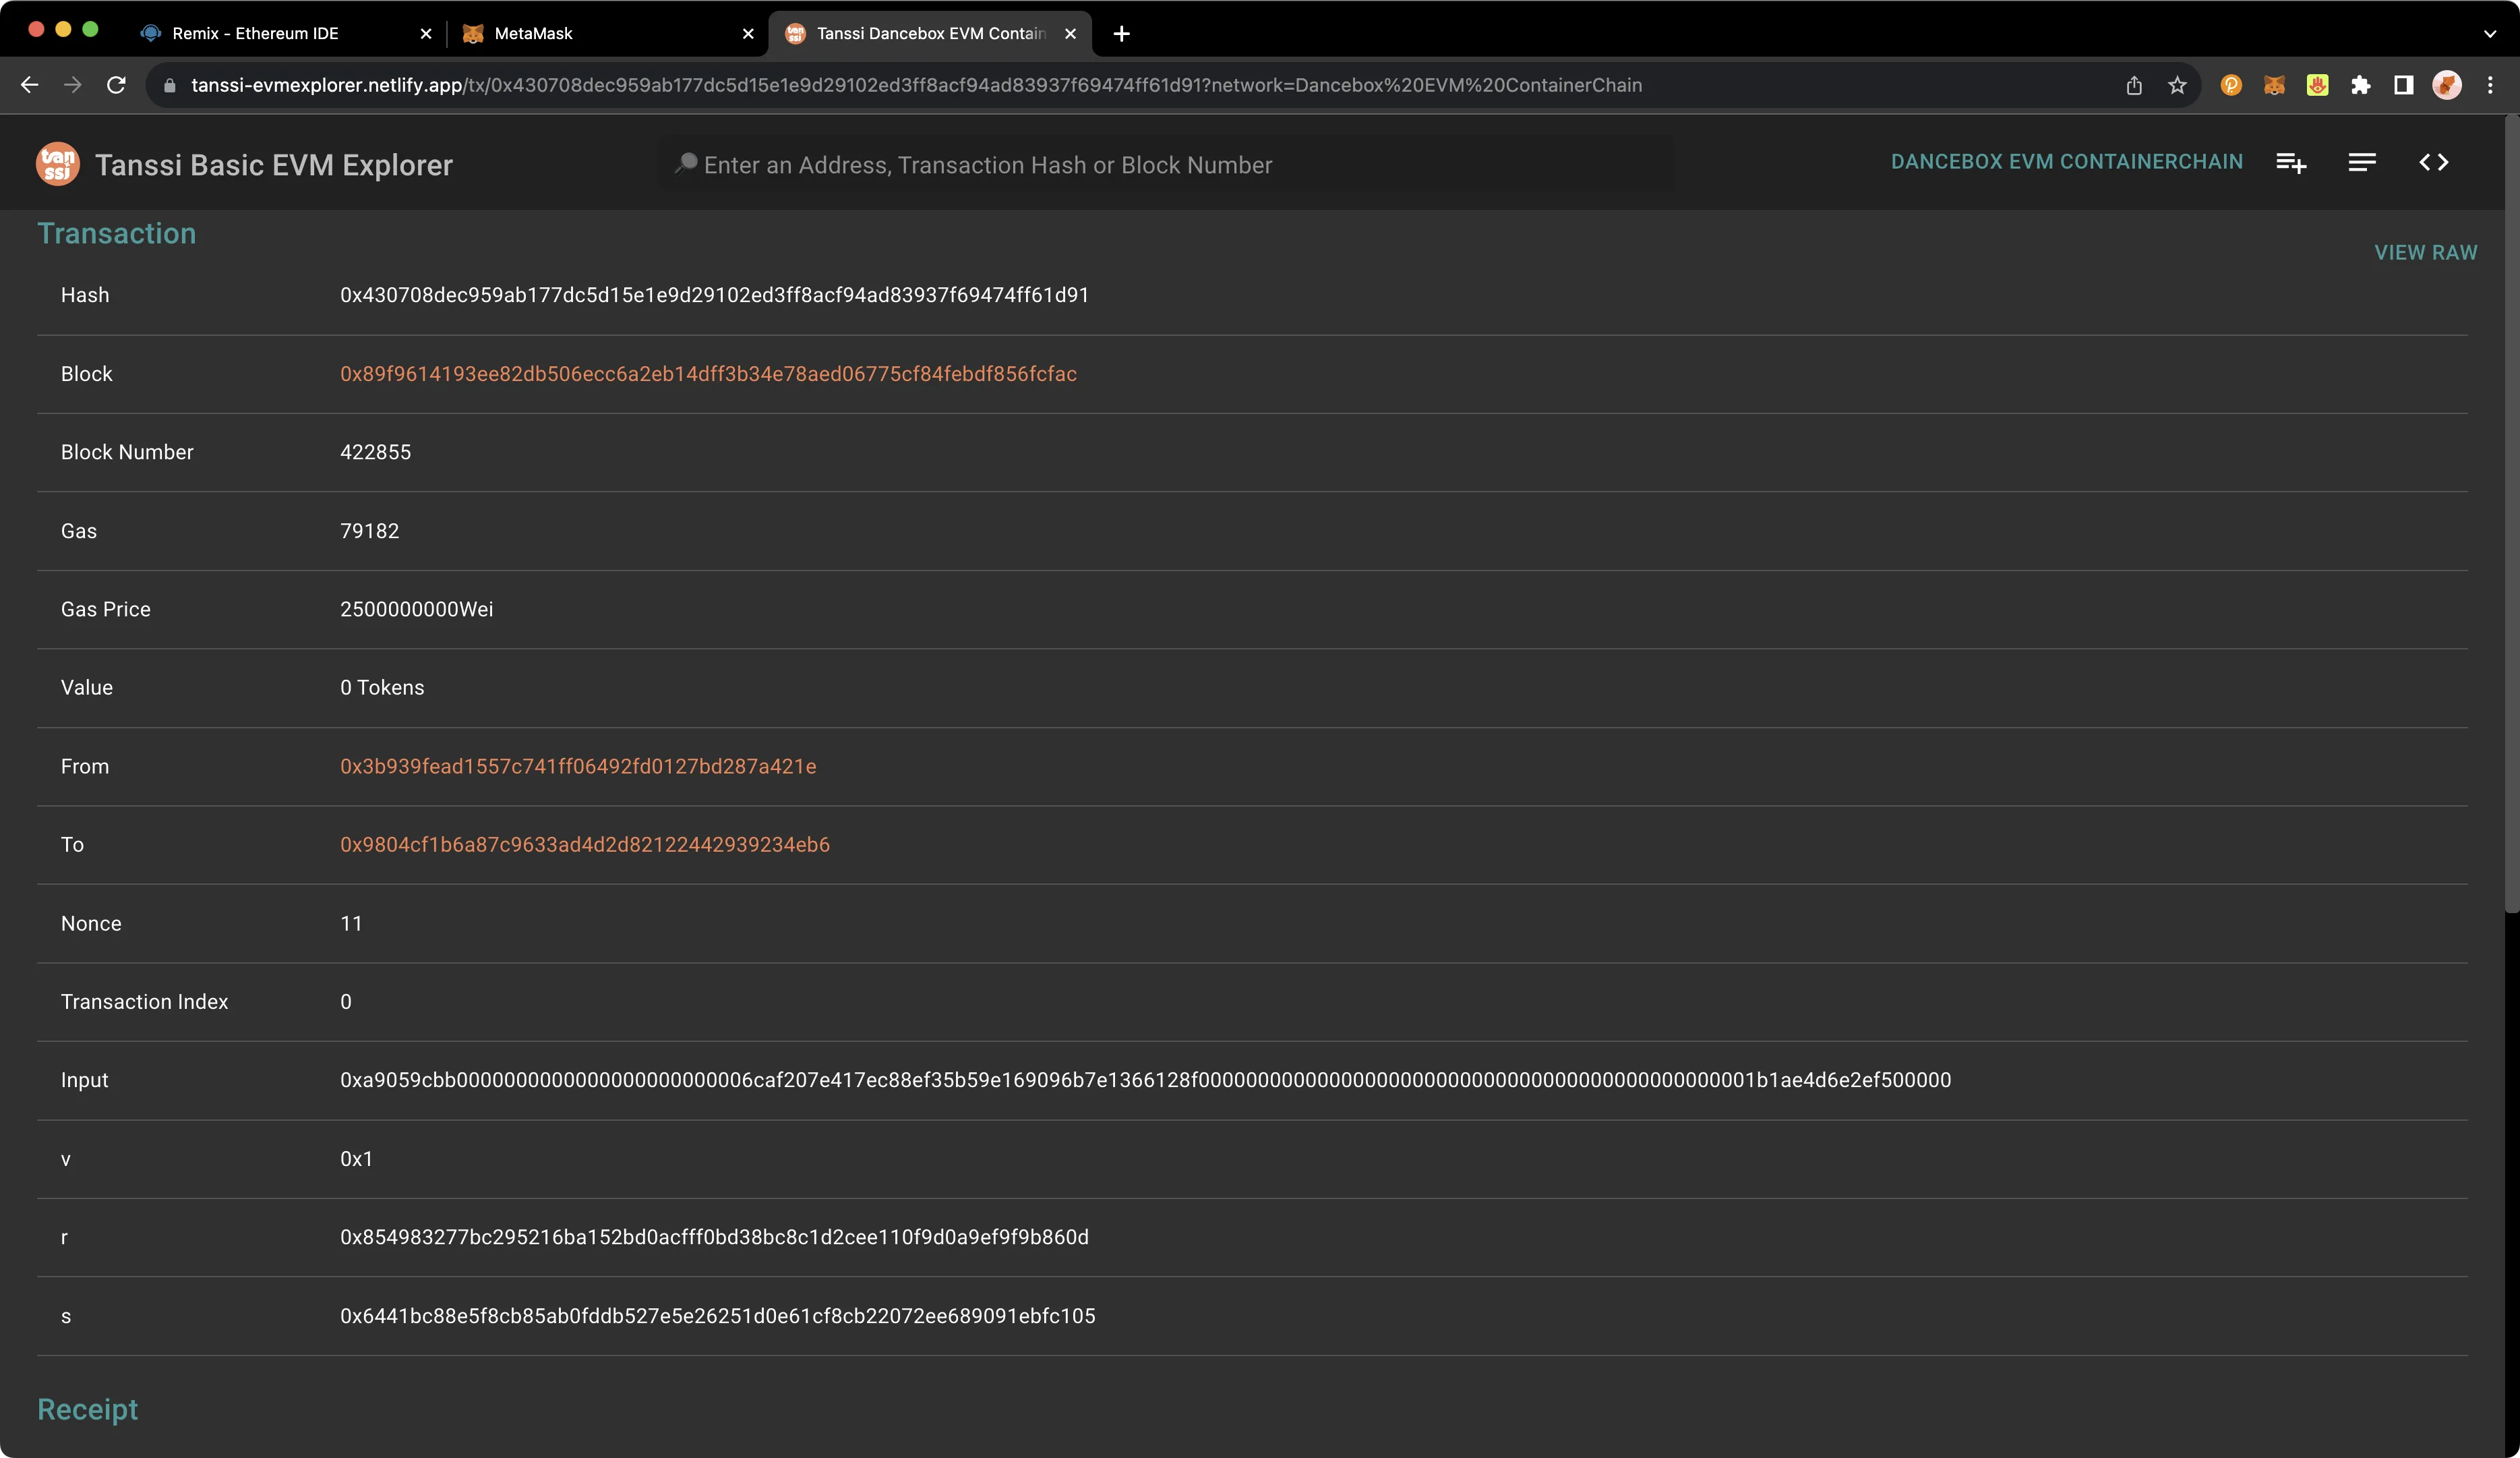
You can also look up the transaction on your Tanssi network's explorer to verify the transaction status.
| Created: October 10, 2023