Set Up an Operator Proxy Account
Introduction
Proxy accounts can be set up to perform a limited number of actions on behalf of primary accounts and help keep the underlying accounts safe. As an operator on Tanssi, it's beneficial to use proxy accounts to interact with the network in place of your account.
The SessionKeyManagement proxy type conveniently allows the account to rotate session keys on behalf of the primary account. It transforms it into a "hot wallet" that performs regular maintenance duties on behalf of your "cold wallet" operator account. For added safety, you can regularly rotate your proxy account.
Proxy accounts can also help you implement the principle of least privilege for access control. For example, if you have multiple team members, you can give them the minimum access required to carry out their duties via a specific proxy account.
This tutorial will walk you through configuring a SessionKeyManagement proxy account on the Tanssi TestNet specifically for operator-related actions and demonstrate how to rotate your newly created keys using the proxy.
Checking Prerequisites
To follow along with this tutorial, you will need to have:
- The developer portal open and connected to the Tanssi TestNet
- Create or have two accounts accessible in the developer portal
- Both accounts will need to be funded with tokens
If you need help importing your accounts into the developer portal, please check out the Connecting to the Developer Portal guide.
Create a Proxy Account
There are a couple of ways you can create proxy accounts in the developer portal, either from the Extrinsics page or the Accounts page. However, you must use the Extrinsics page to create a time-delayed proxy. The delay provides an additional layer of security for proxies by specifying a delay period based on the number of blocks. This setting prevents the proxy account from executing a transaction until the delay period ends, allowing the primary account that controls the proxy to review or cancel pending transactions.
You can also create a proxy of type Any, which grants the proxy account full and unrestricted control over the primary account. The proxy account can transfer funds and perform any arbitrary action. The following demo will showcase how to configure a SessionKeyManagement proxy, which is more restrictive than an Any proxy, as it limits functionality to activities that pertain to mapping session keys.
Using the Extrinsics Section
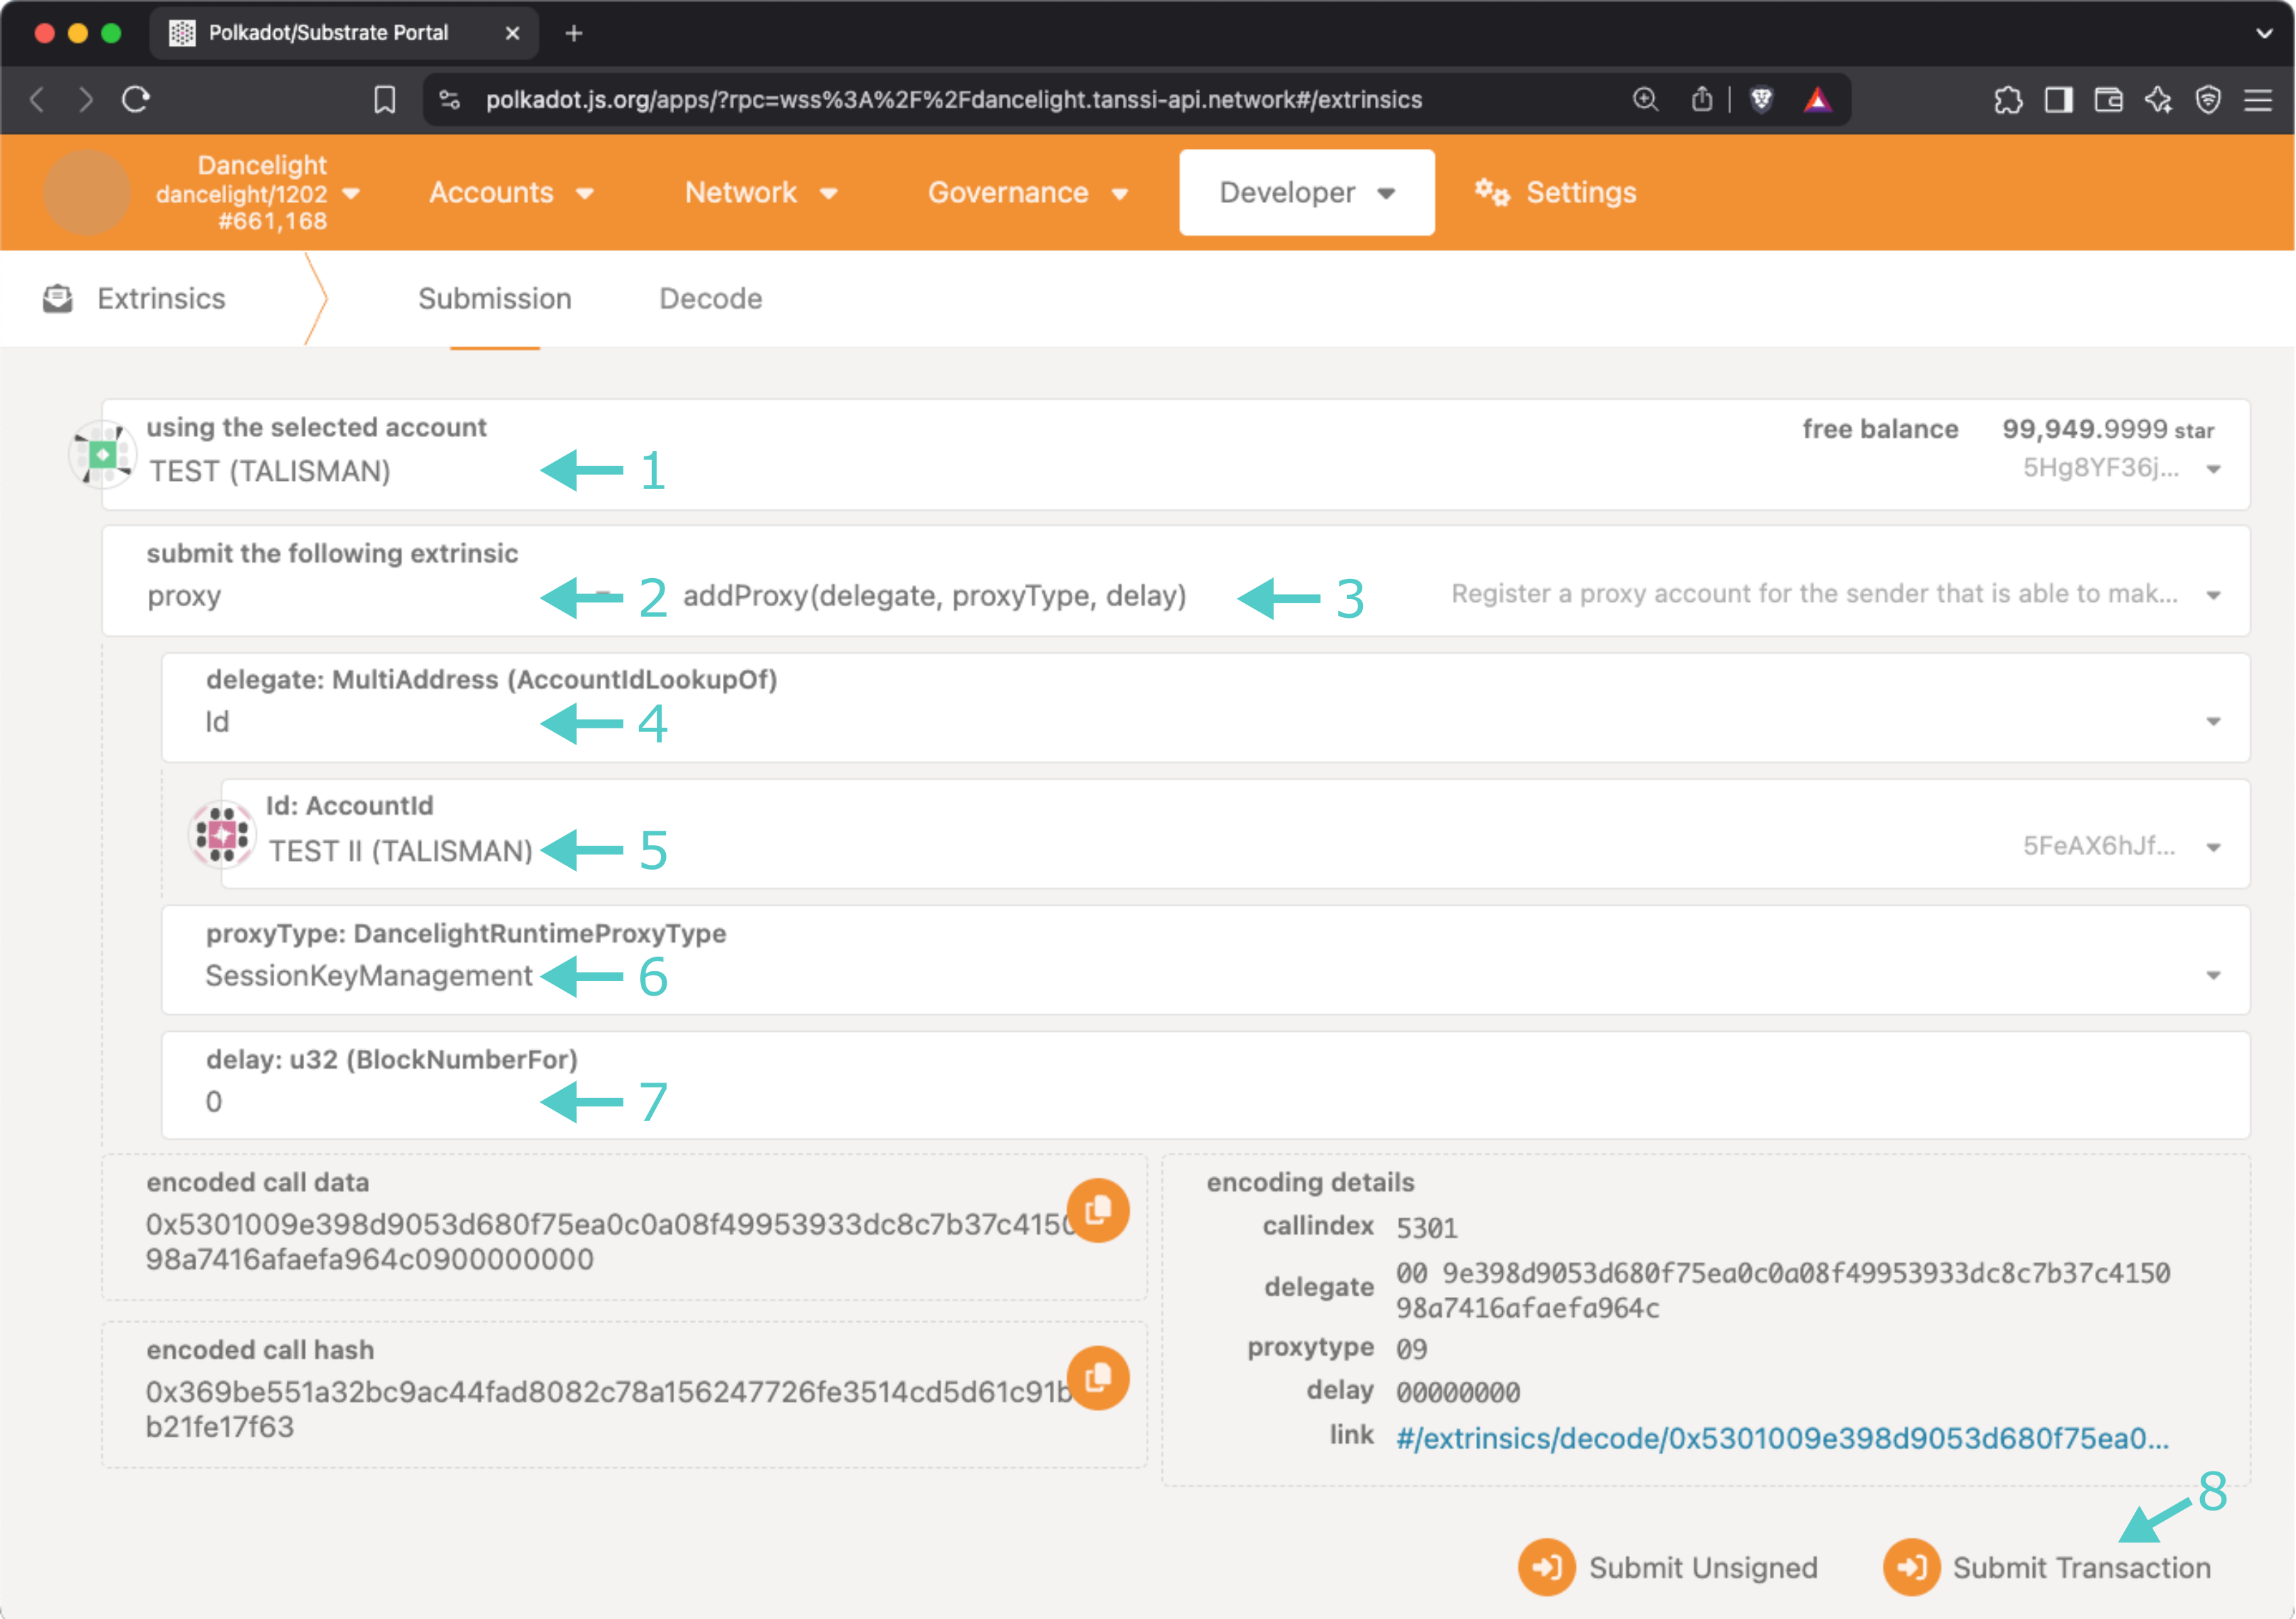
To start creating your proxy account, head to the Developer tab and select Extrinsics from the dropdown. Next, you will need to take the following steps:
- Select the primary account
- From the submit the following extrinsic dropdown, select proxy
- Choose the addProxy extrinsic
- Choose Id from the AccountIdLookupOf dropdown
- Select the delegate account for the proxy
- From the proxyType dropdown, choose SessionKeyManagement
- Optionally, you can add a time delay using a specified number of blocks to add an additional layer of security for the primary account to review the pending transaction
- Click Submit Transaction
You will then be prompted to authorize and sign the transaction. Click Sign and Submit to create the proxy relationship. Once the transaction has been successfully submitted, you will receive some notifications confirming the transaction.
Using the Accounts Section
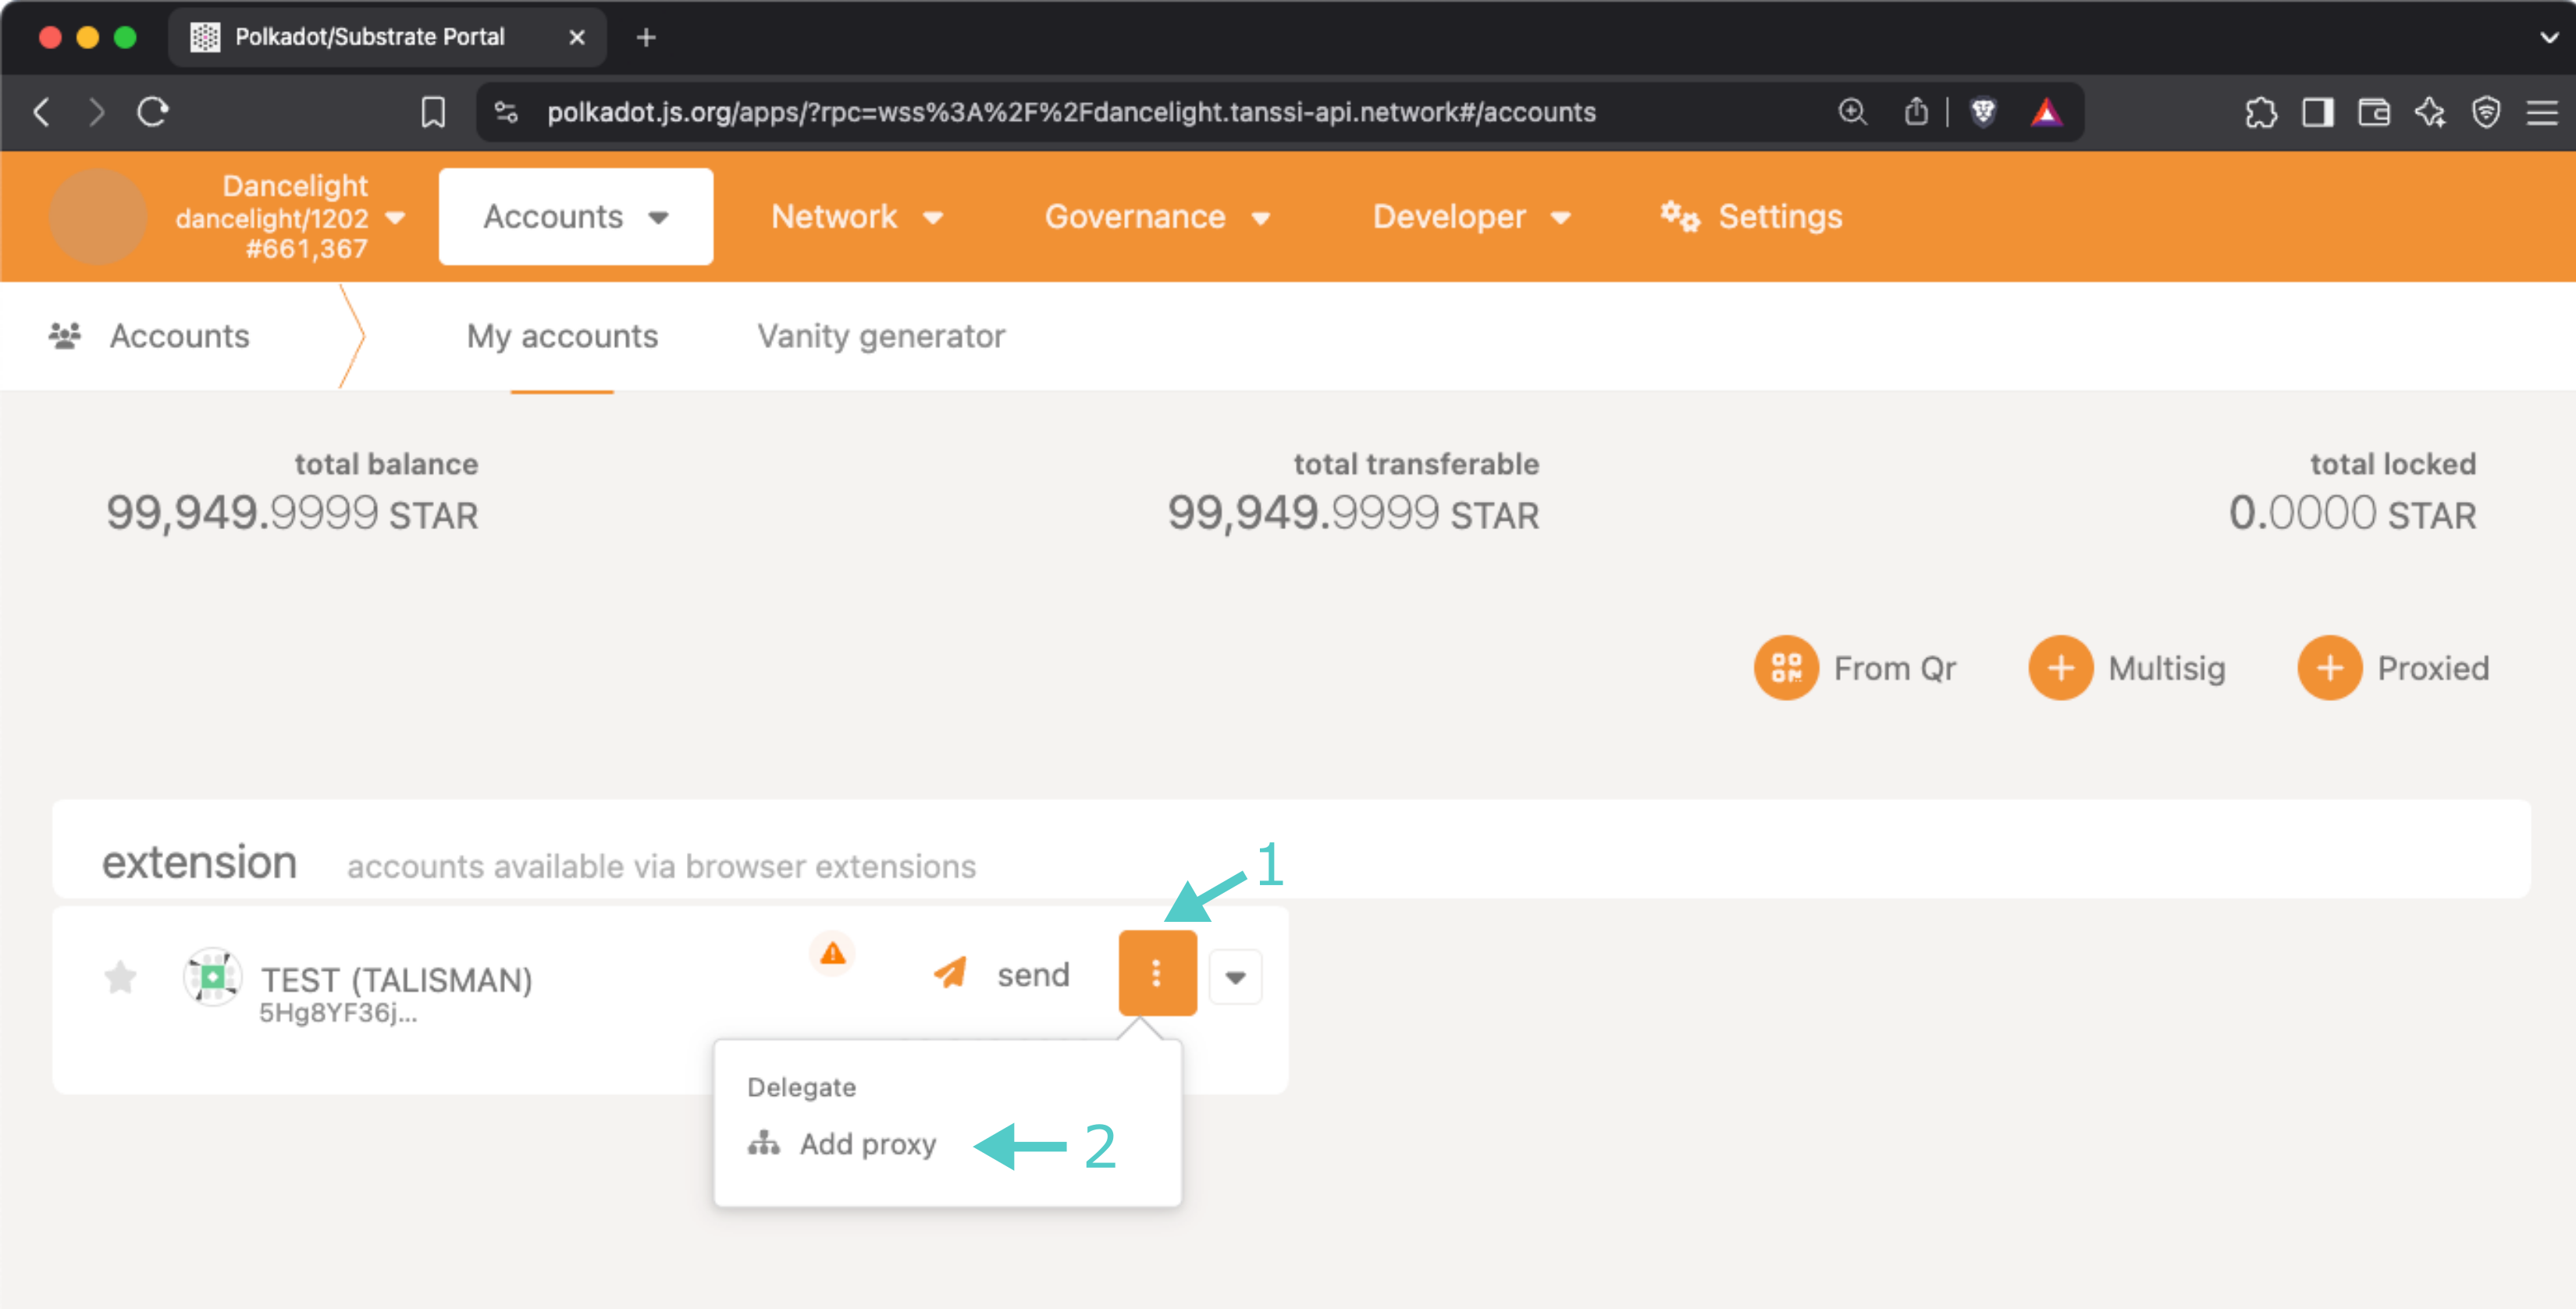
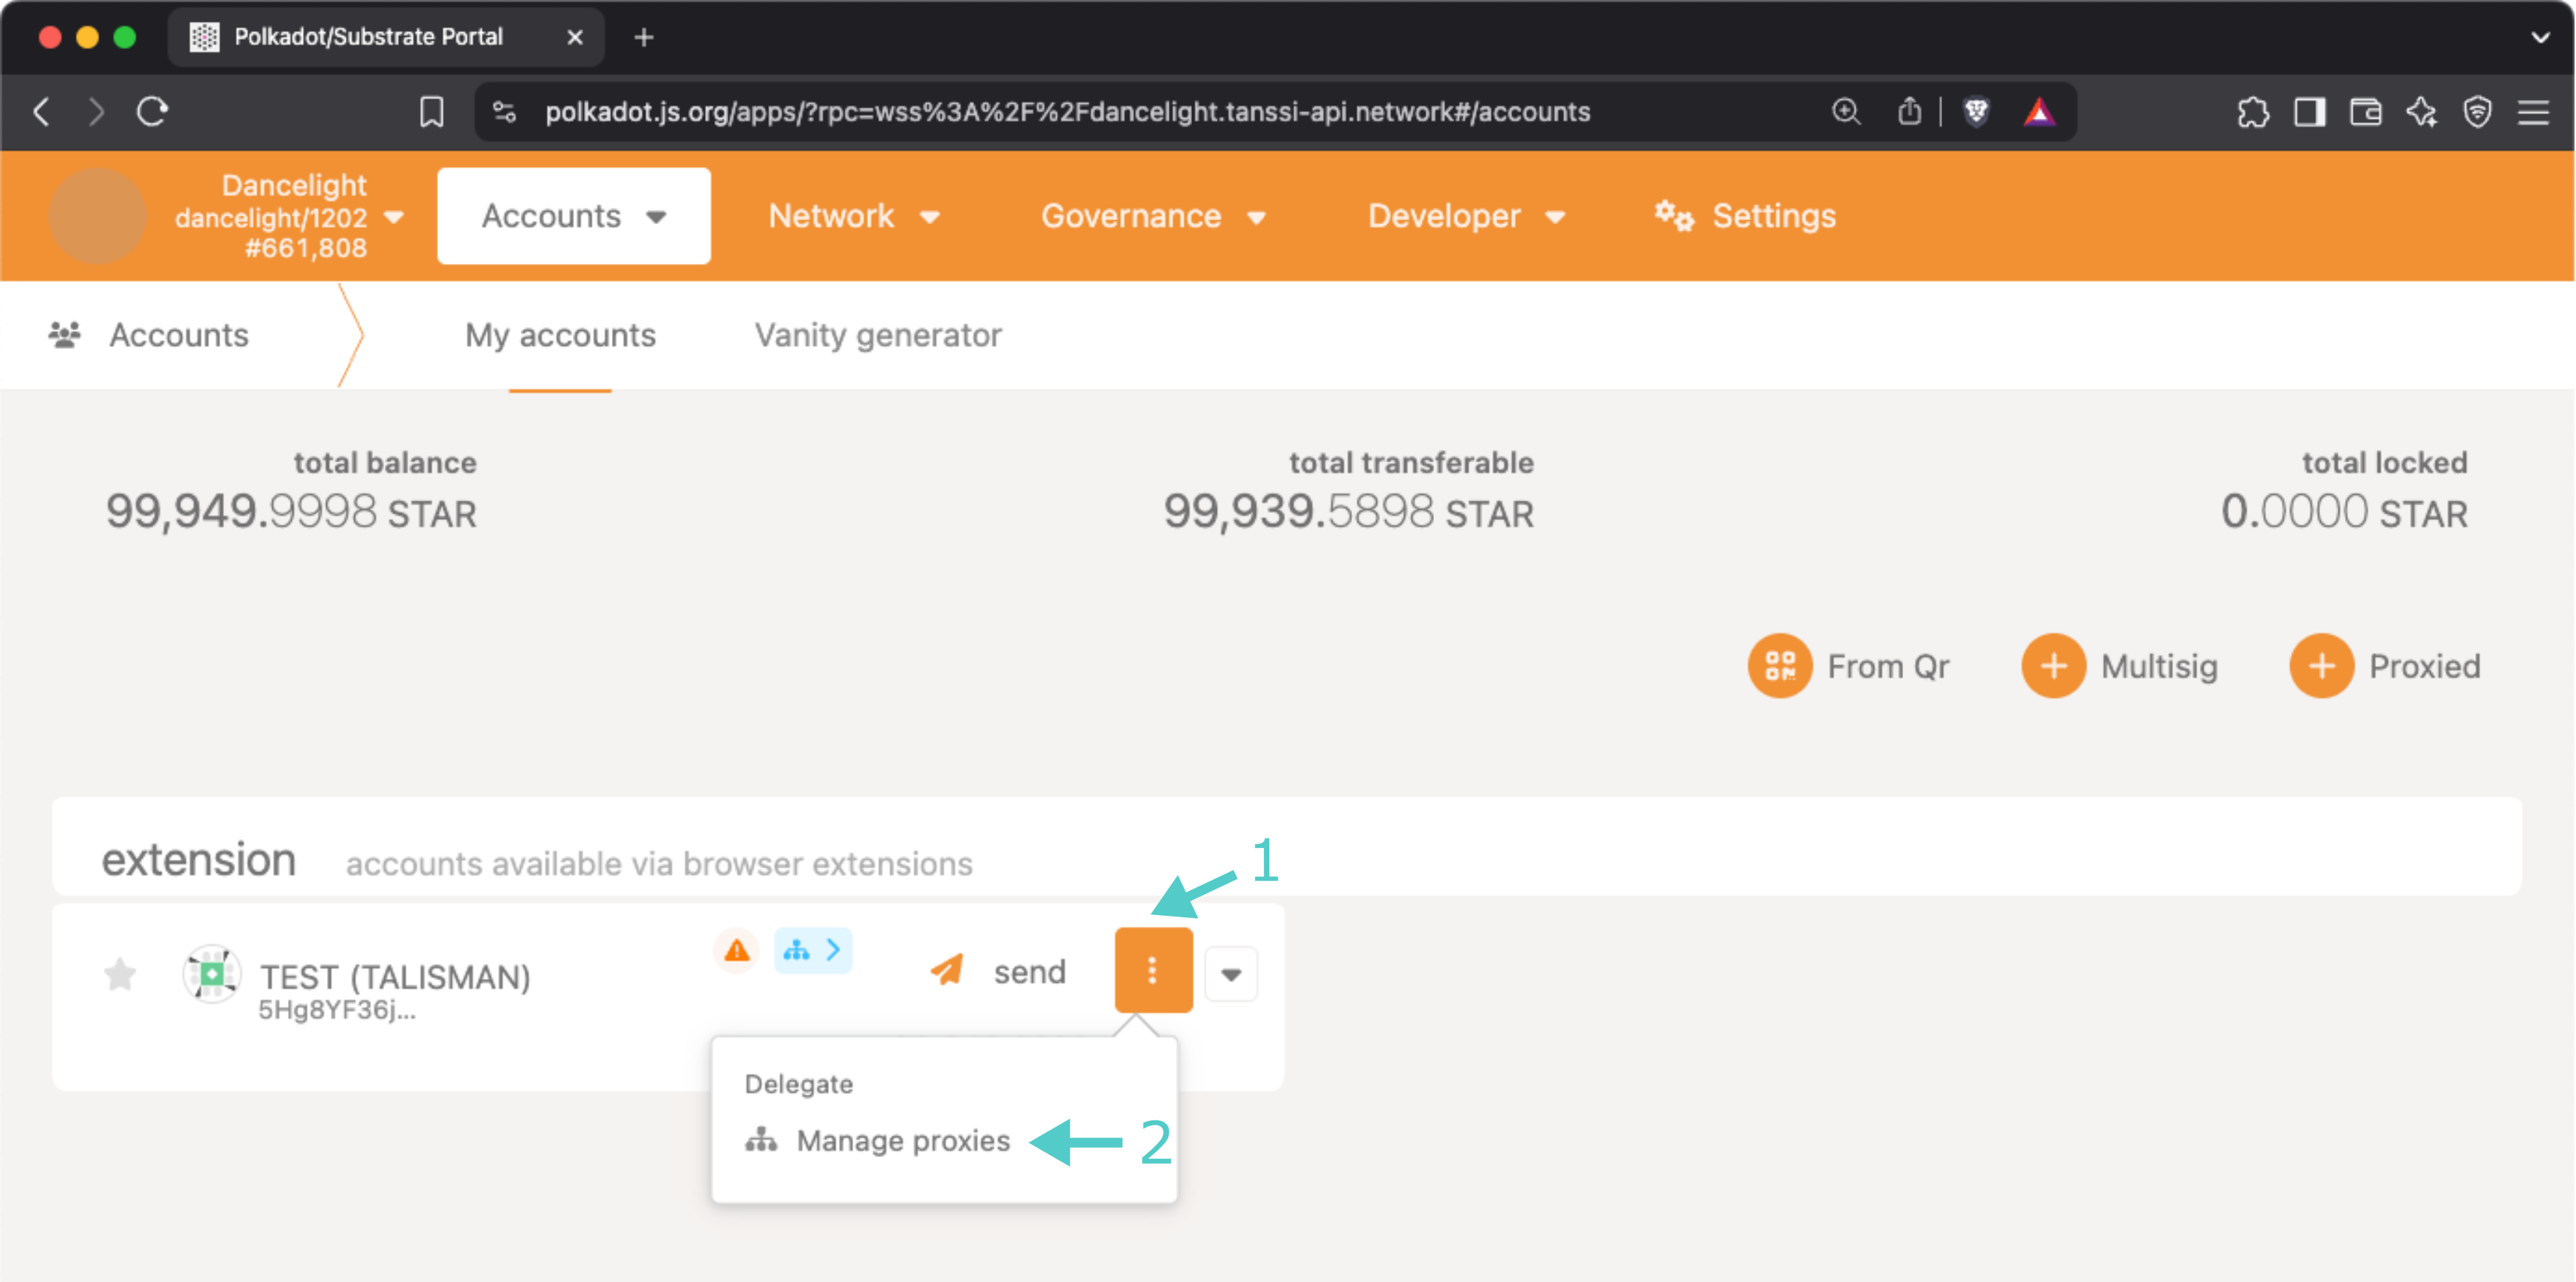
Another method for creating a proxy is by using the Accounts section of the developer portal. To do so, navigate to the Accounts page and take the following steps:
- Select the three vertical dots next to the primary account
- Select Add proxy
Note
If the account already has a proxy, Manage proxies will be displayed as an option instead of Add proxy.
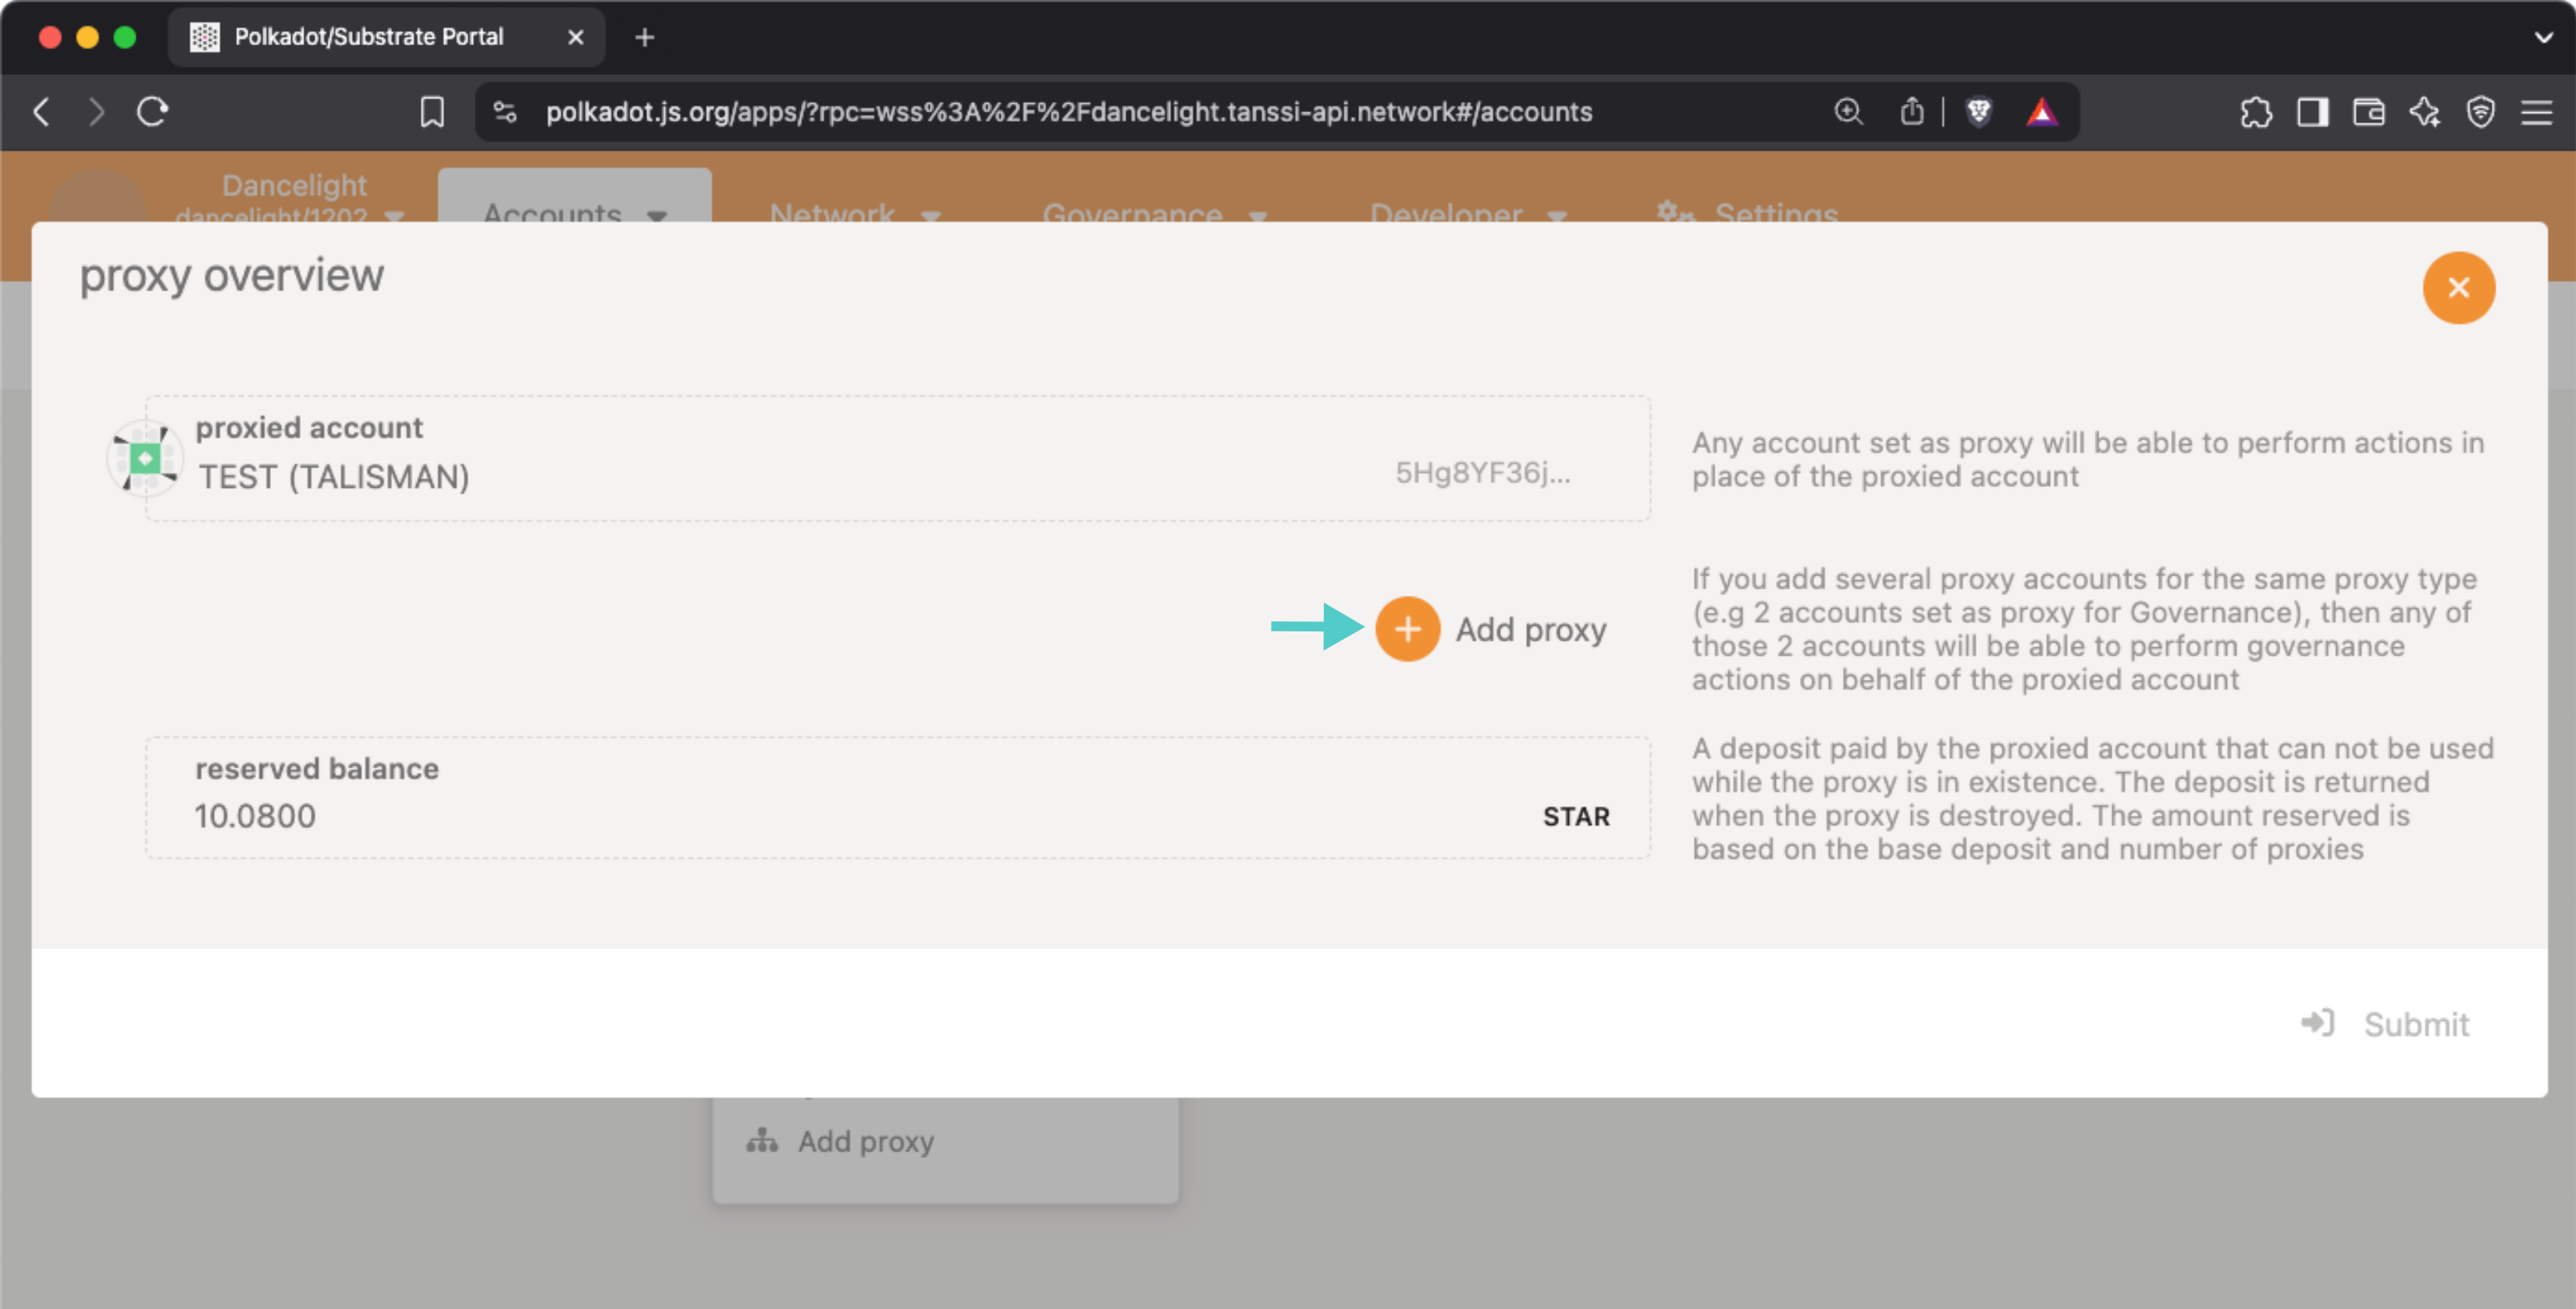
A pop-up will appear where you can enter the required information, such as the proxied/primary account, the proxy account, and the type of proxy to create a proxy account. First, click Add proxy.
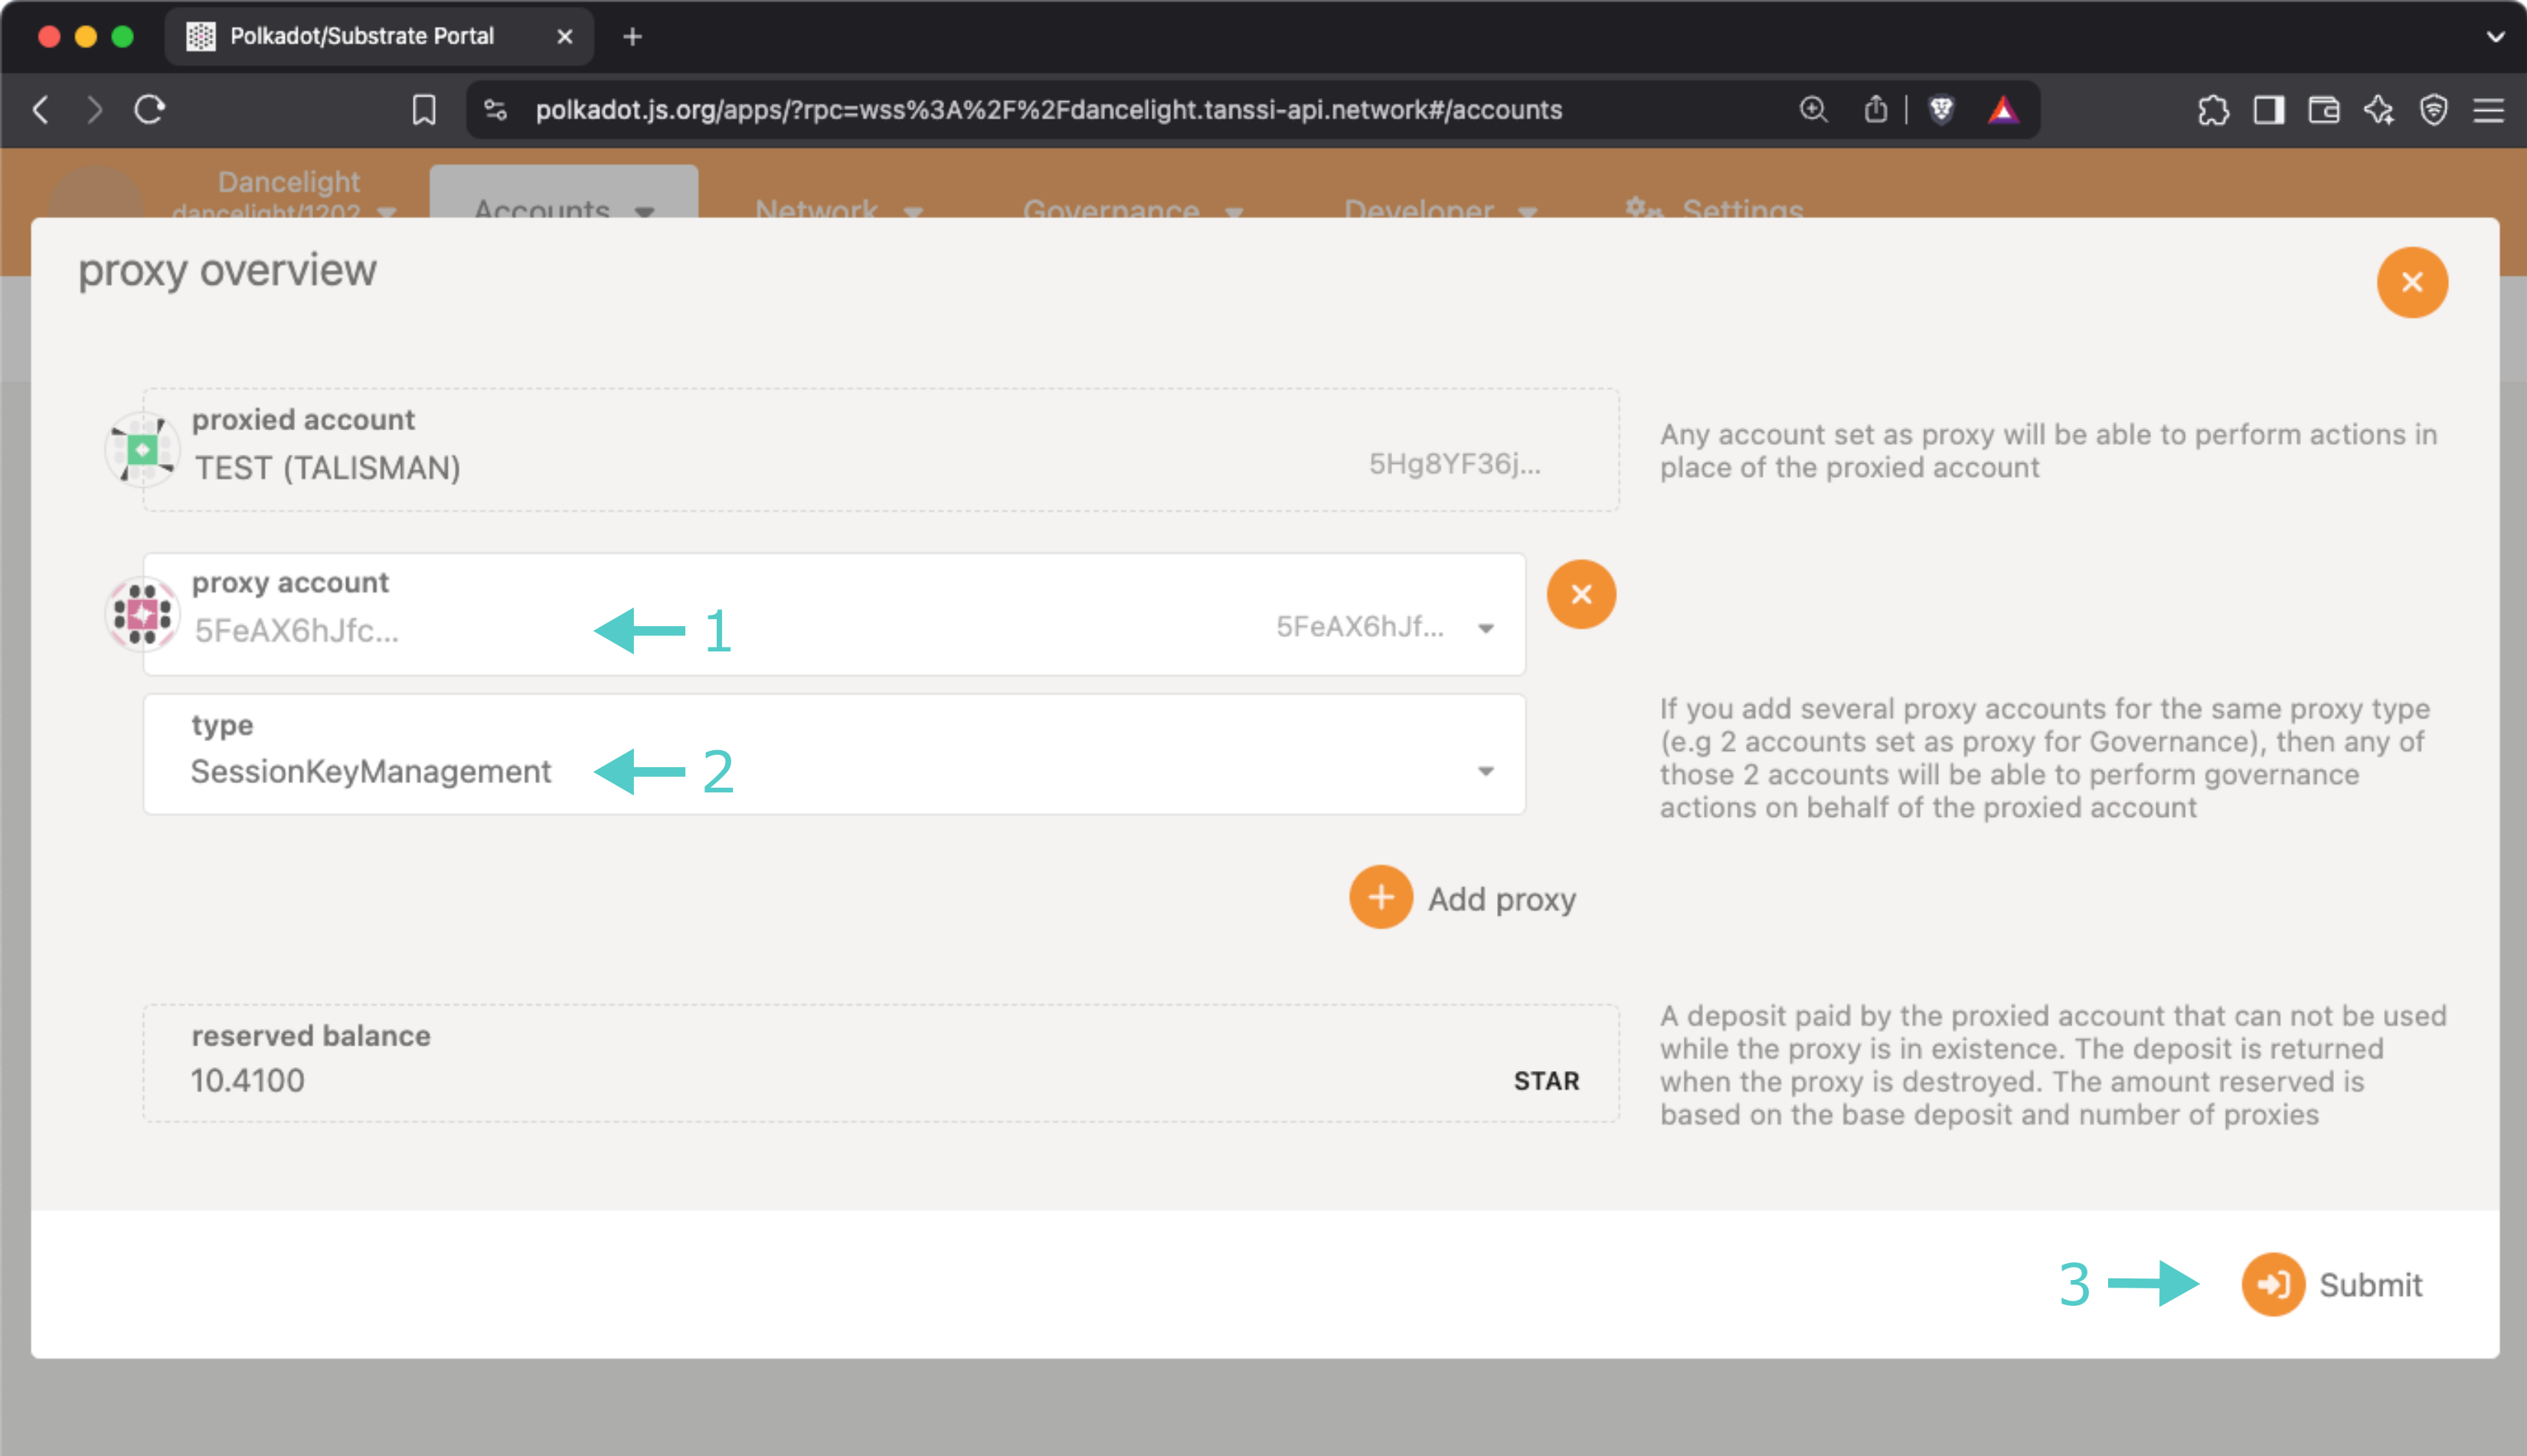
Then, take the following steps:
- Select the account you would like to set as a proxy
- Select the proxy type
- Click Submit and sign the transaction
In the next section, you will learn how to verify if your proxy account was set up successfully.
Verify Your Proxy Account
You can verify that your proxy account has been successfully set up in two ways: through the Accounts page or via the Chain state page.
Using the Chain State Section
To check your proxy accounts from the Chain state section of the developer portal, you can take the following steps:
- From the selected state query dropdown, select proxy
- Choose the proxies entry from the list
- Select or paste your primary/proxied account
- Click on the + button to send the query

The result will appear on the page showing you information about your proxies, including the delegate/proxy account address, the proxy type, the delay period if one was specified, and the total bond amount for all of your proxies, expressed in Planck units.
Using the Accounts Section
You can also check your proxy accounts from the Accounts section of the developer portal. To do so, navigate to the Accounts page and take the following steps:
- Select the three vertical dots next to the primary account
- Select Manage proxy
Note
There should be a proxy symbol next to the primary account. To achieve the same effect, hover over the icon and click Manage proxies.
A pop-up will appear where you can see an overview of your proxy accounts.

Execute a Proxy Transaction
Now that you have created a proxy account and verified that it was successfully set up, you can execute a transaction using the proxy on behalf of your primary account. The following example will set keys for a node. The proxy configuration shown is a realistic example of how you might have your own proxy configured for your developer portal primary account.
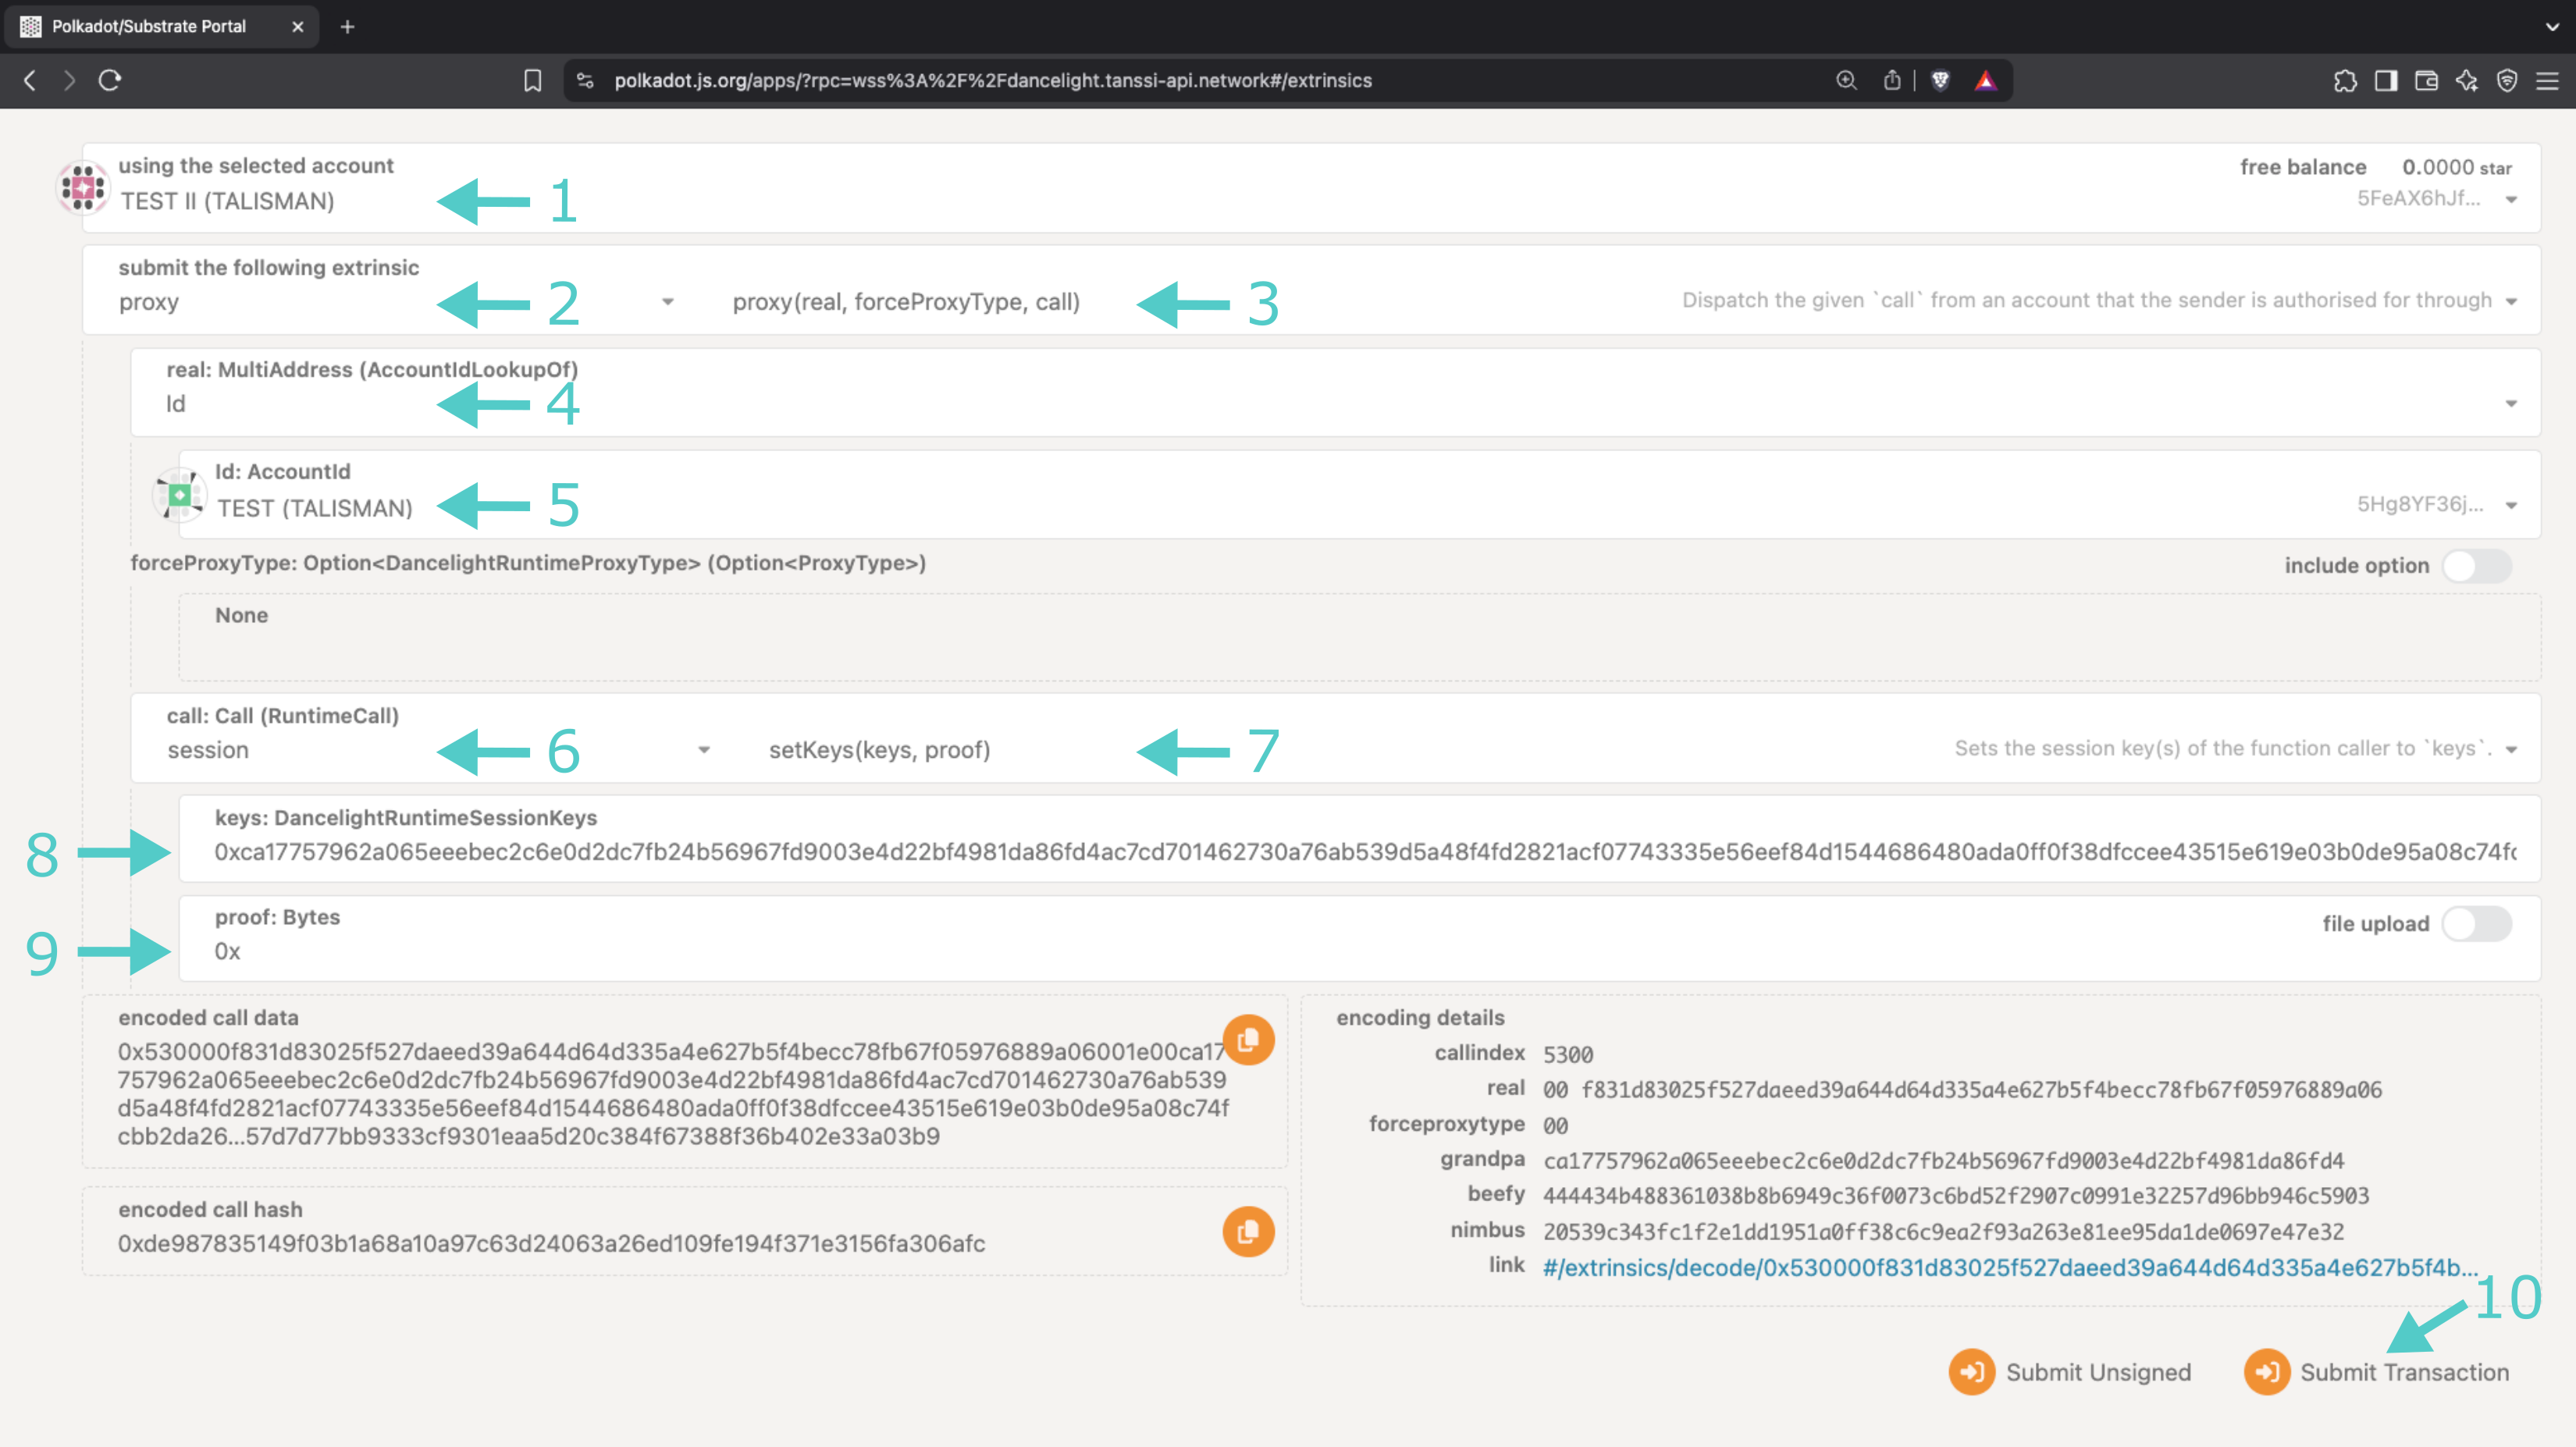
To execute a transaction, you can navigate back to the Extrinsics page and take the following steps:
- Select the proxy account to submit the transaction from the using the select account dropdown
- From the submit the following extrinsic menu, select proxy
- Choose the proxy extrinsic
- Choose Id from the AccountIdLookupOf dropdown
- Select the primary account from the real dropdown
- Select the Session call
- Choose the setKeys entry
- Enter the node keys you want to map to your operator's account
- Enter
0xin proof - Click Submit Transaction
A pop-up will appear asking you to authorize and sign the transaction; click on Sign and Submit.
That's it! You've successfully executed a transaction using a proxy account on behalf of your primary operator account.
| Created: April 12, 2025